Crawling
The English user guide is currently in beta preview. Most of the documents have been automatically translated from the Japanese version. Should you find any inaccuracies, please reach out to Flatt Security.
The features covered in this tutorial are only available to organizations that have signed up for the web application security assessment feature.
Shisho Cloud provides a crawling feature to identify endpoints in your target application. By entering the top page of your application, Shisho Cloud will automatically crawl your application by following links and forms on the page, and identify endpoints.
Crawling
Go to the "Crawling Jobs" tab (https://cloud.shisho.dev/[orgid]/applications/[appid]/jobs/find) and click the "Run Crawling Job" button.

In the "Entry Point" field of the Crawling Job, specify the URL to be the starting point of the crawl. For applications that do not require login, specify the top page; for applications that require login, specify the top page after login. Once you have entered the entry point, click the "Schedule" button.
After a while, Shisho Cloud will automatically crawl from the specified URL, following links, forms, etc. within the pages, and register endpoints and scenarios.
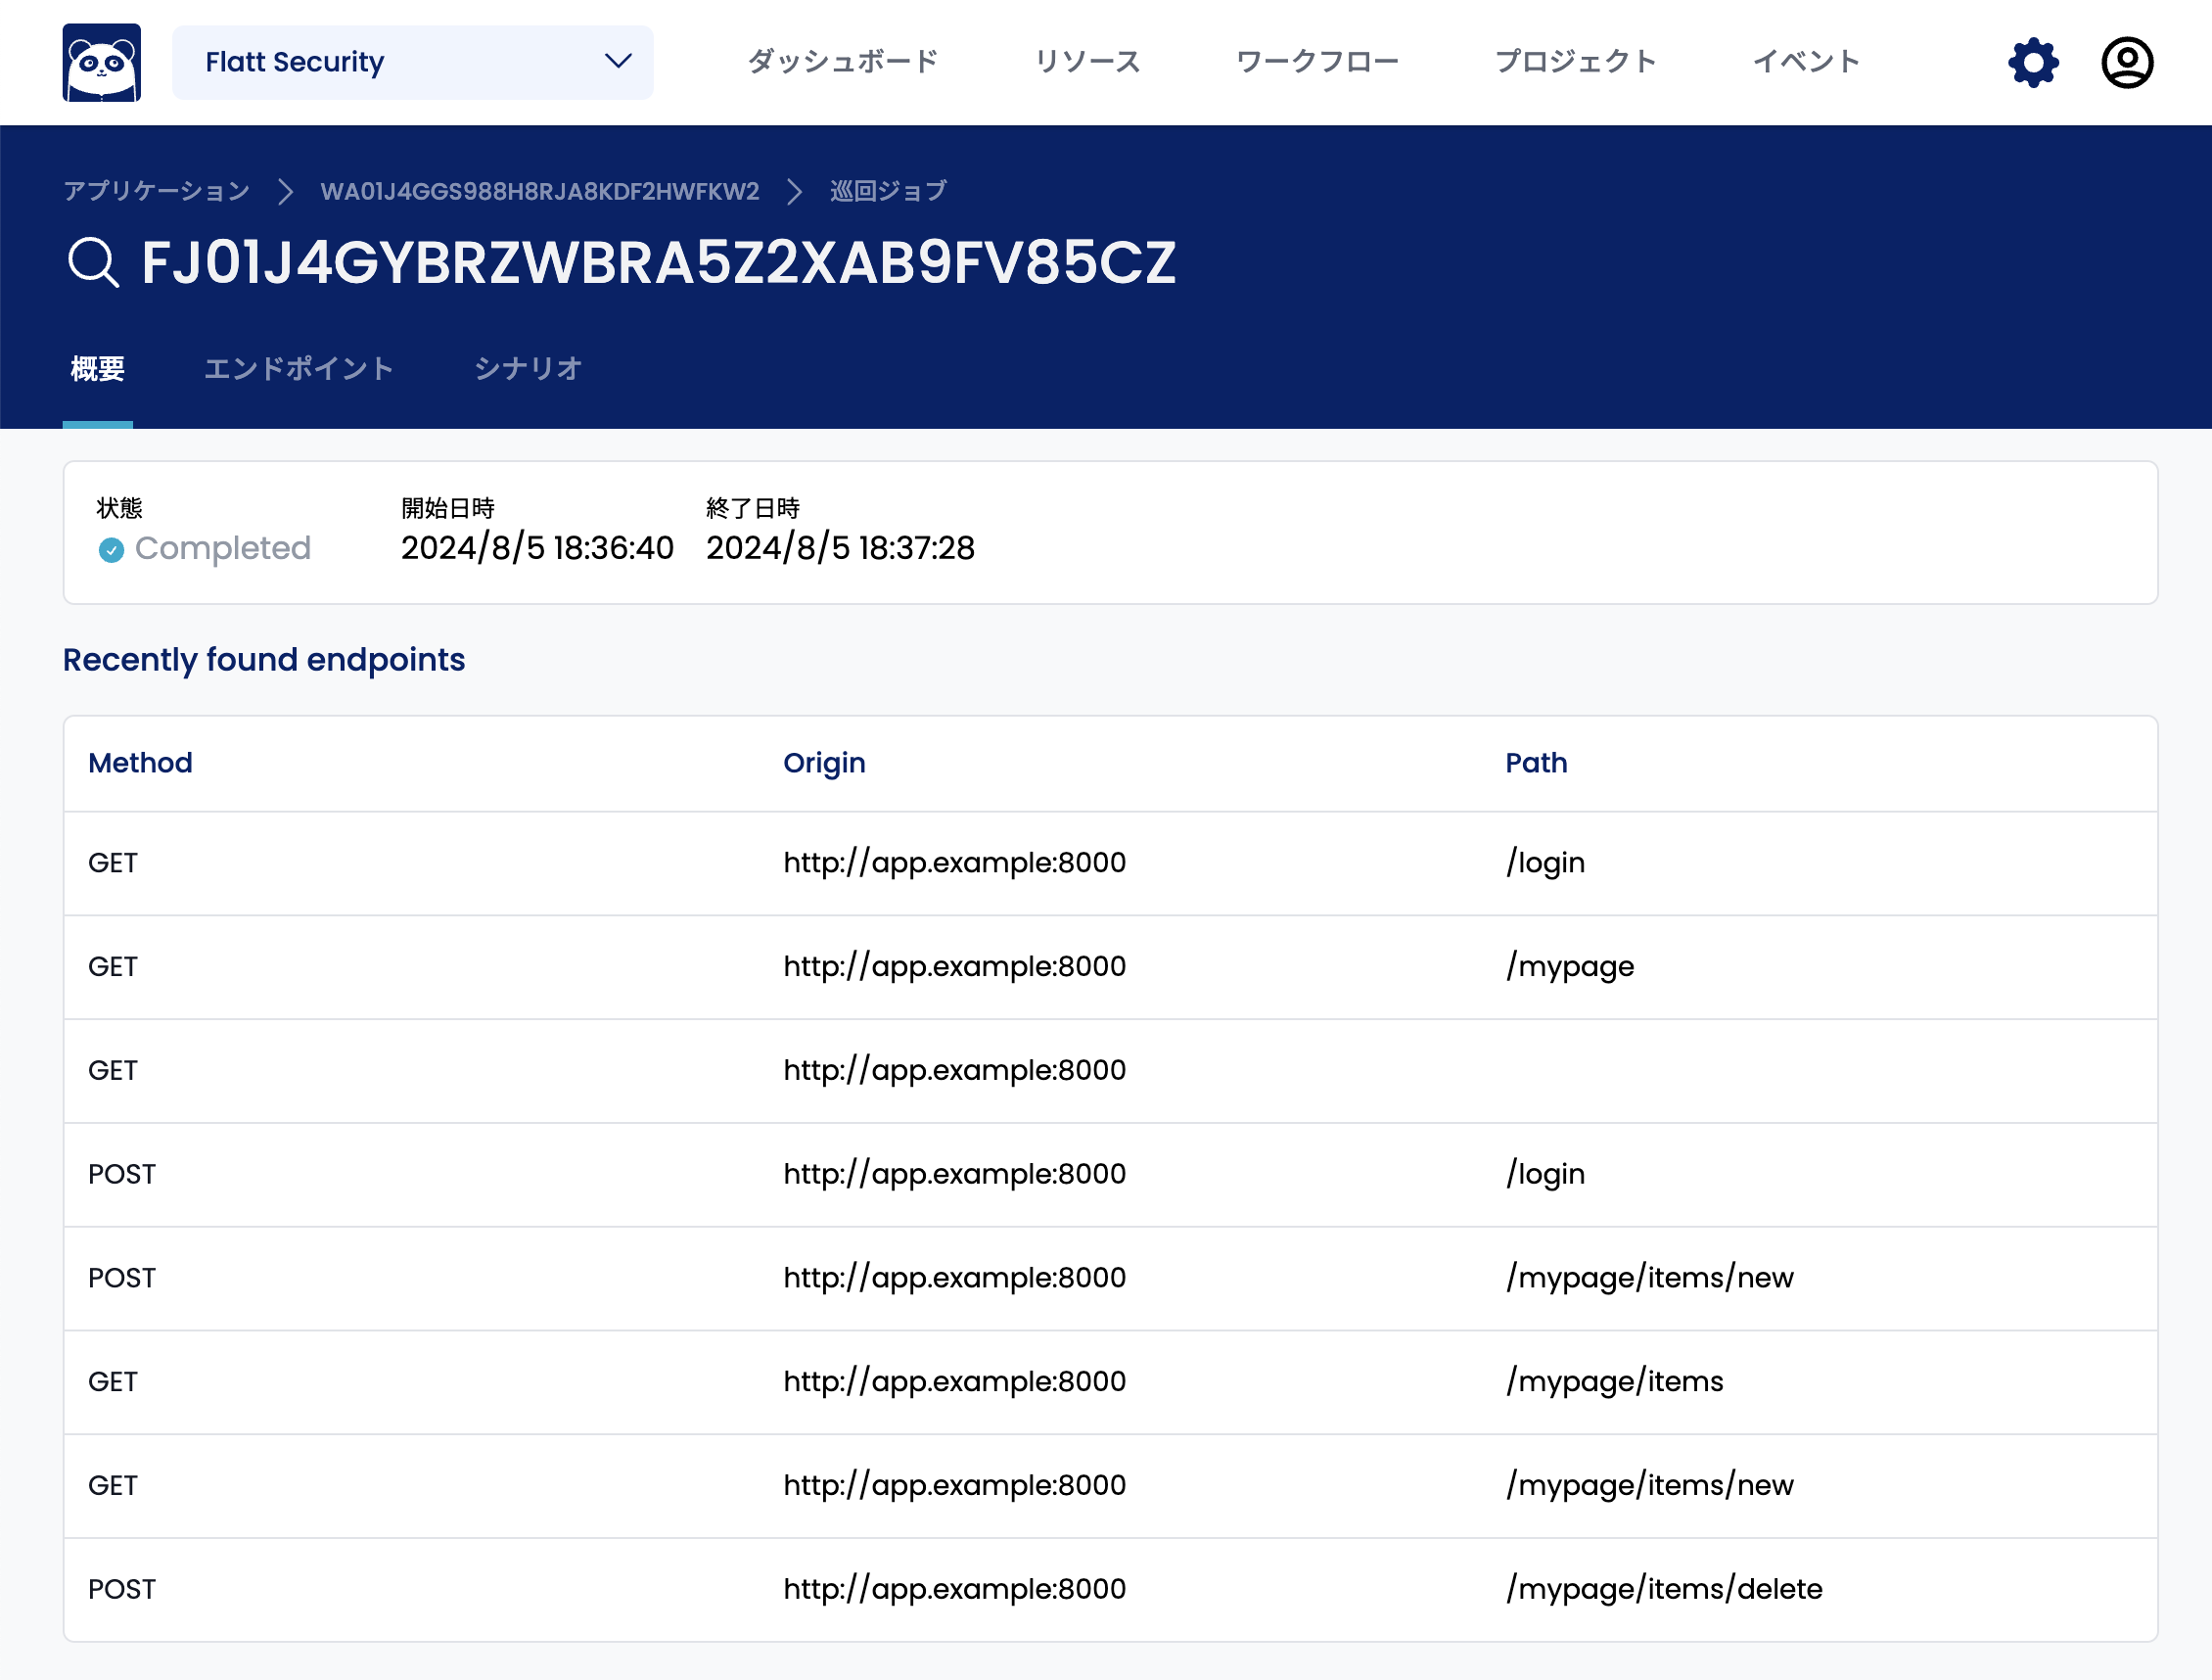
Modifying Crawl Results
Shisho Cloud automatically fills in and submits input fields when it detects a form during crawling. However, in some cases, the automatically entered parameters may not be appropriate. In such cases, you can manually specify the parameters to be entered.
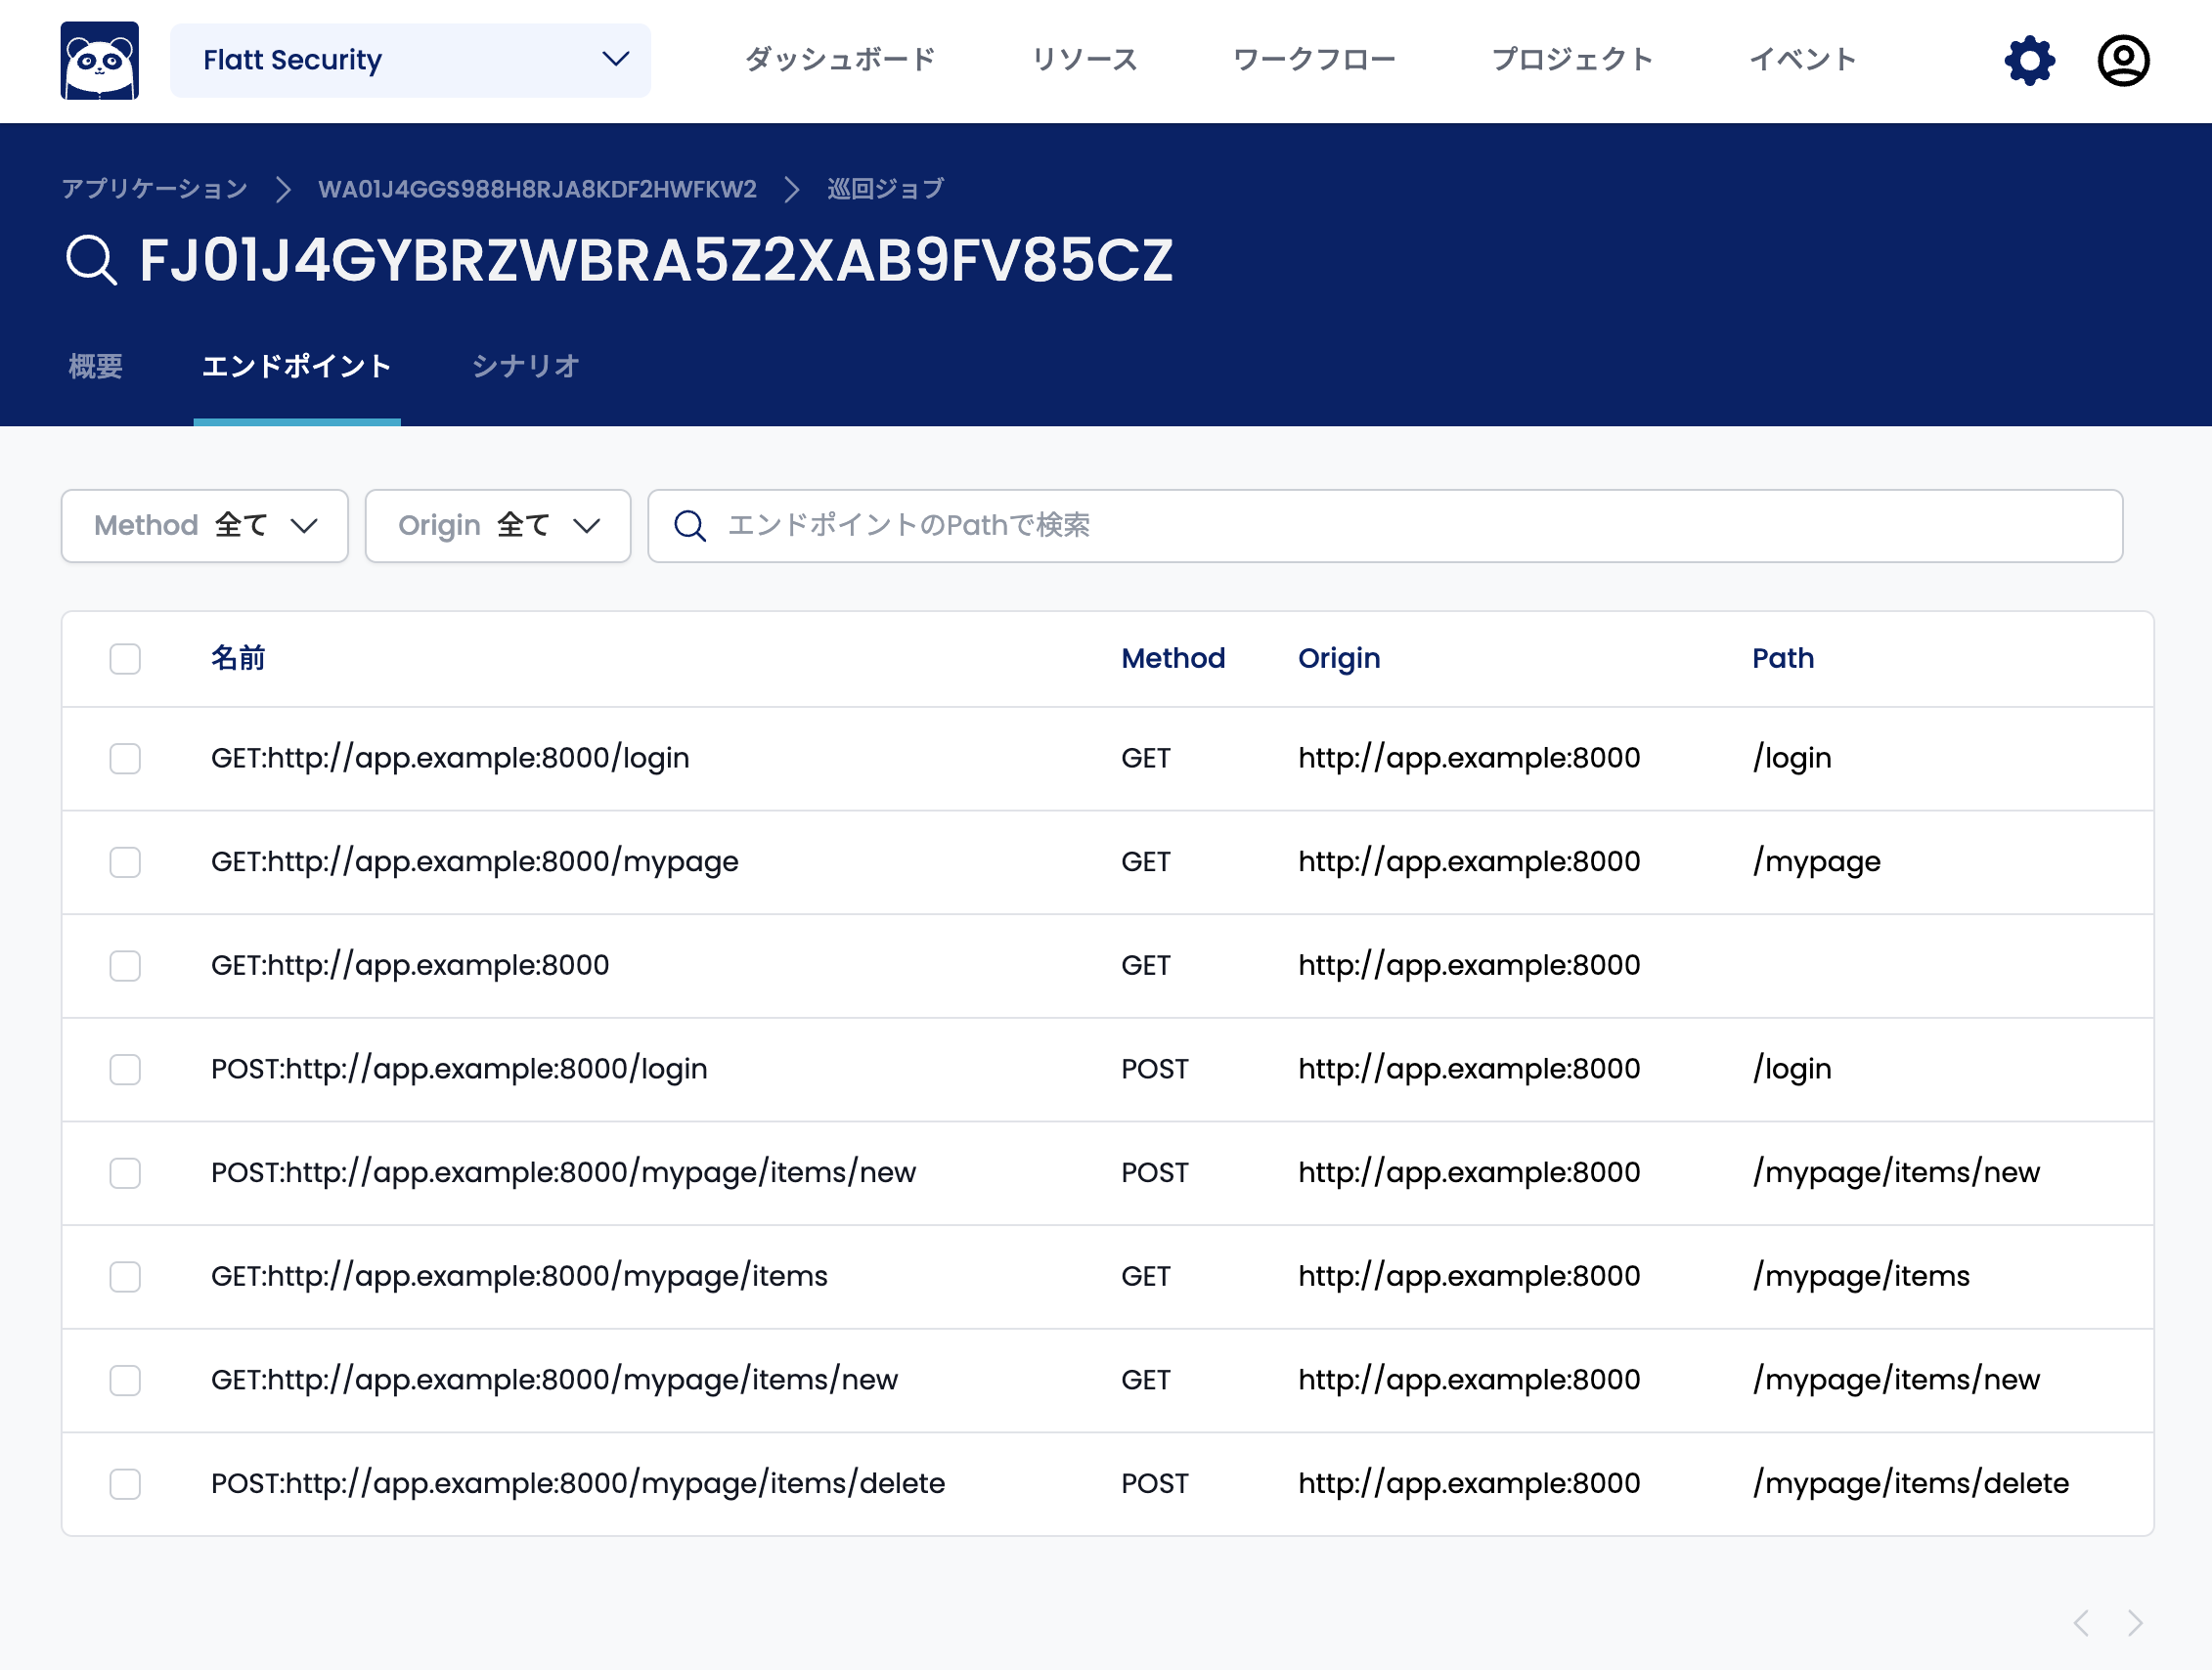
Open the "Endpoints" tab and select the endpoint whose parameters you want to modify.
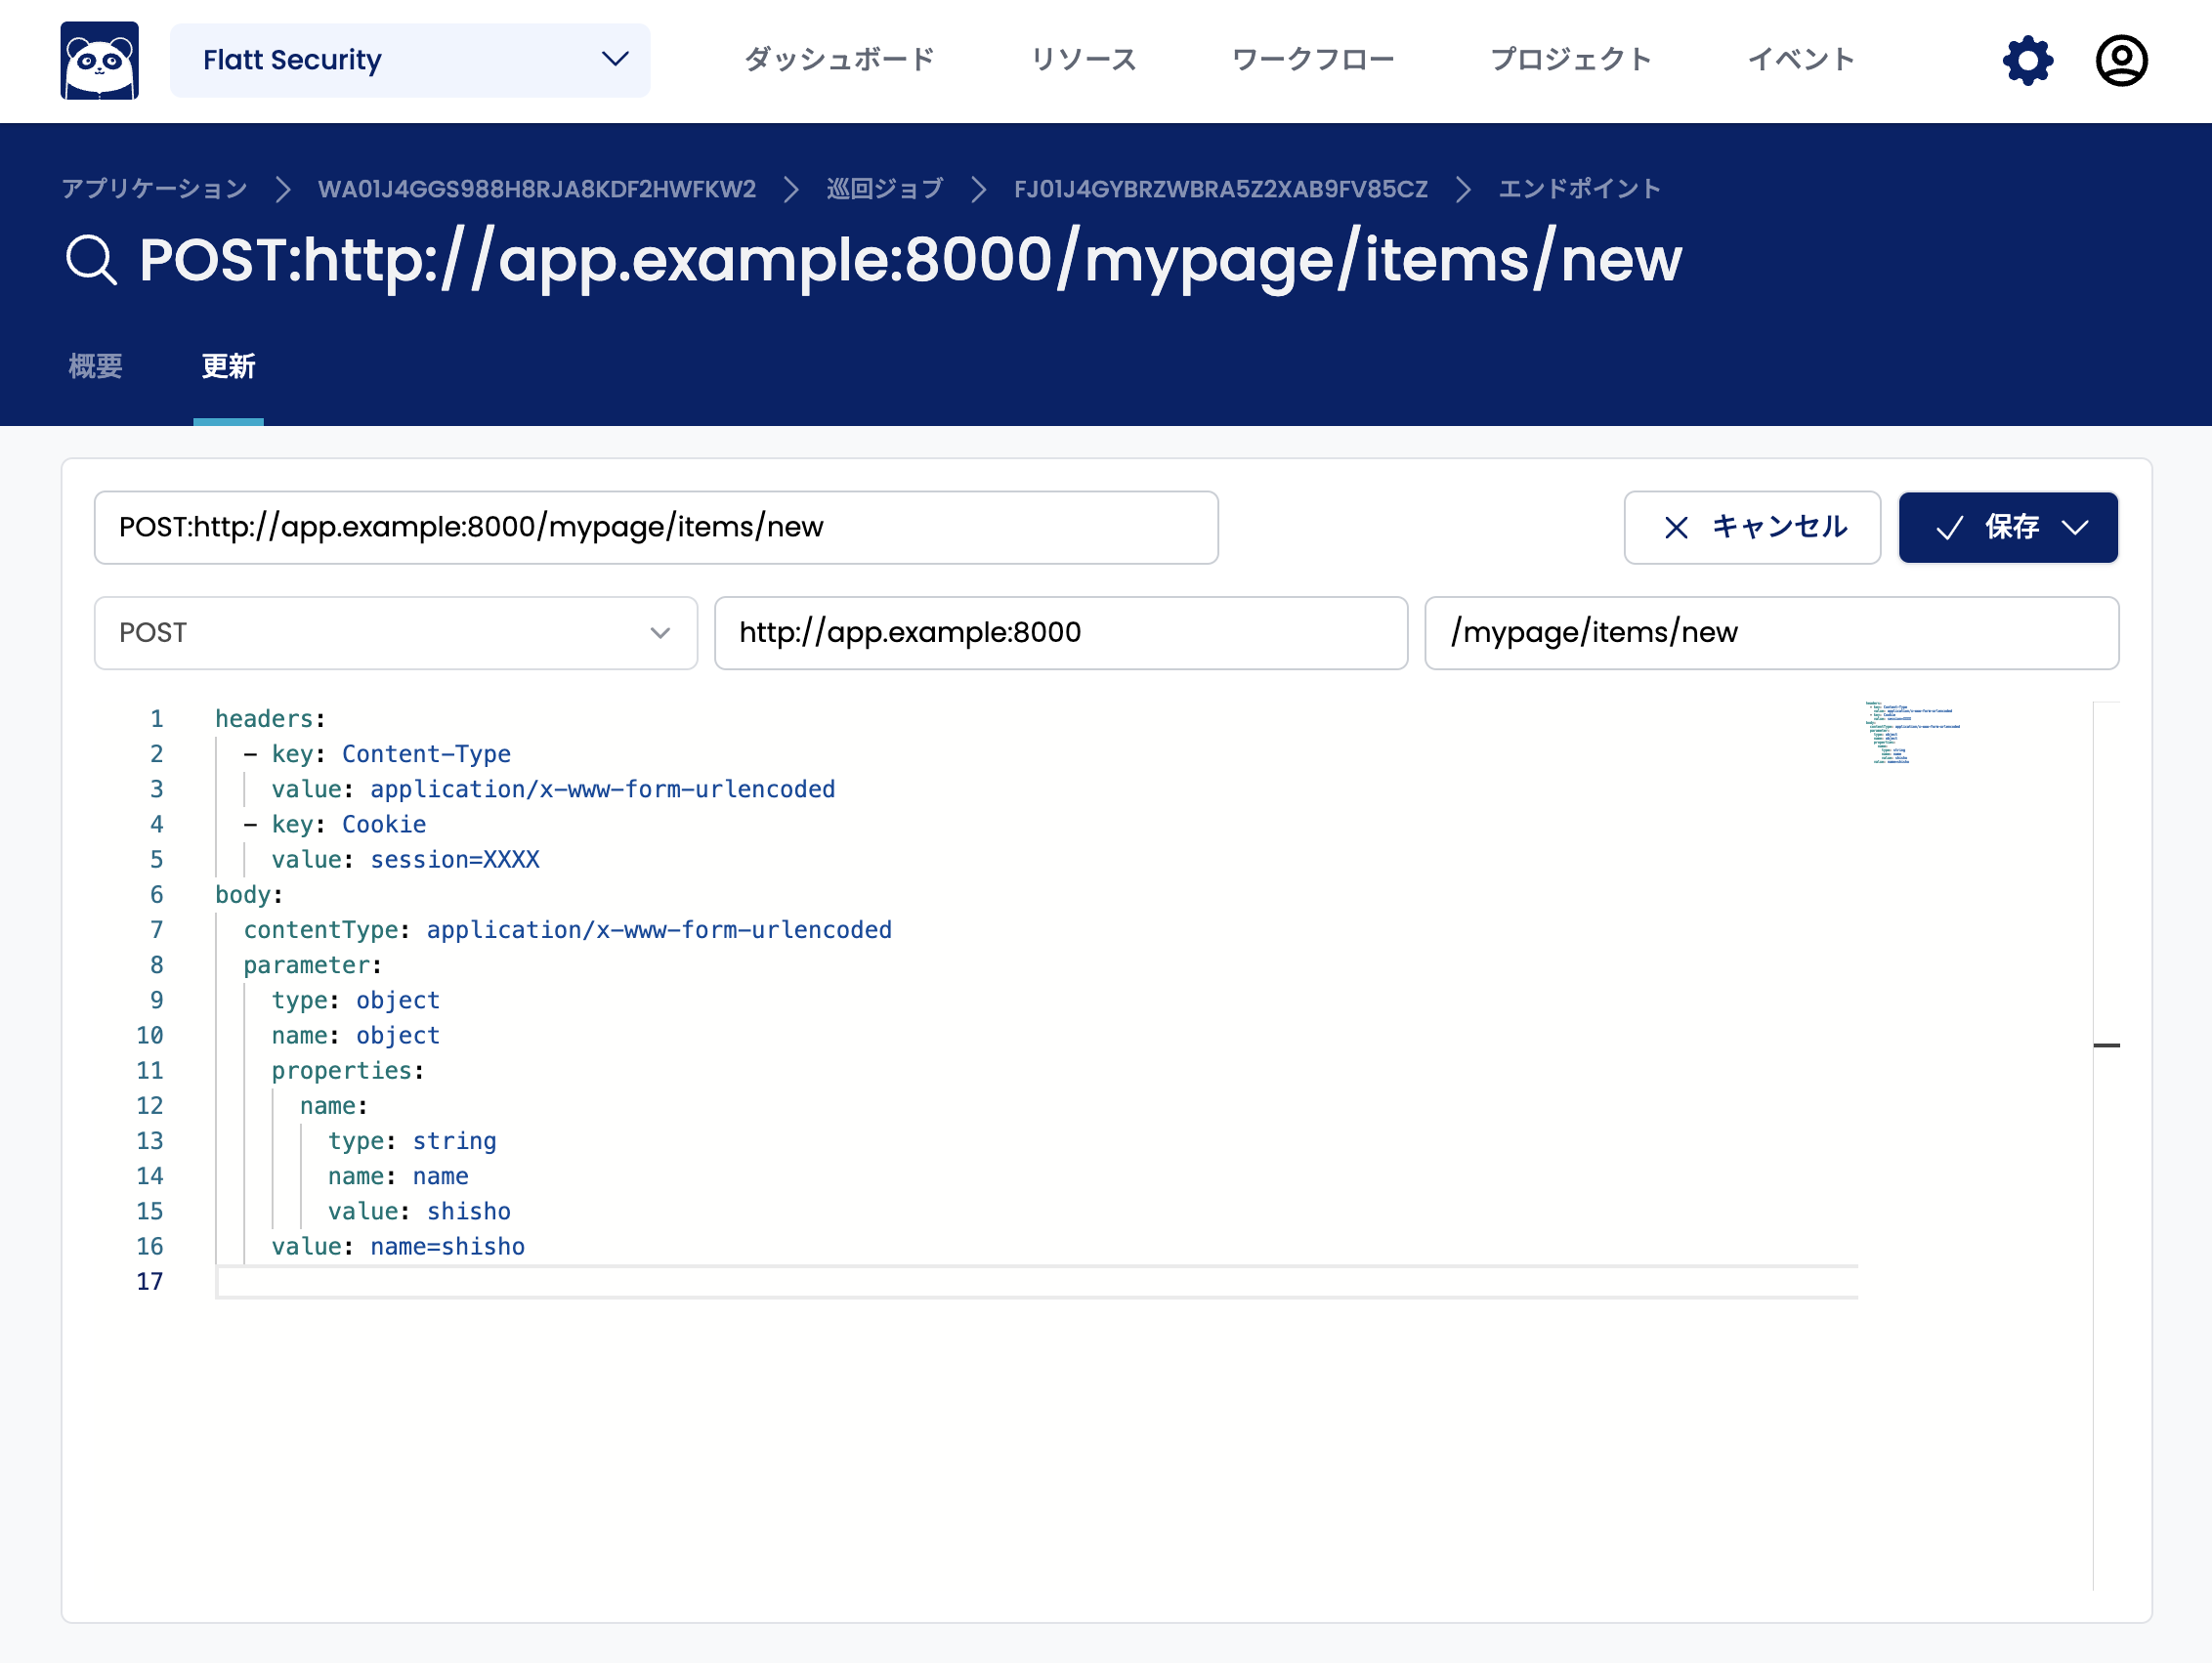
In the endpoint update screen, the parameters of the endpoint are described in the YAML input field. For example, the following endpoint has the value shisho automatically entered for the parameter named name.
If you want to specify the value test instead of shisho as the value of the name parameter, rewrite the value part to test.
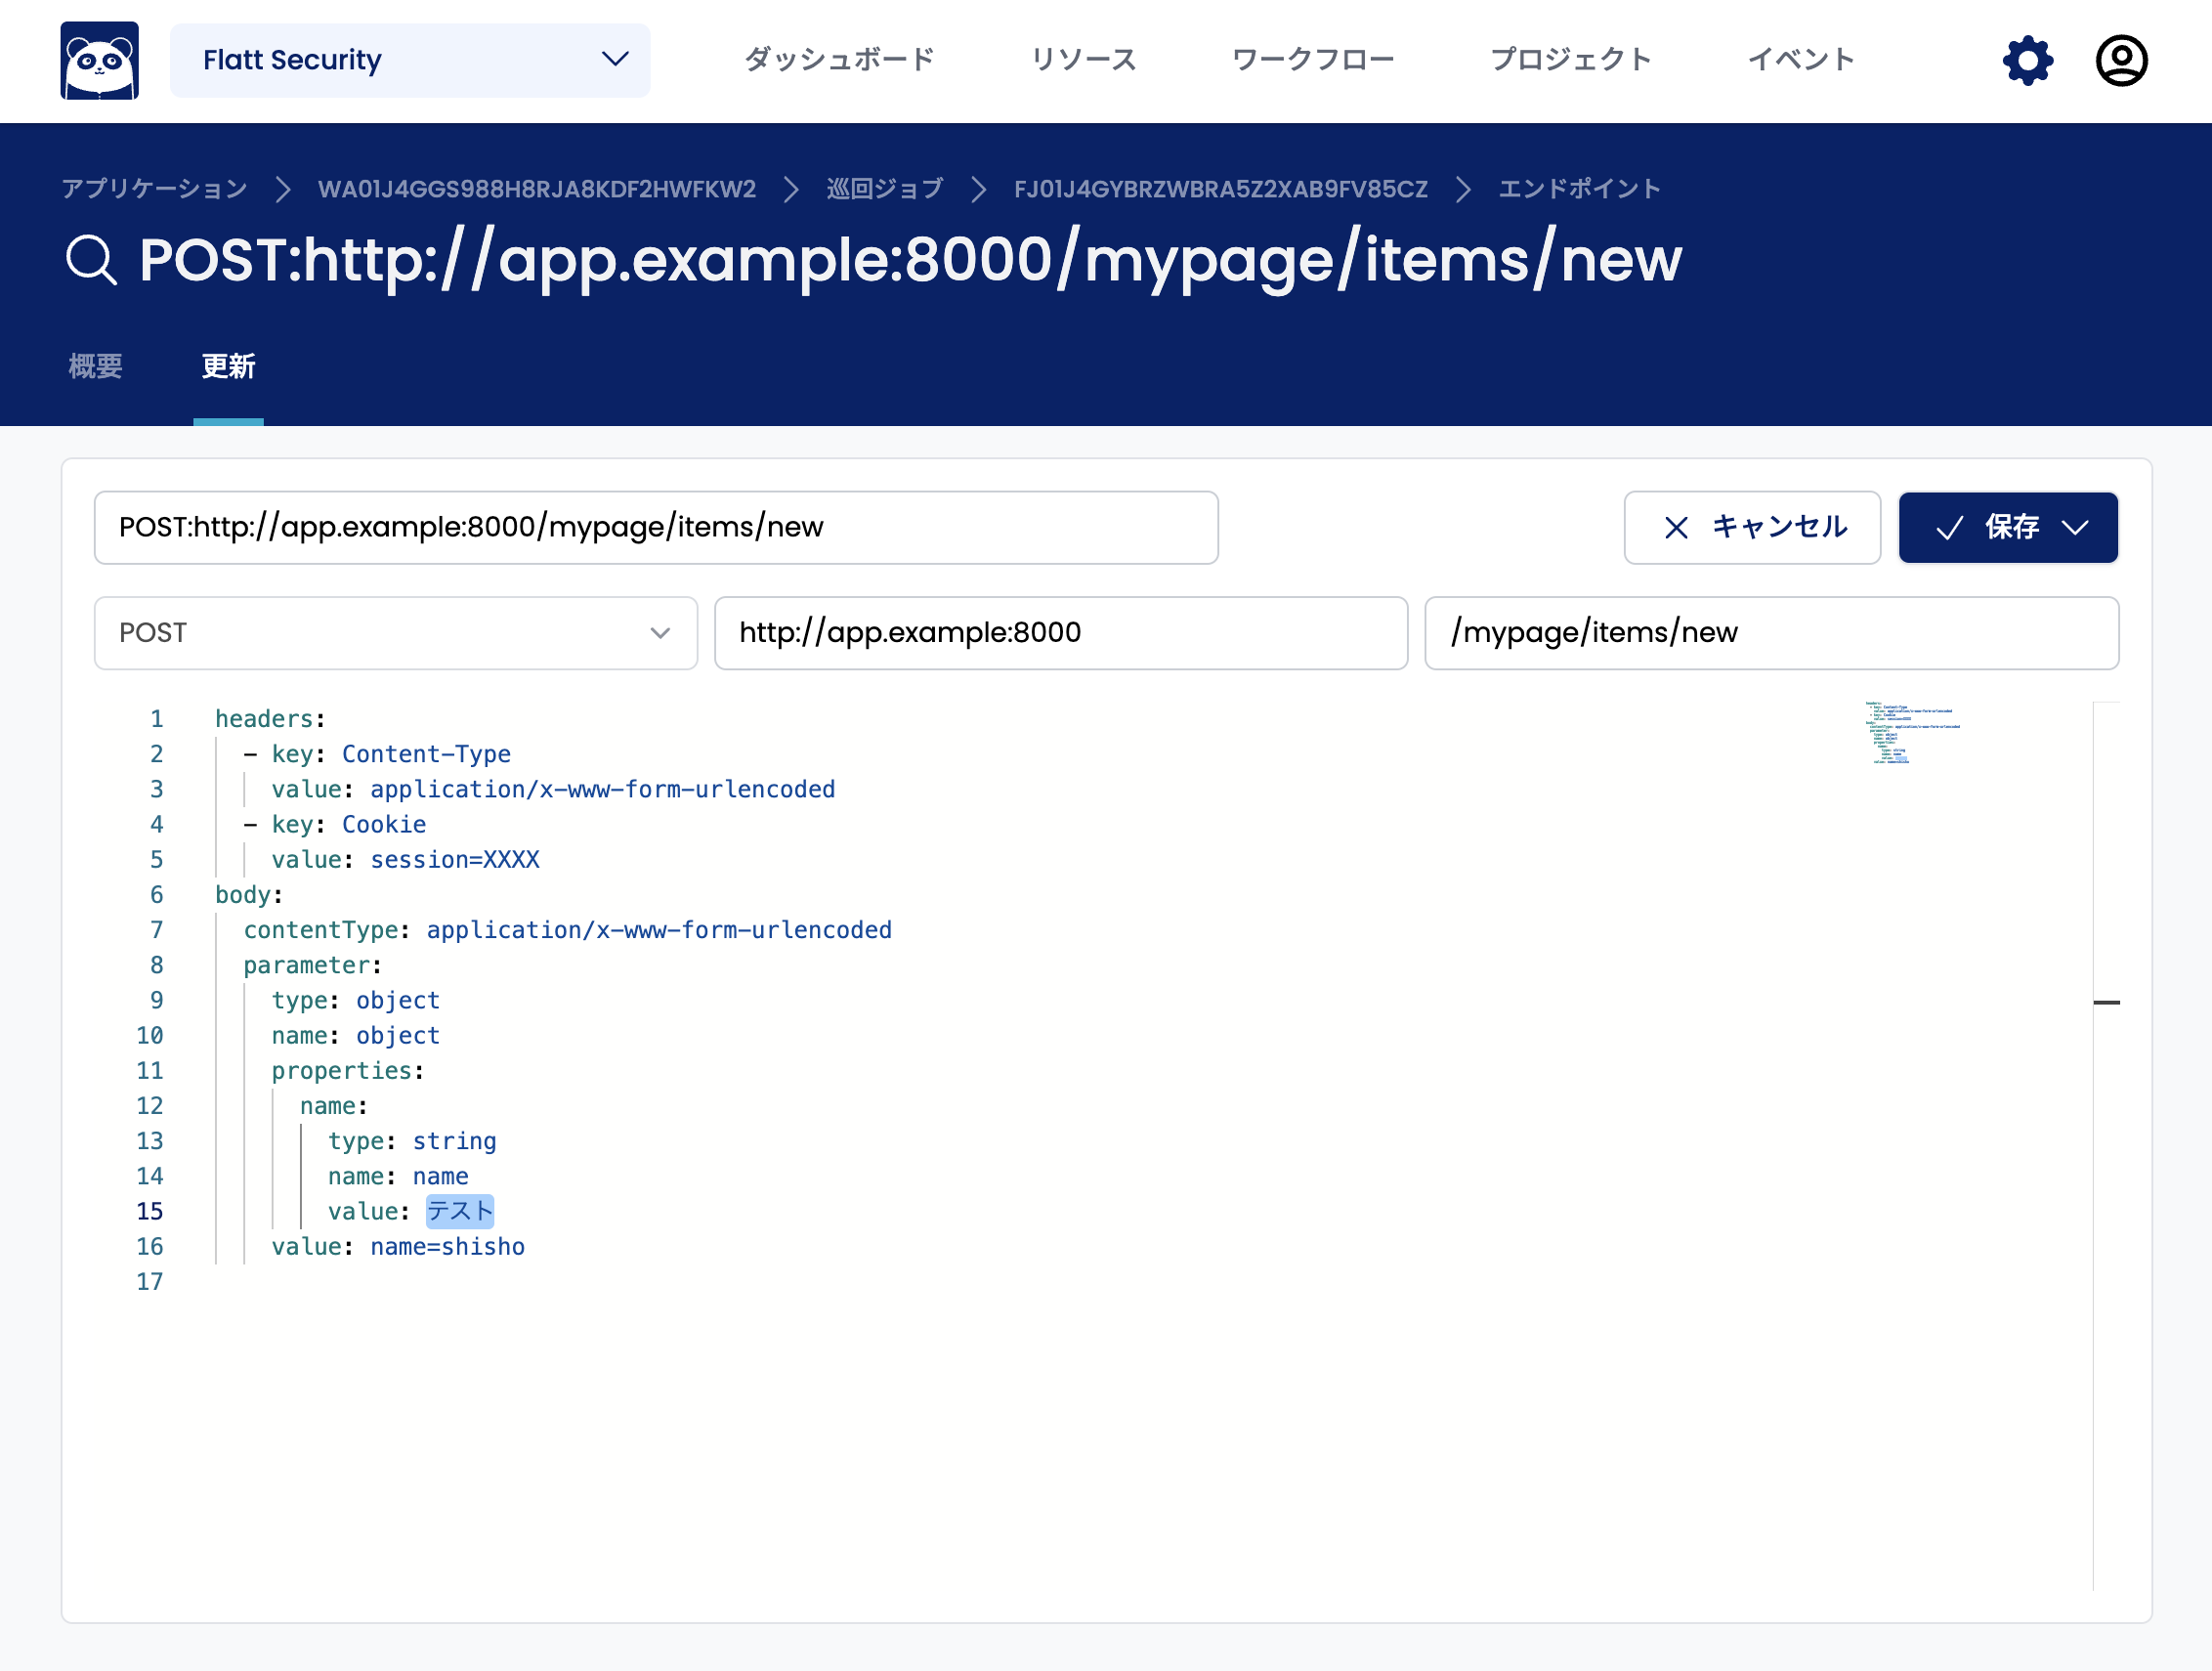
Once you have modified the parameter, click the "Save" button at the top right. Then, future scan jobs will use this modified parameter to send requests.
Modifying Scenarios
Depending on the function of an endpoint, it may be necessary to send another request before sending a request to that endpoint. For example, for delete endpoints, you may need to create the resource to be deleted before sending the delete request. In such cases, you can effectively diagnose the delete endpoint by setting up a scenario to "send a create request and then send a delete request."
To edit a scenario, open the "Scenarios" tab and select the scenario you want to edit.
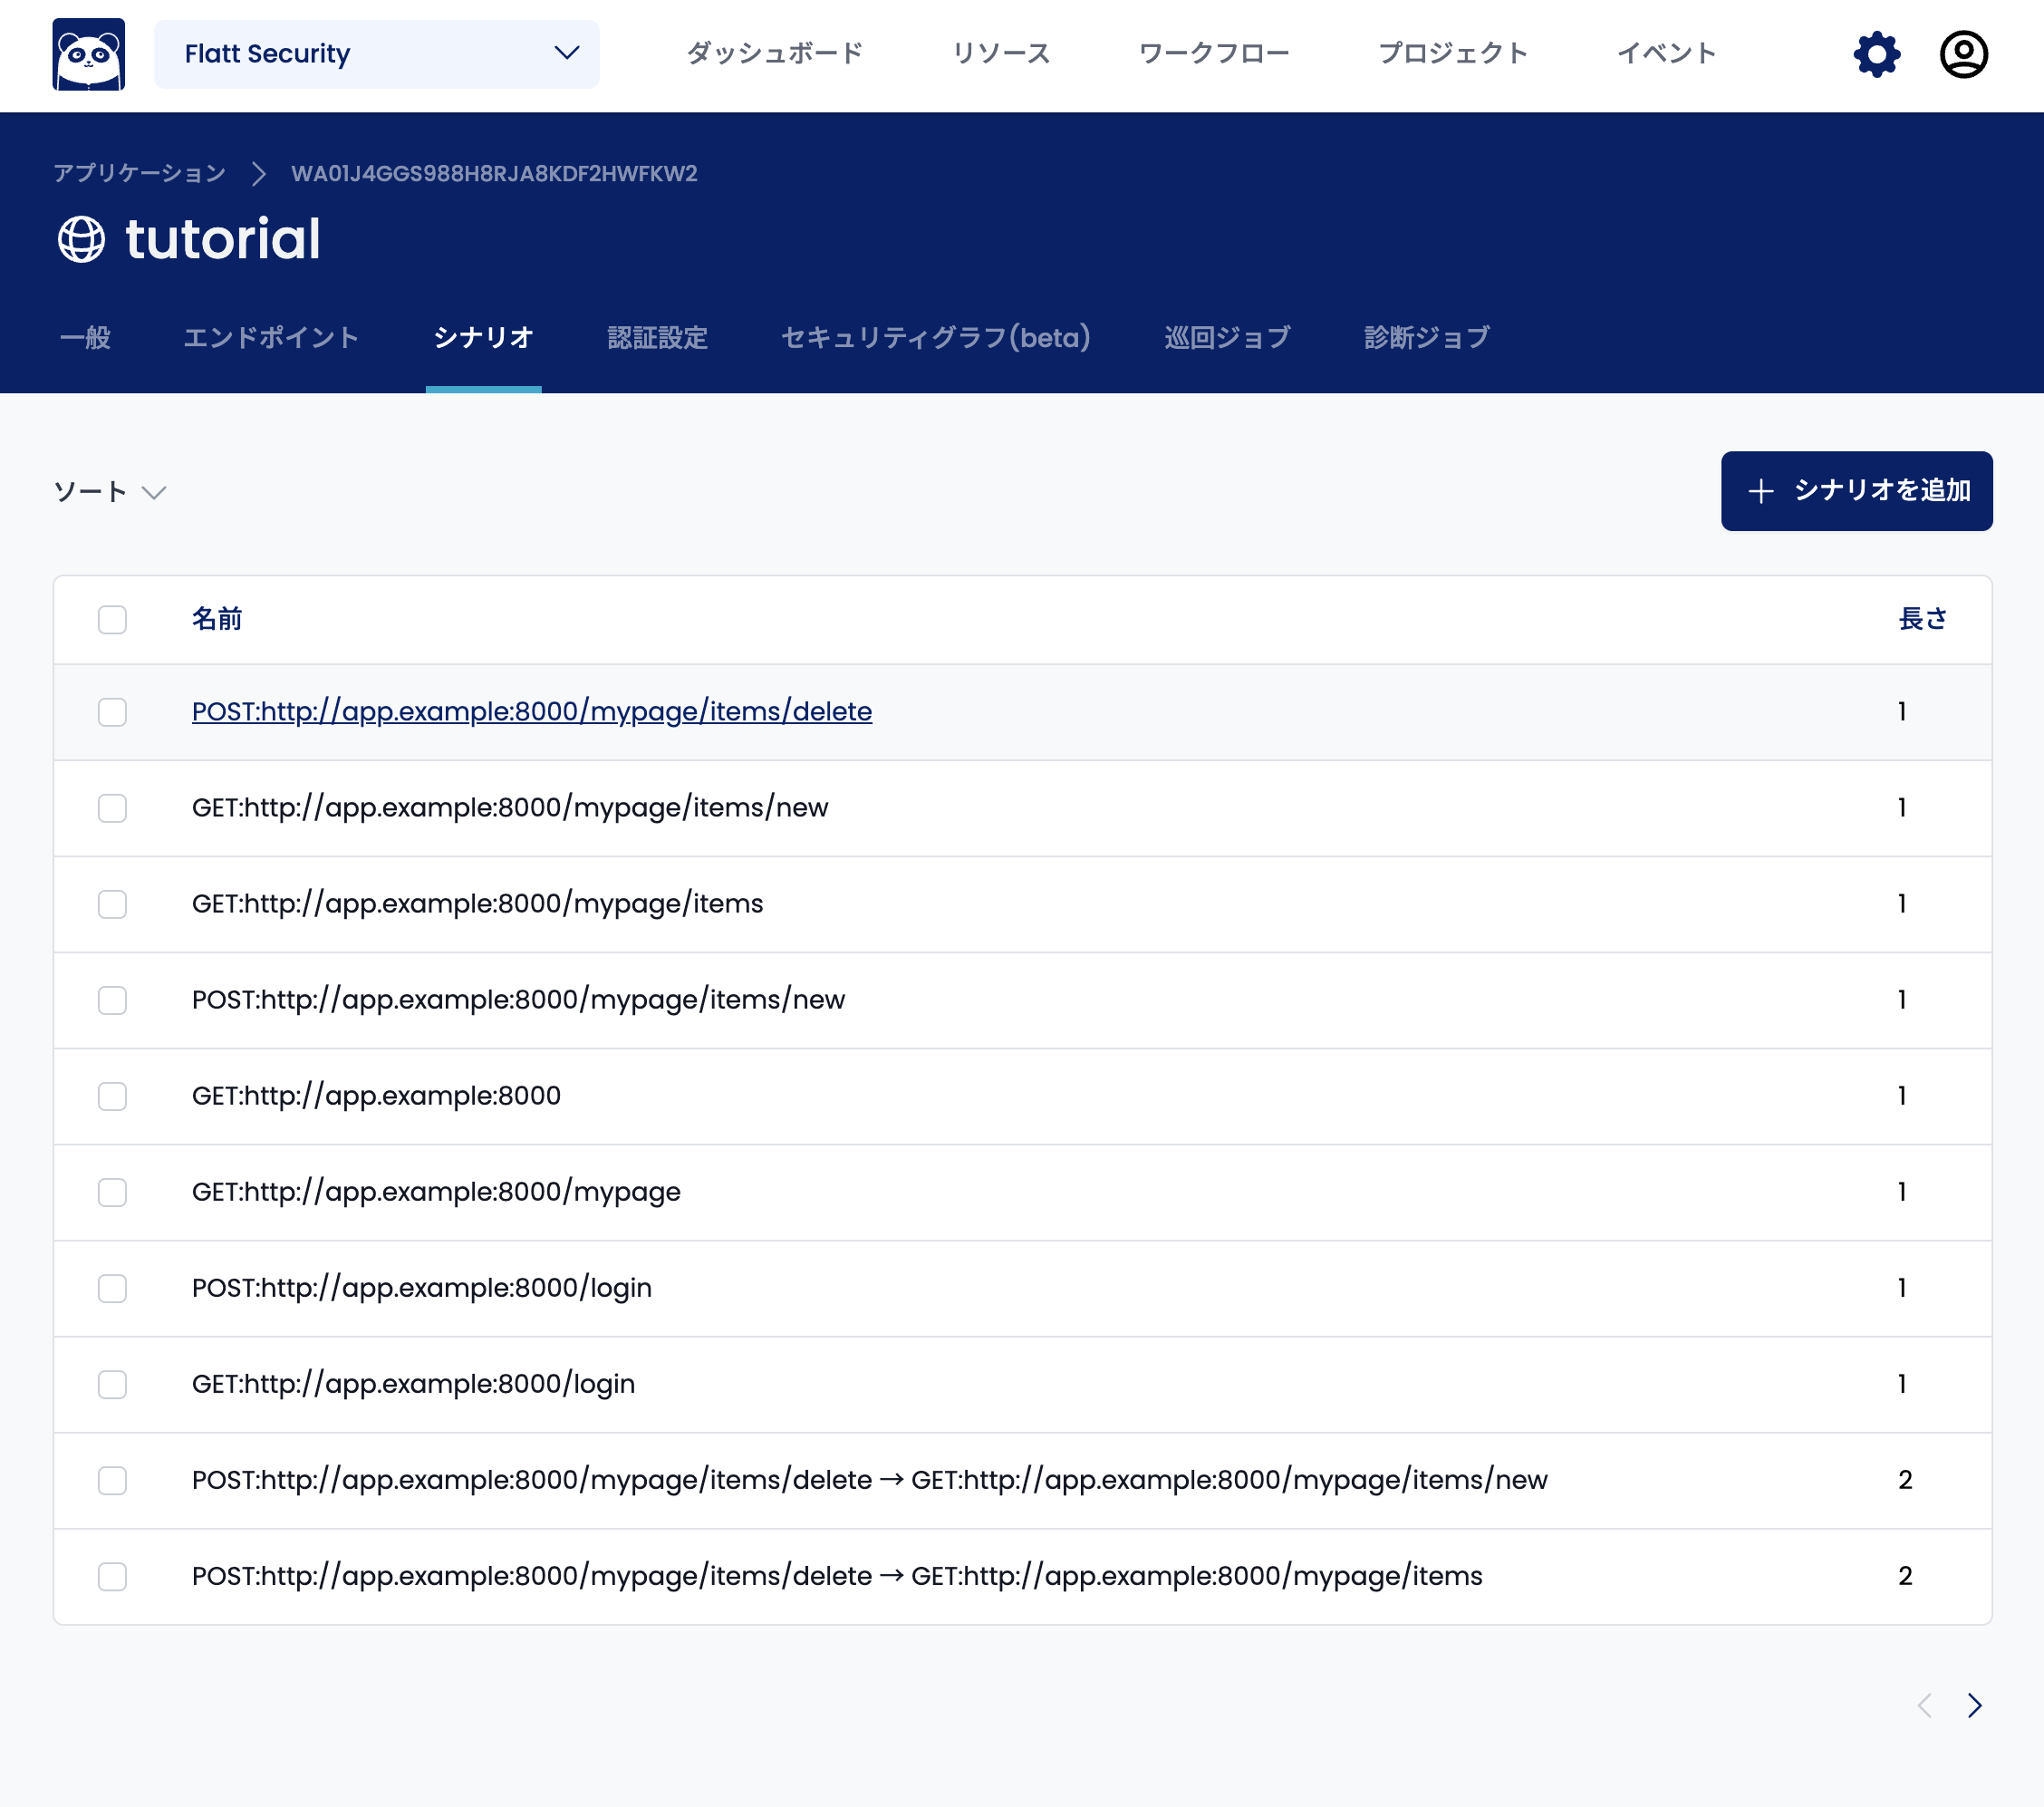
Select the "Update" tab to edit the scenario.
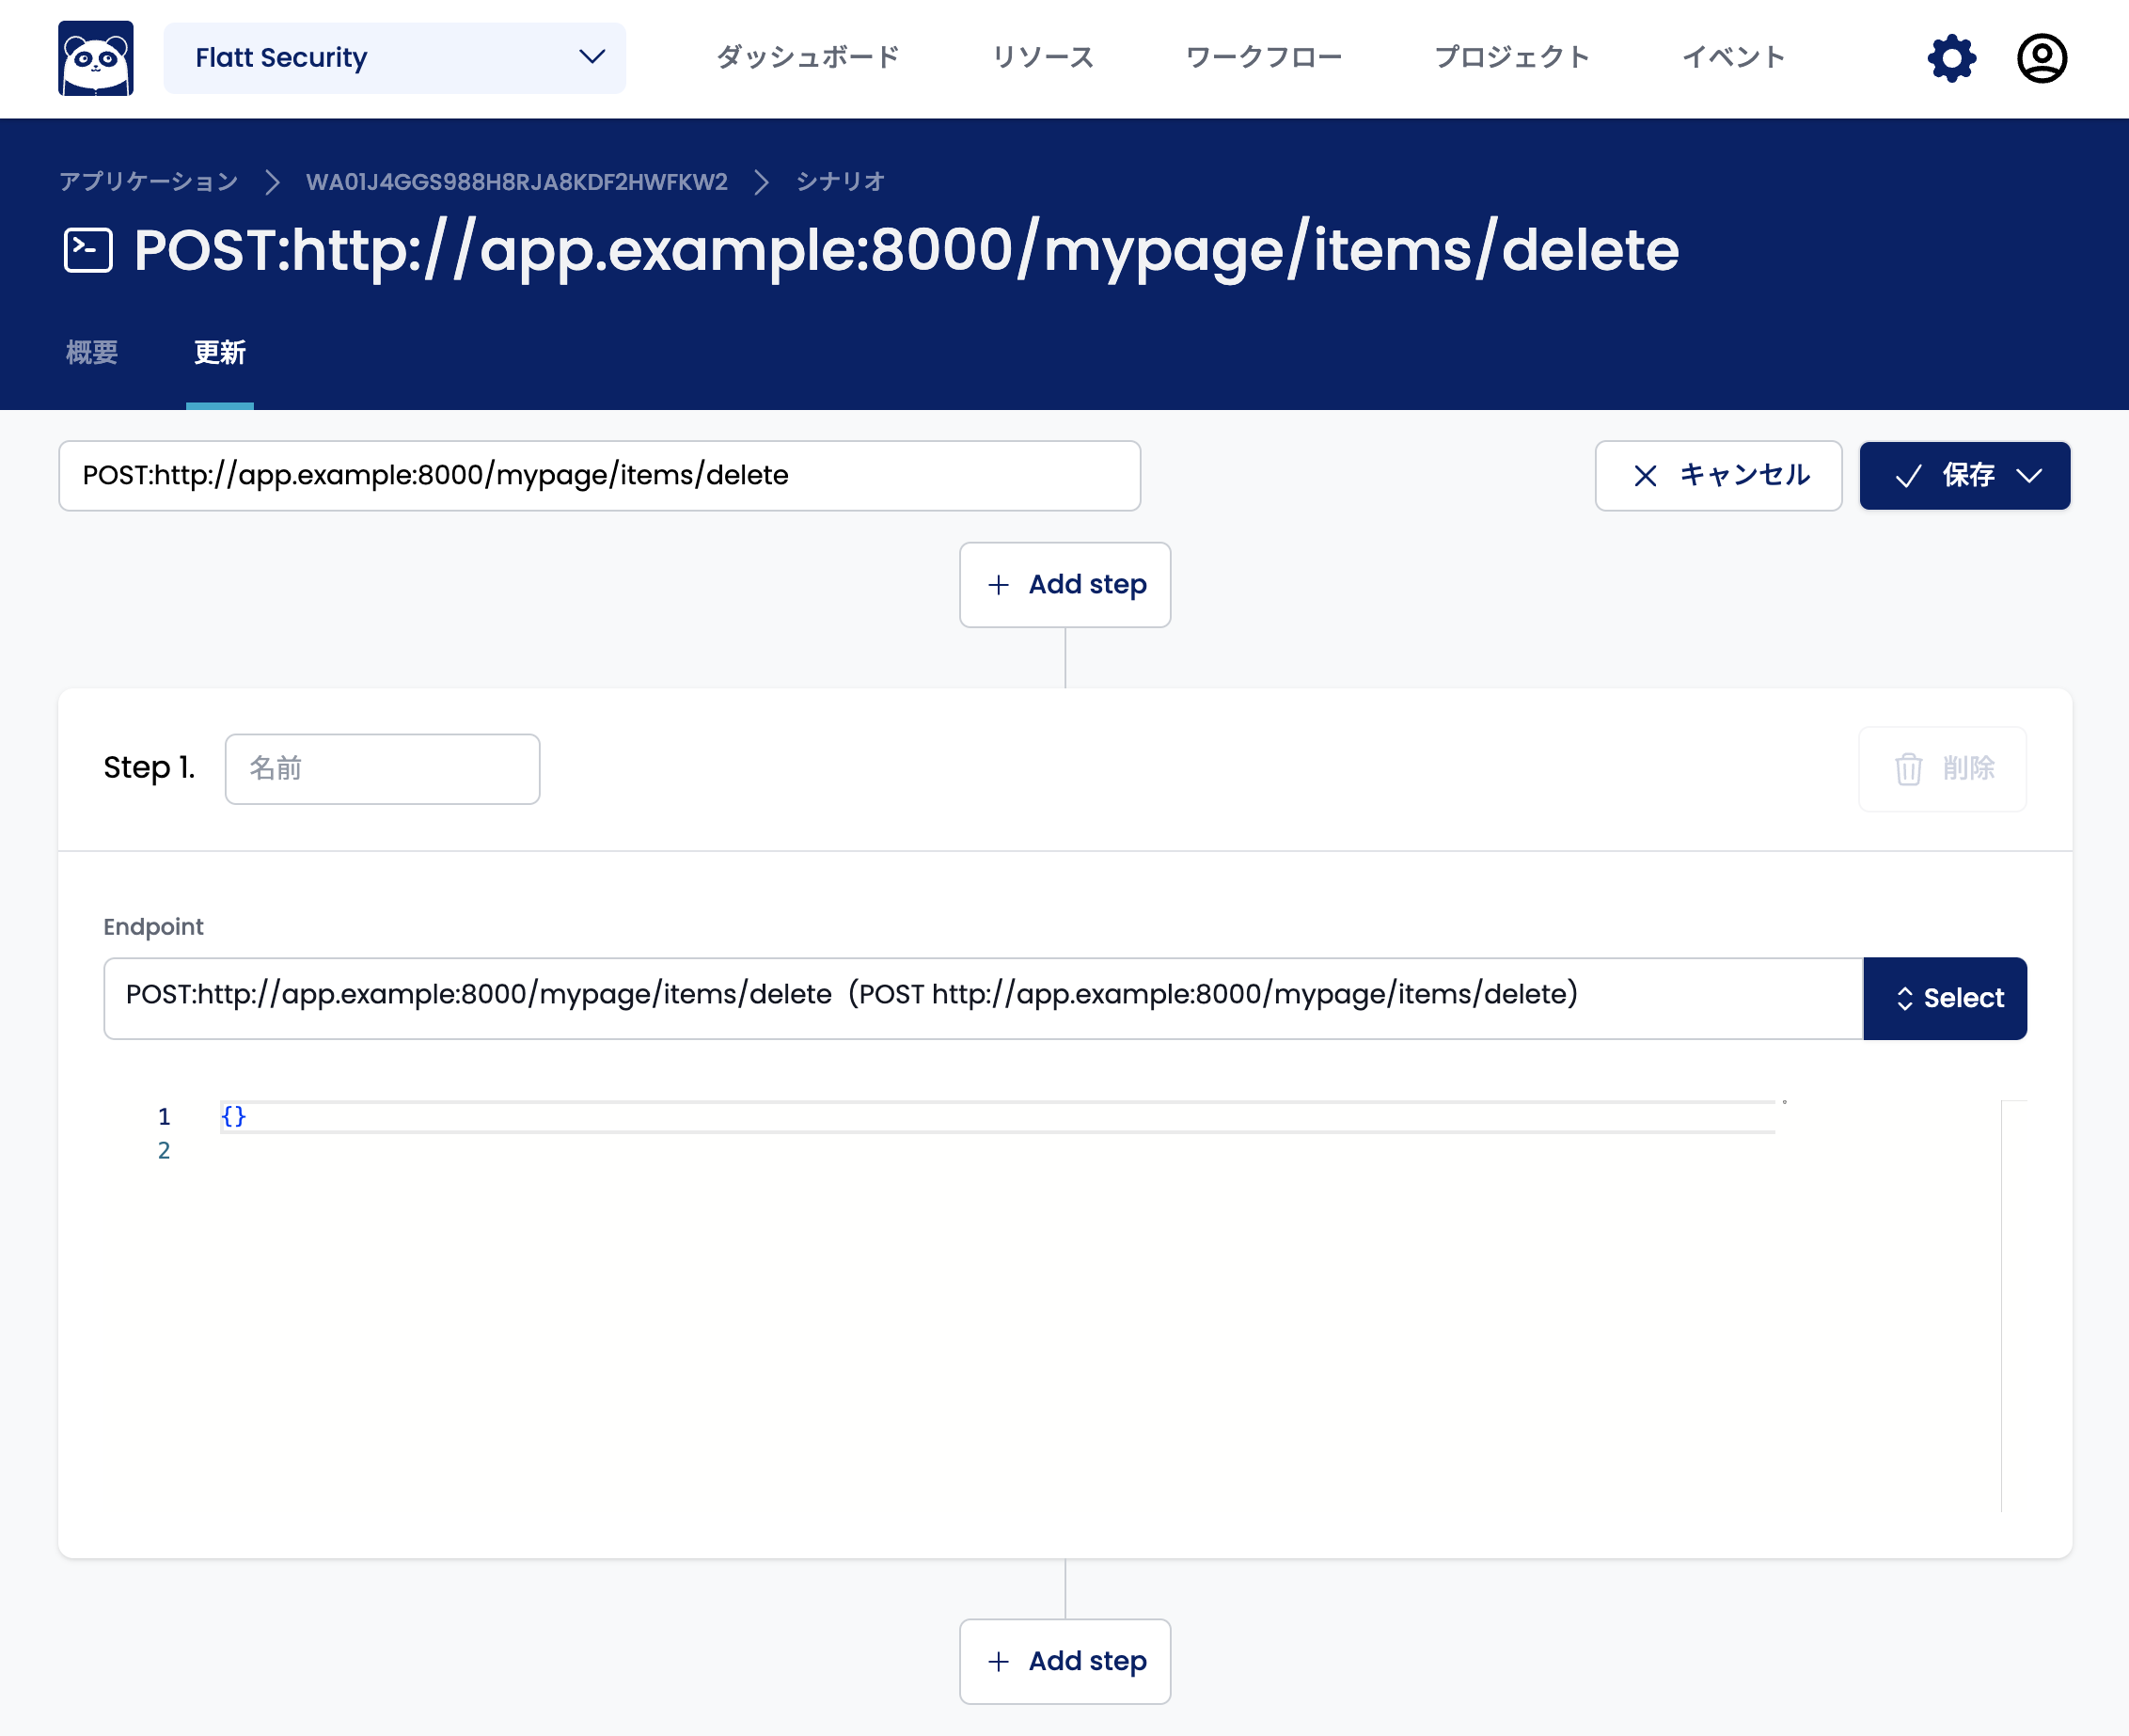
This tutorial explains how to set up a scenario where a create request is sent before a delete request. For a comprehensive description of scenario definitions, see the reference.
First, click the "Add step" button above Step 1 to add a step before the delete request.
Click the "Select" button in the endpoint field of the added Step and select the endpoint to send the create request to. If there are many endpoints, you can narrow down the list by entering the path in the search field.

Once you have selected the endpoint, click the "Select" button to confirm your selection.
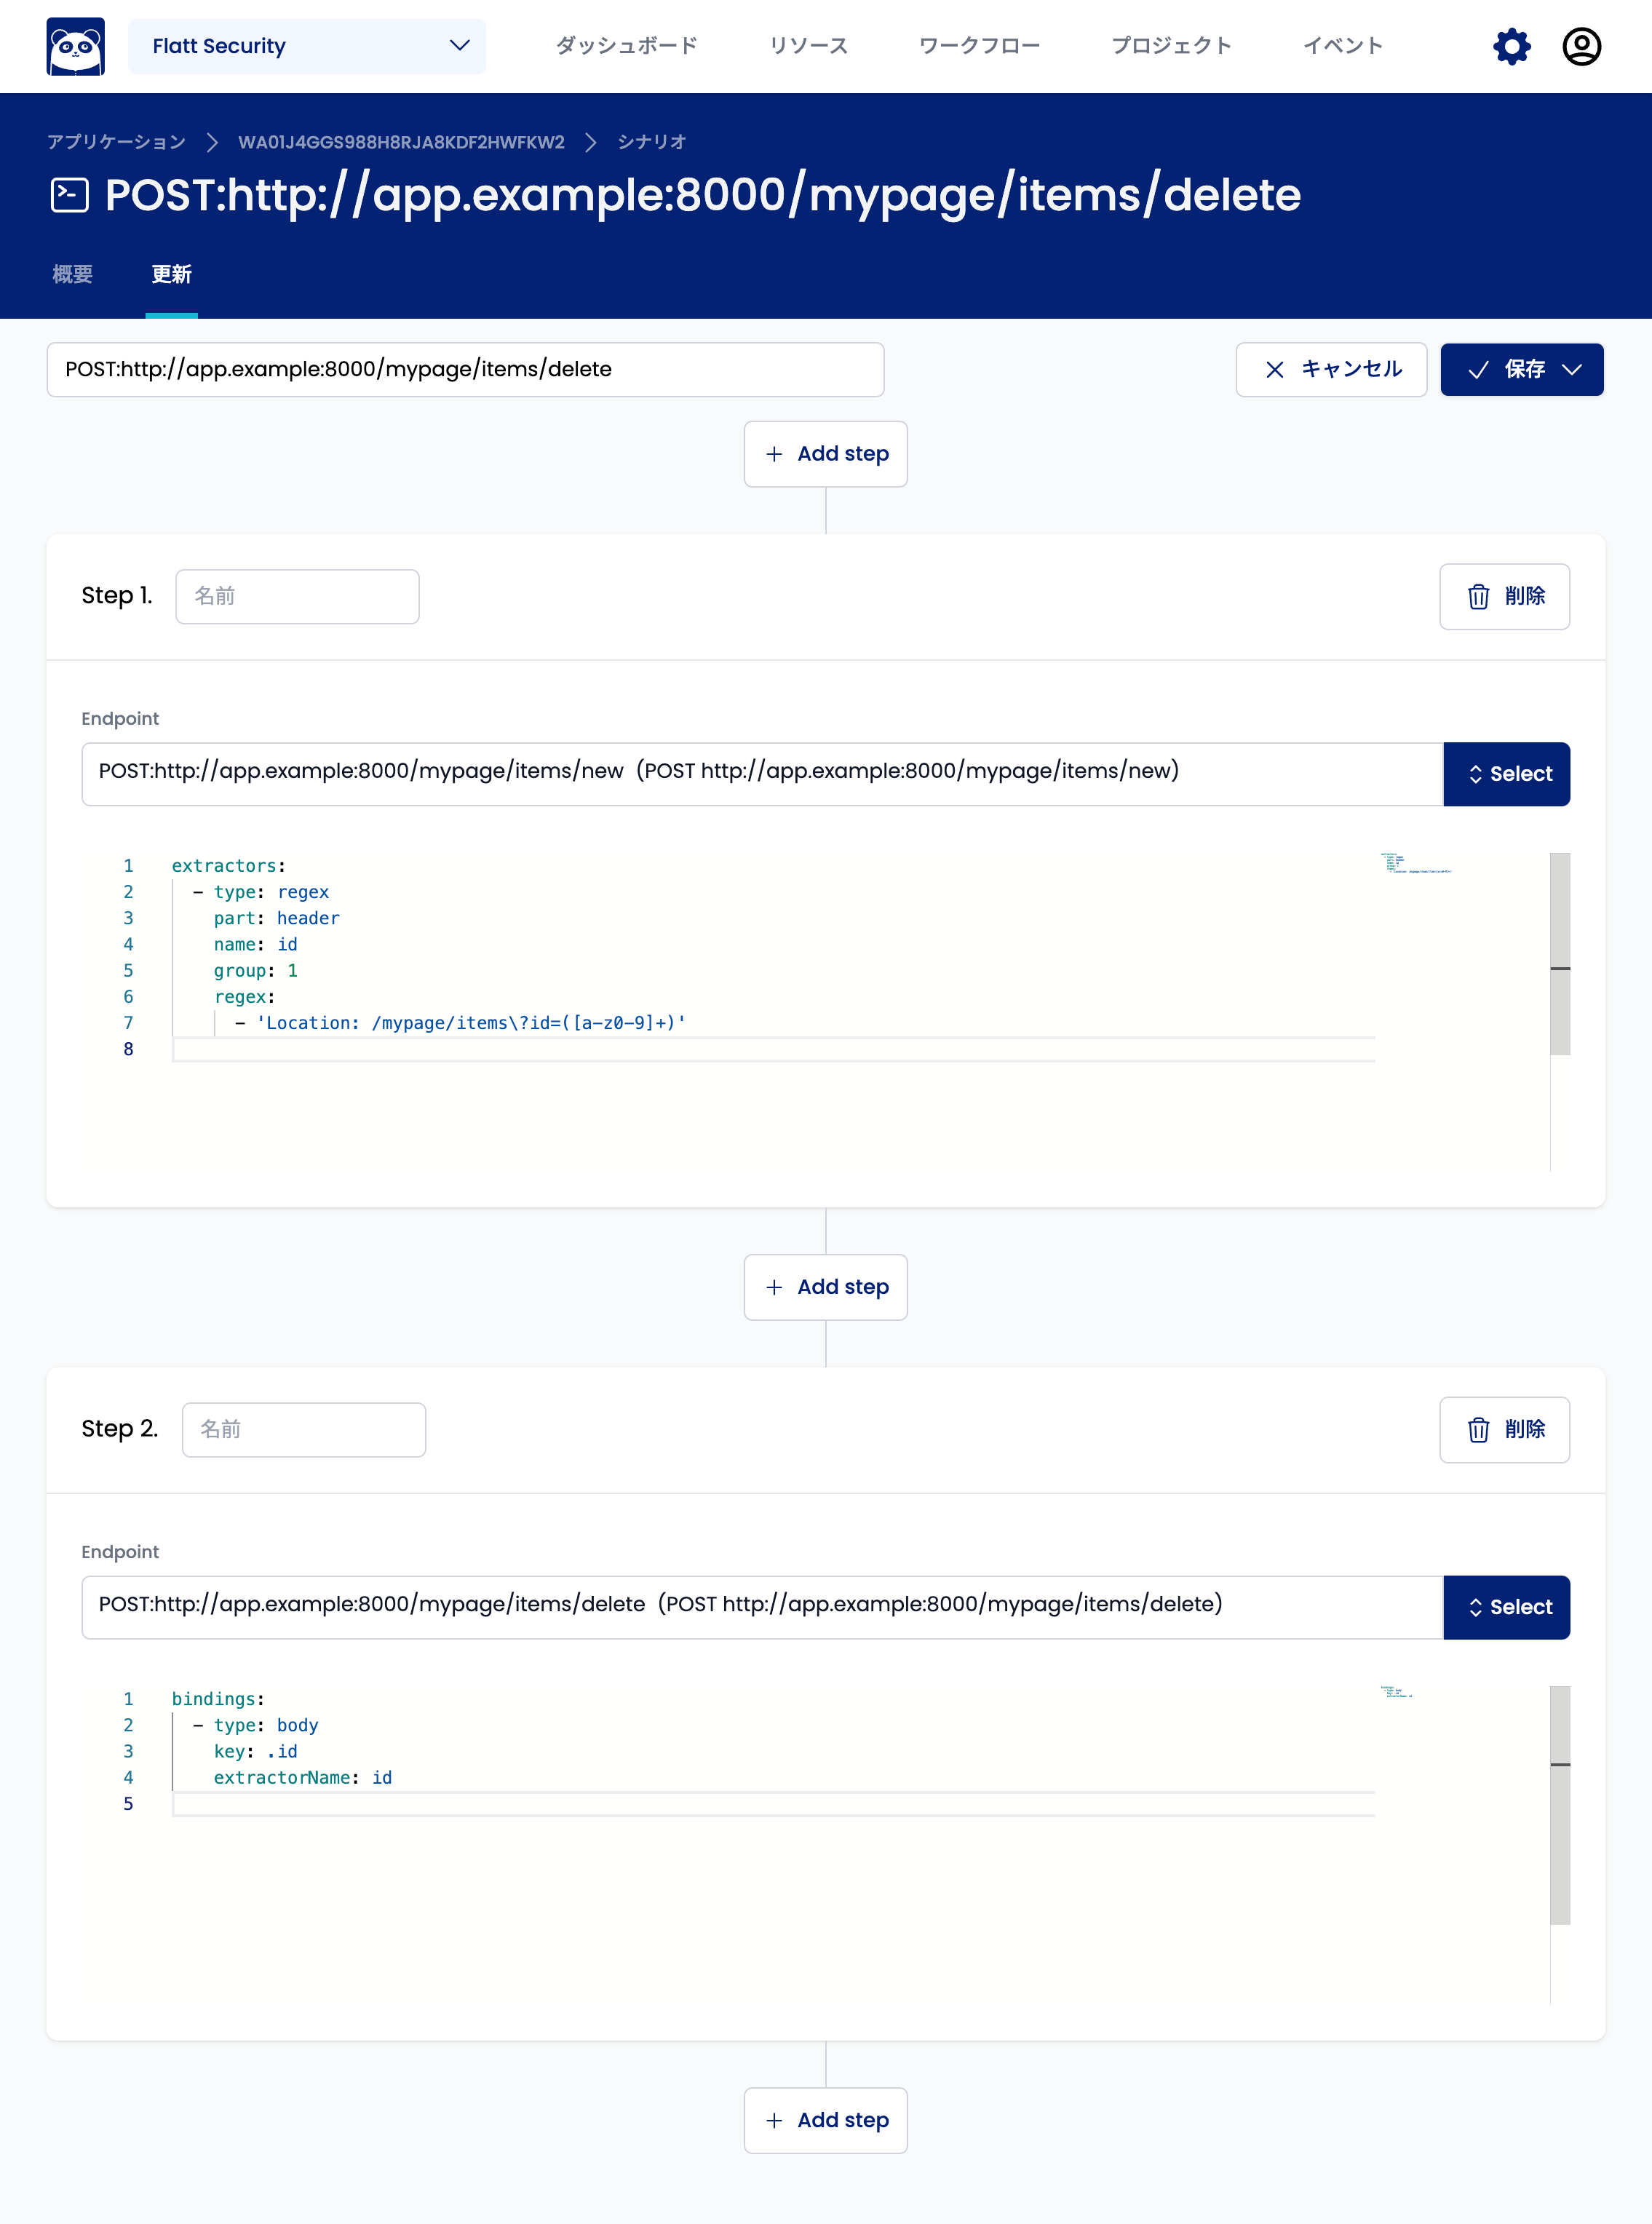
Next, enter the settings to extract the resource ID from the create request response and inject it into the delete request. Here, we assume that the resource ID in the response at the time of creation is described in the header as Location: /mypage/items?id=XXXX. In such a case, enter the following configuration in the YAML input field of Step 1 to specify the extraction method.
extractors:
  - type: regex
    part: header
    name: id
    group: 1
    regex:
      - 'Location: /mypage/items\?id=([a-z0-9]+)'
This setting will extract the XXXX part of Location: /mypage/items?id=XXXX and store the value in a variable named id. To extract a different part of the response, refer to the reference.
Next, enter the settings to inject the ID extracted in Step 2. The following shows the settings for injecting into the id parameter in the body of the delete request.
bindings:
  - type: body
    key: .id
    extractorName: id
This setting sets the value of the id variable extracted earlier to the id parameter in the body of the delete request. If you want to inject into a different parameter, replace the key part with the appropriate parameter name, referring to the reference.
If a CSRF token, etc. is required in the create request or delete request, you need to add a step to extract the CSRF token. Refer to the CSRF token extraction and injection method described in the "Applications that require login" section and the reference.
Once you have entered the above settings, click the "Save" button.
Next, proceed to the Run a Web scan procedure.