Register Web Applications
The English user guide is currently in beta preview. Most of the documents have been automatically translated from the Japanese version. Should you find any inaccuracies, please reach out to Flatt Security.
The features covered in this tutorial are only available to organizations that have signed up for the Web application security assessment feature.
This document describes how to register a web application with Shisho Cloud and configure an automated security diagnosis.
There are three ways to register a web application with Shisho Cloud:
- For web applications running on cloud resources integrated with Shisho Cloud
- For other web applications
Register from Attack Surface List
Open the Attack Surface List to see a list of hosts automatically detected from resources integrated with Shisho Cloud.
All hostnames displayed in the Attack Surface List are detected by referring to the configuration of resources integrated with Shisho Cloud. It is possible that not all hostnames will be detected immediately after the external integration is complete.
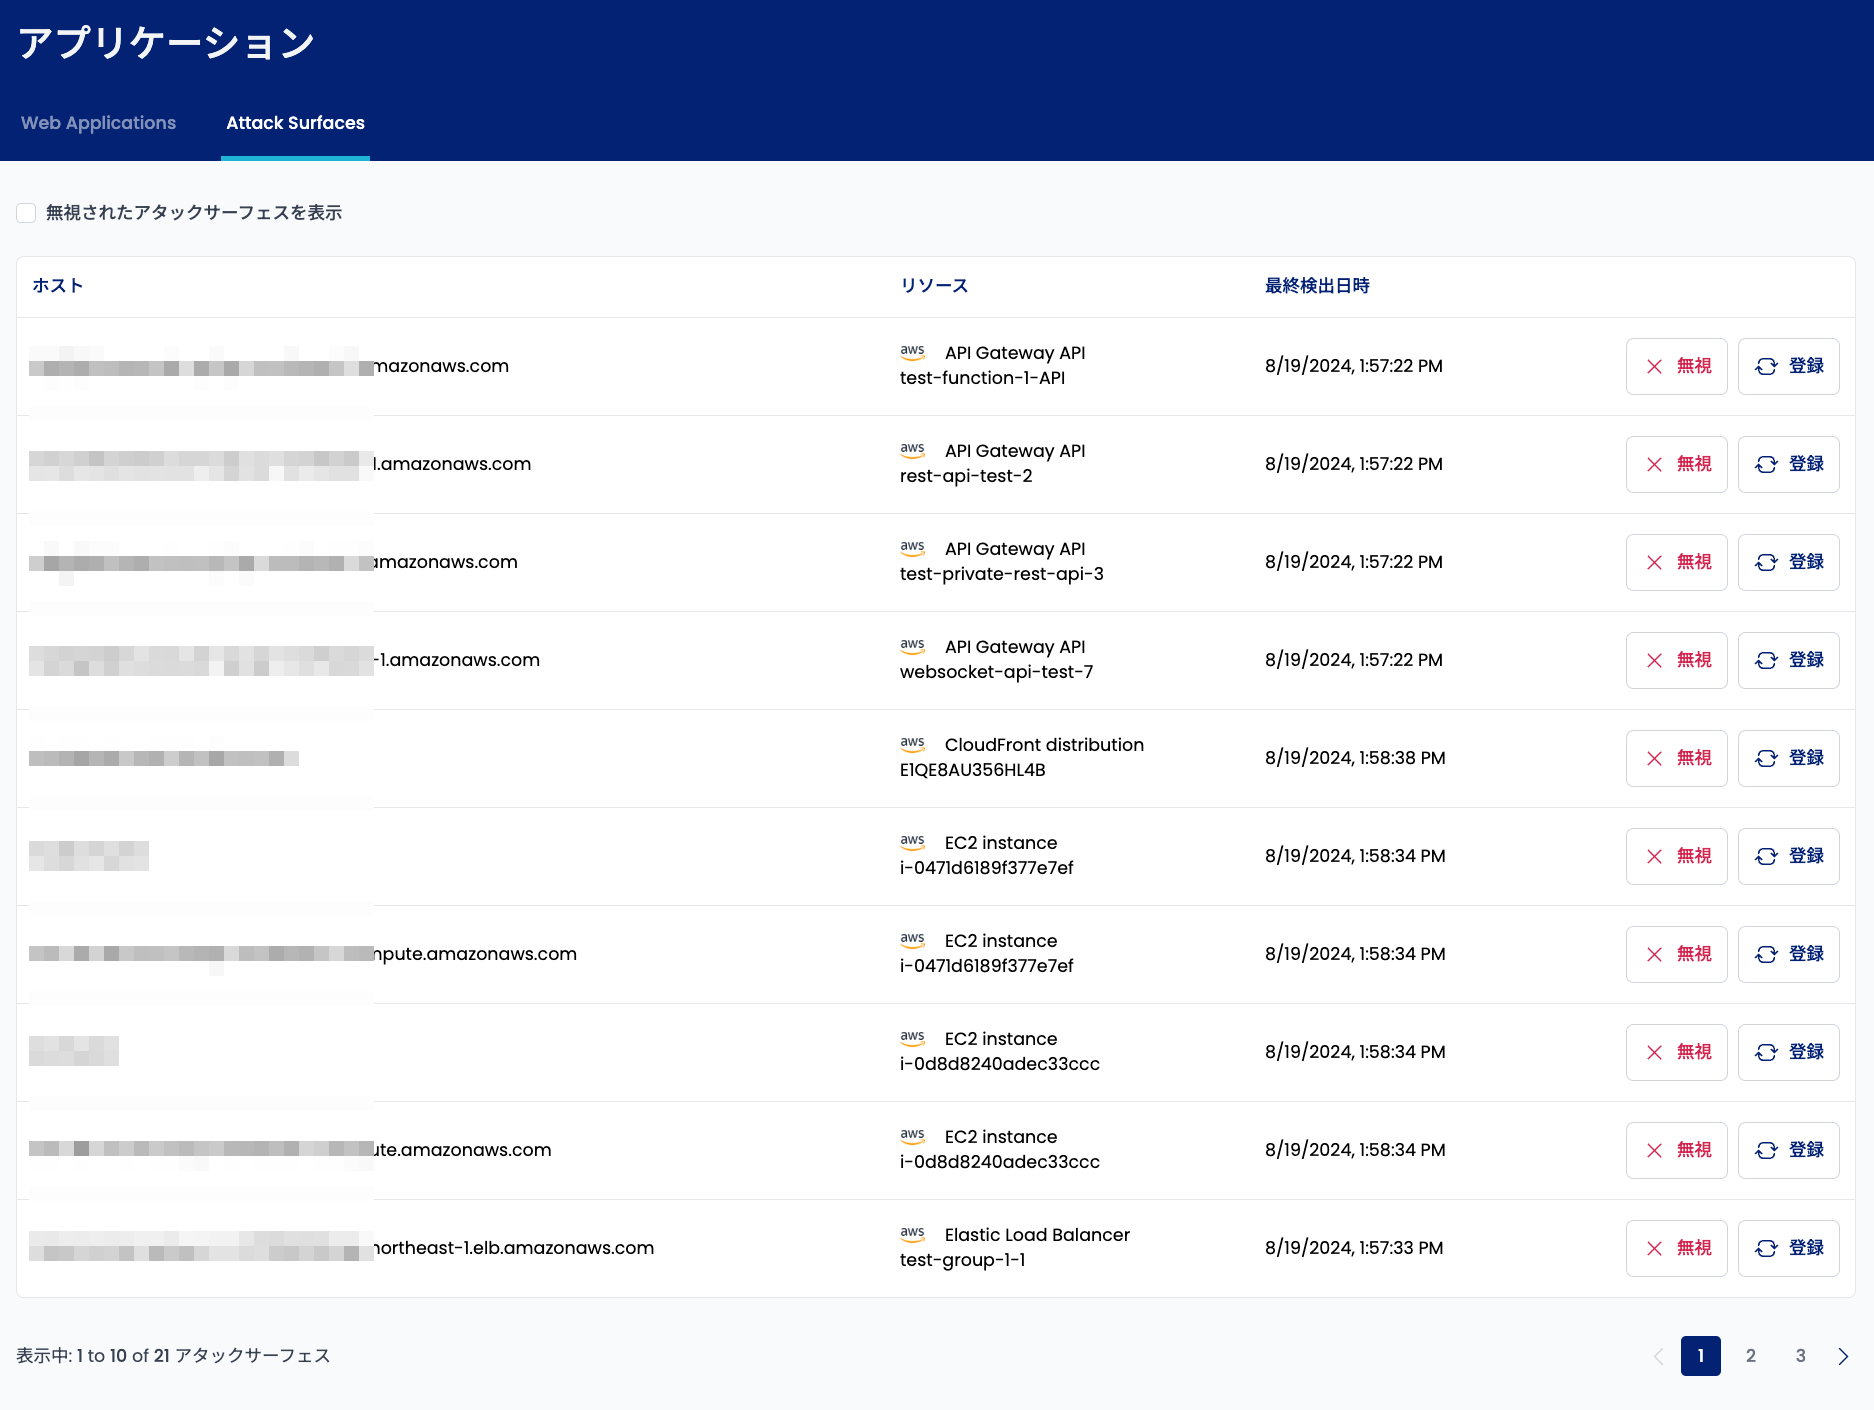
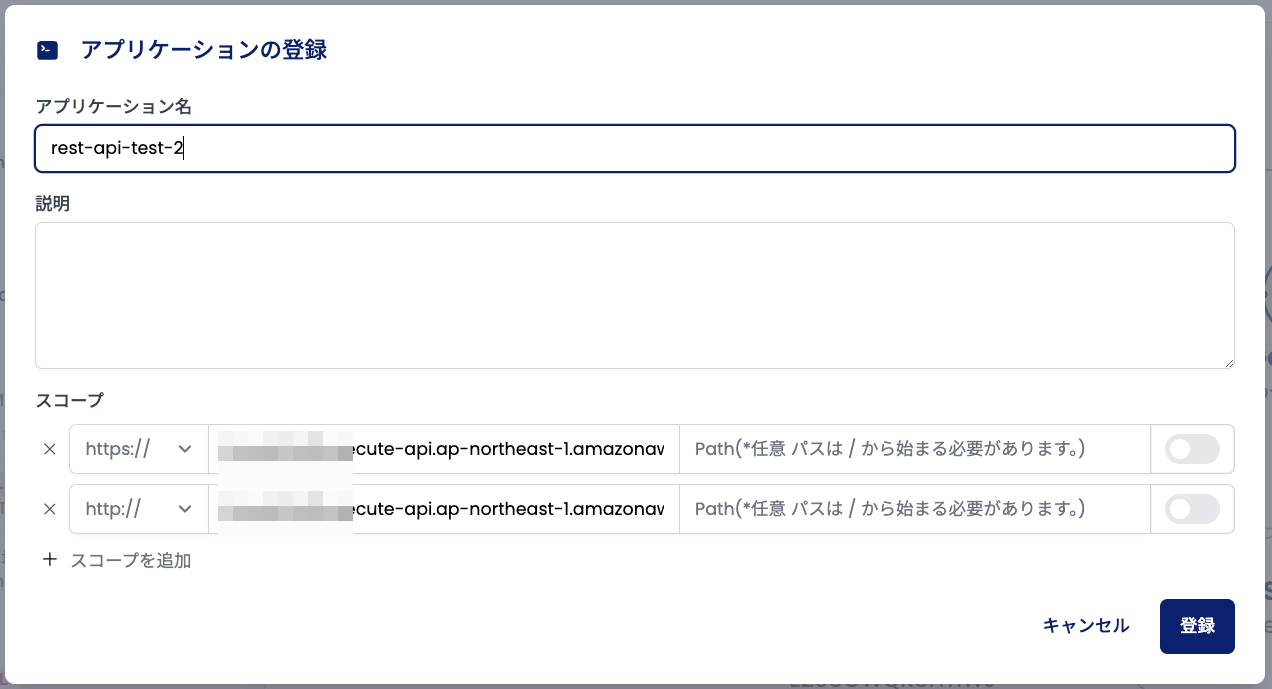
Click the "Register" button on the right side to open the sidebar for registering a web application.
When creating a web application from the Attack Surface list screen, the hostnames associated with the selected attack surface are specified as the scope. You can change this at this point if necessary. You can also edit it after registering the web application.
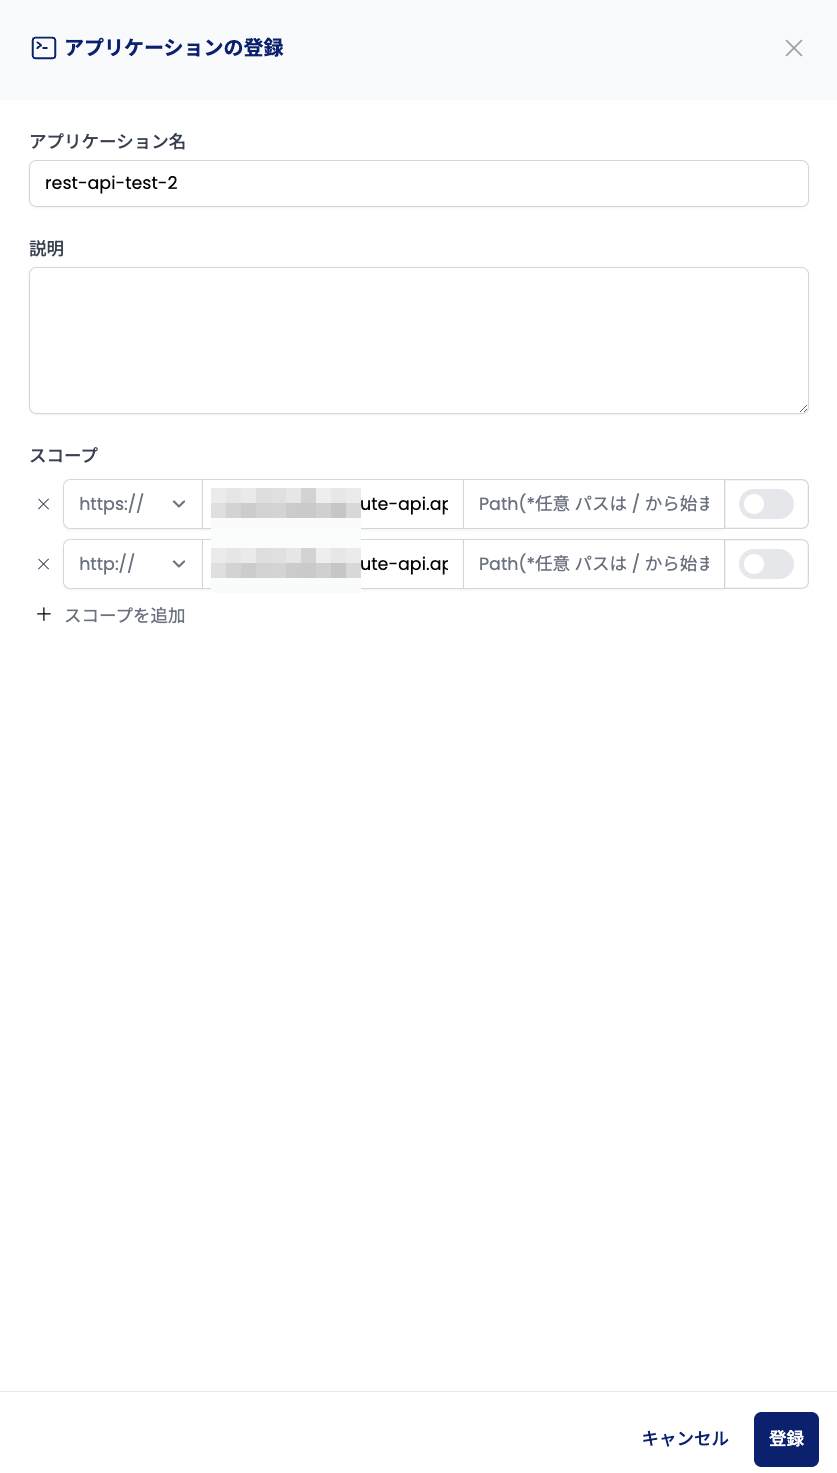
Fill in the "Application Name" (required) and "Description" (optional) fields, then click "Register" in the lower right corner of the screen to register the web application.
Register from Security Graph
If a resource that is an attack surface is included in the Security Graph, you can register a web application directly from the Security Graph.
As a straightforward example, open the Security Graph page of the resource on which the web application you want to register is running.
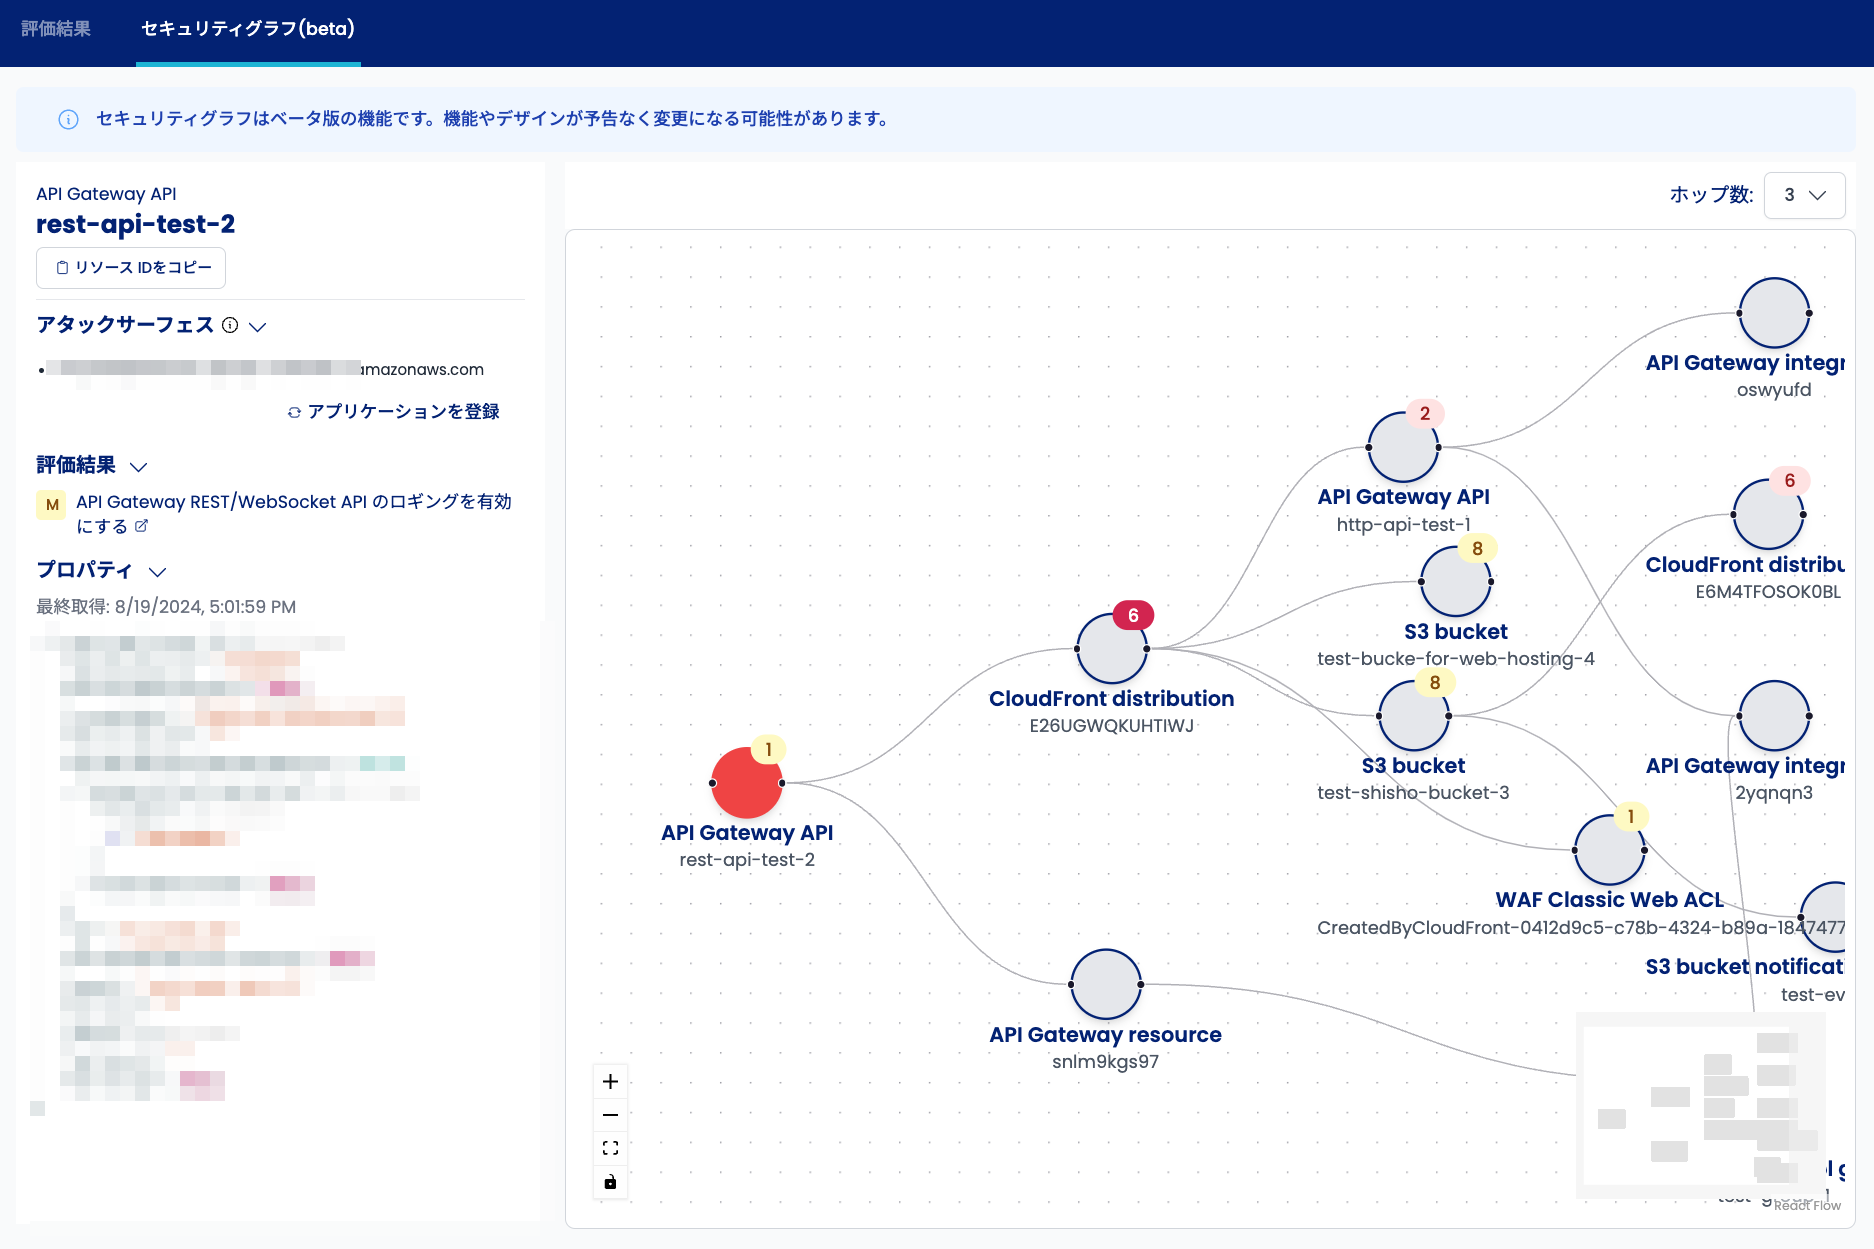
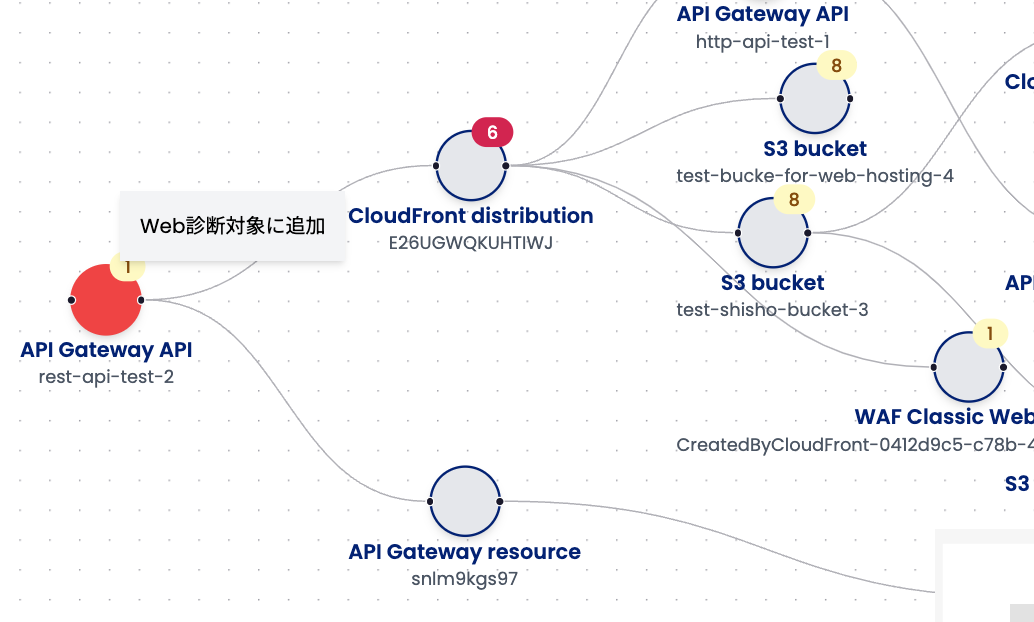
The nodes drawn in red on the Security Graph have detected attack surfaces. Left-click on a red node to display detailed information about the node on the left side, which contains a section called Attack Surface. Click on "Register Application" at the bottom right of the section to display a modal for registering the web application.
You can also register a web application from the menu that appears when you right-click on a red node.
Register Manually
First, open the Web Application List and click the "Register Application" button in the upper right corner.
In the "Scope" field of the Add Application screen, specify the URL to be diagnosed.
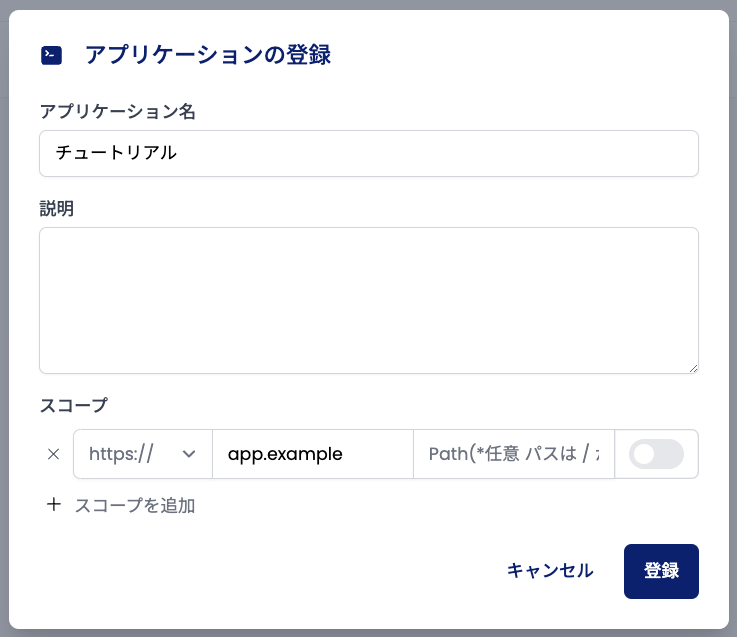
After filling in the required information, click the "Register" button to register the web application.
Next, proceed to the Collect Target Endpoints procedure.