Importing from Connect RPC
The English user guide is currently in beta preview. Most of the documents have been automatically translated from the Japanese version. Should you find any inaccuracies, please reach out to Flatt Security.
This feature is available only to organizations that have subscribed to the Web application security assessment feature.
To import endpoints based on Connect RPC (Protocol Buffers), follow the steps below.
Automatically Sync Schemas with GitHub Actions (Recommended)
Set up GitHub Actions to Log in to Shisho Cloud
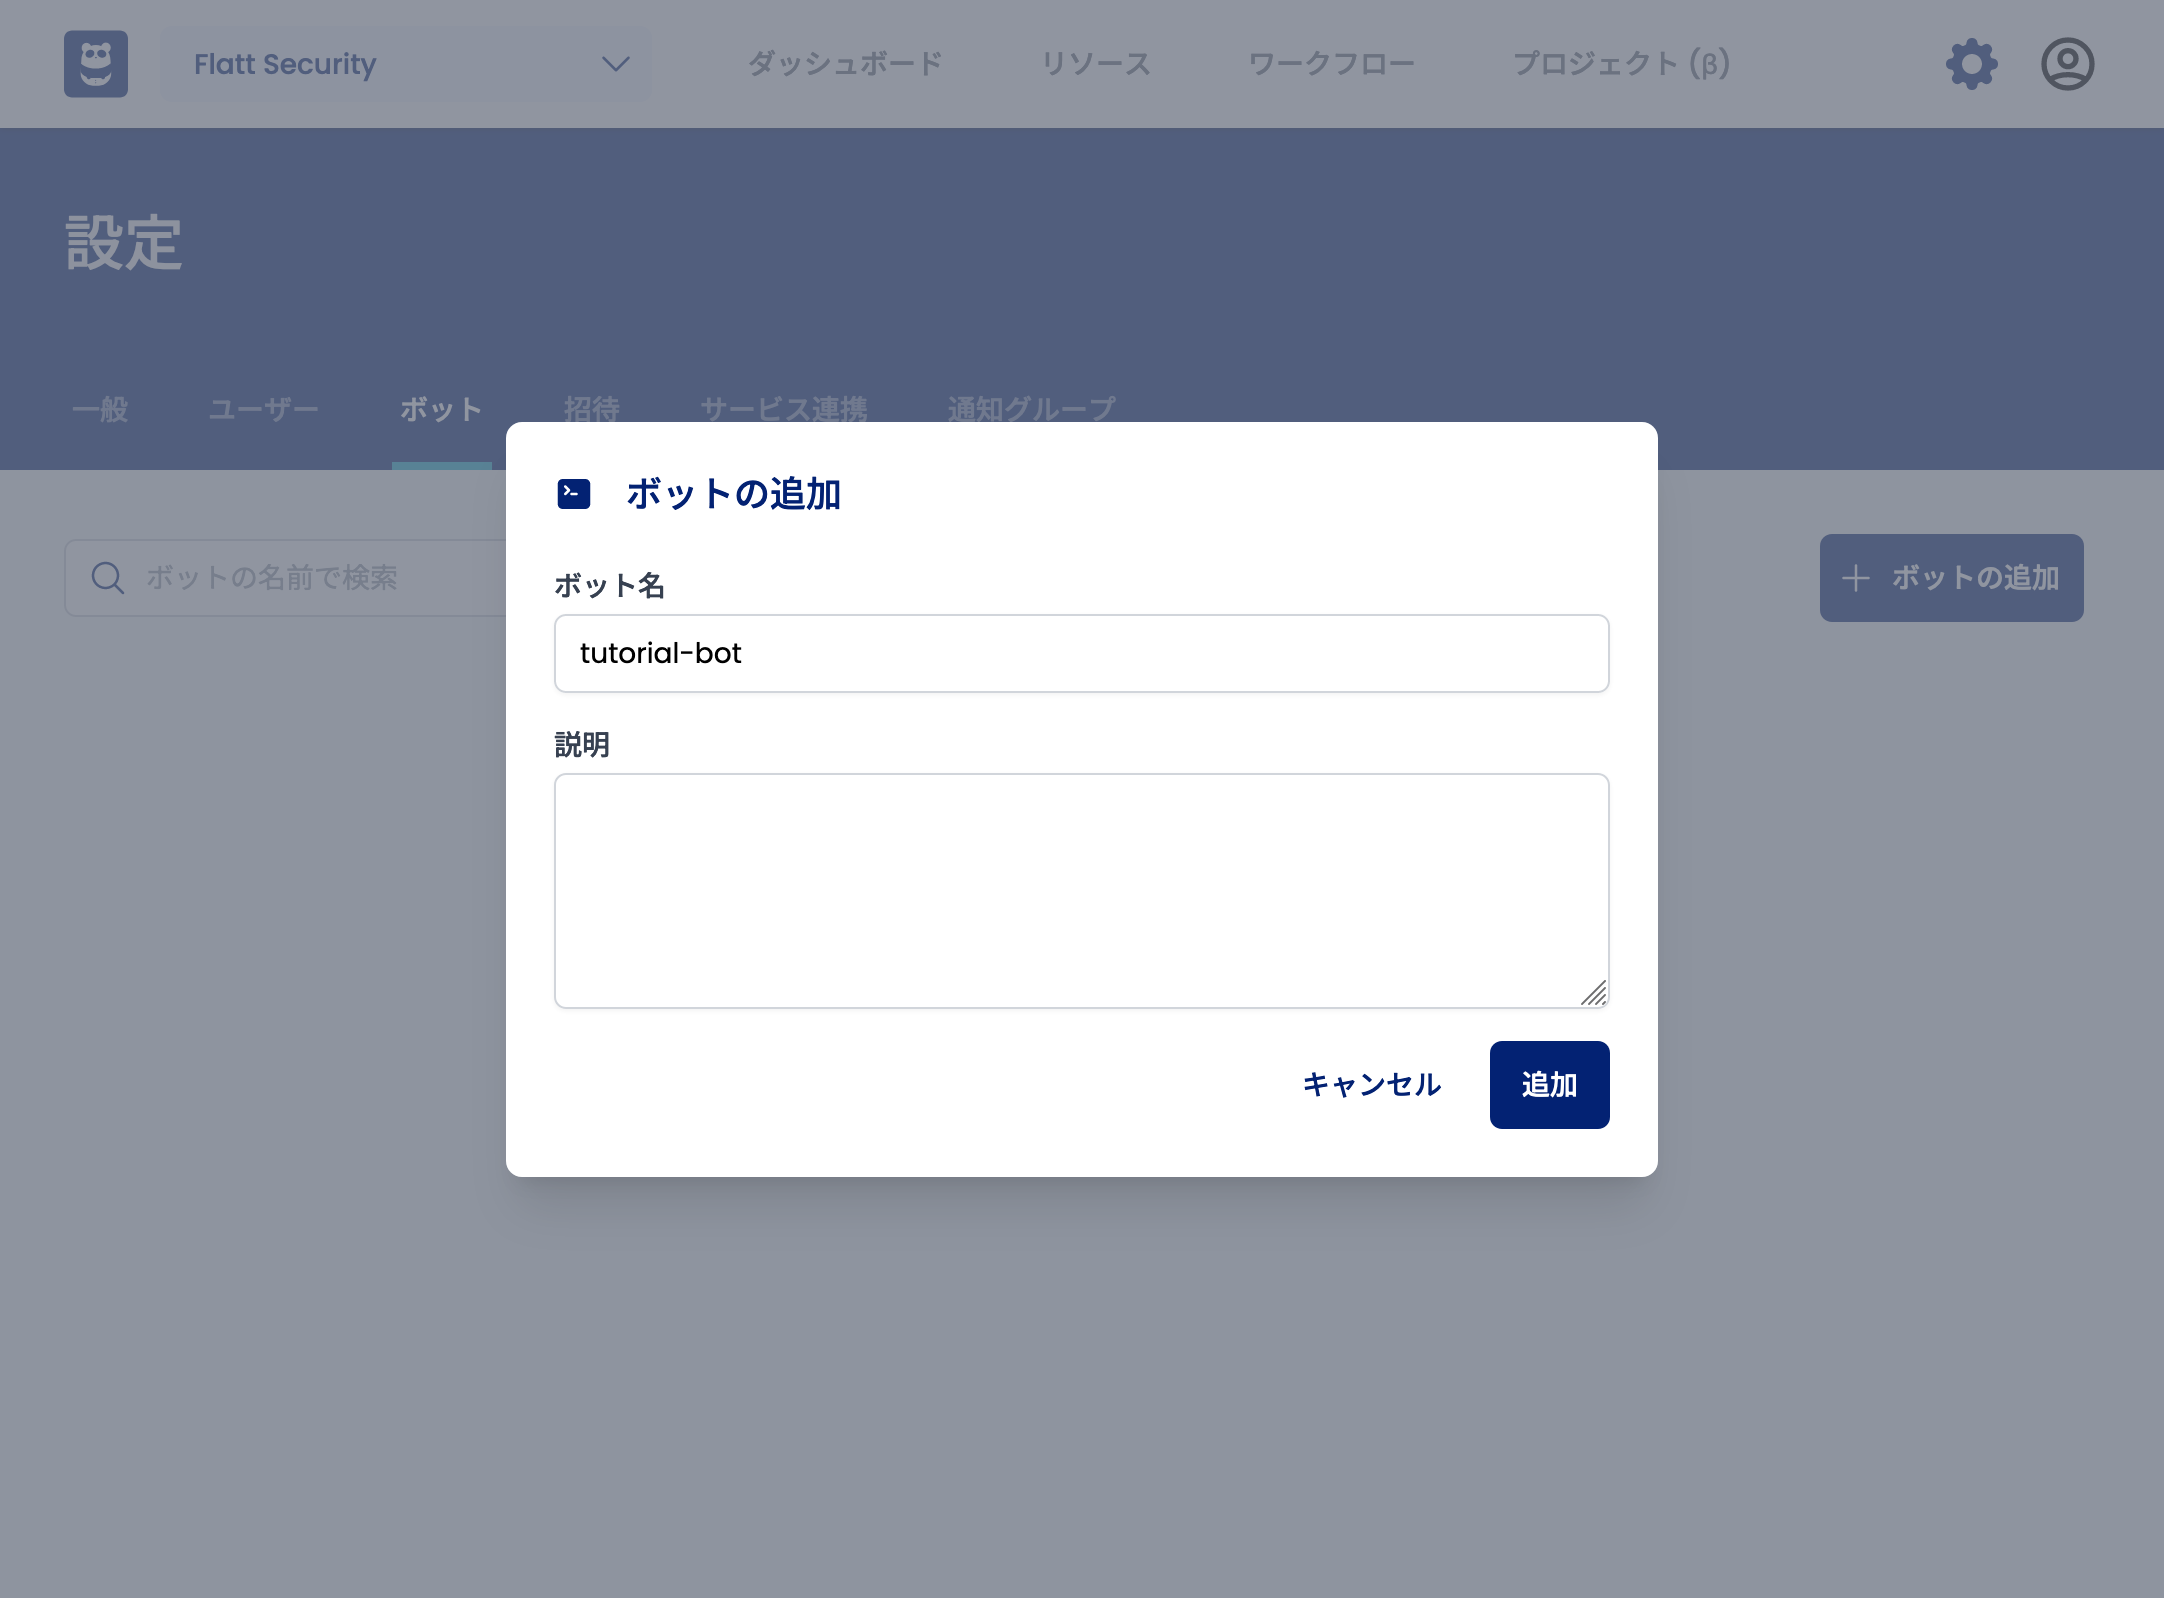
To allow your GitHub Actions workflow to log in to Shisho Cloud, you need to configure a few things in Shisho Cloud. First, go to the Bot creation page in Shisho Cloud and create a new Bot. A bot is an entity that has permission to access Shisho Cloud organizations. Your GitHub Actions job will log in to Shisho Cloud as this bot.

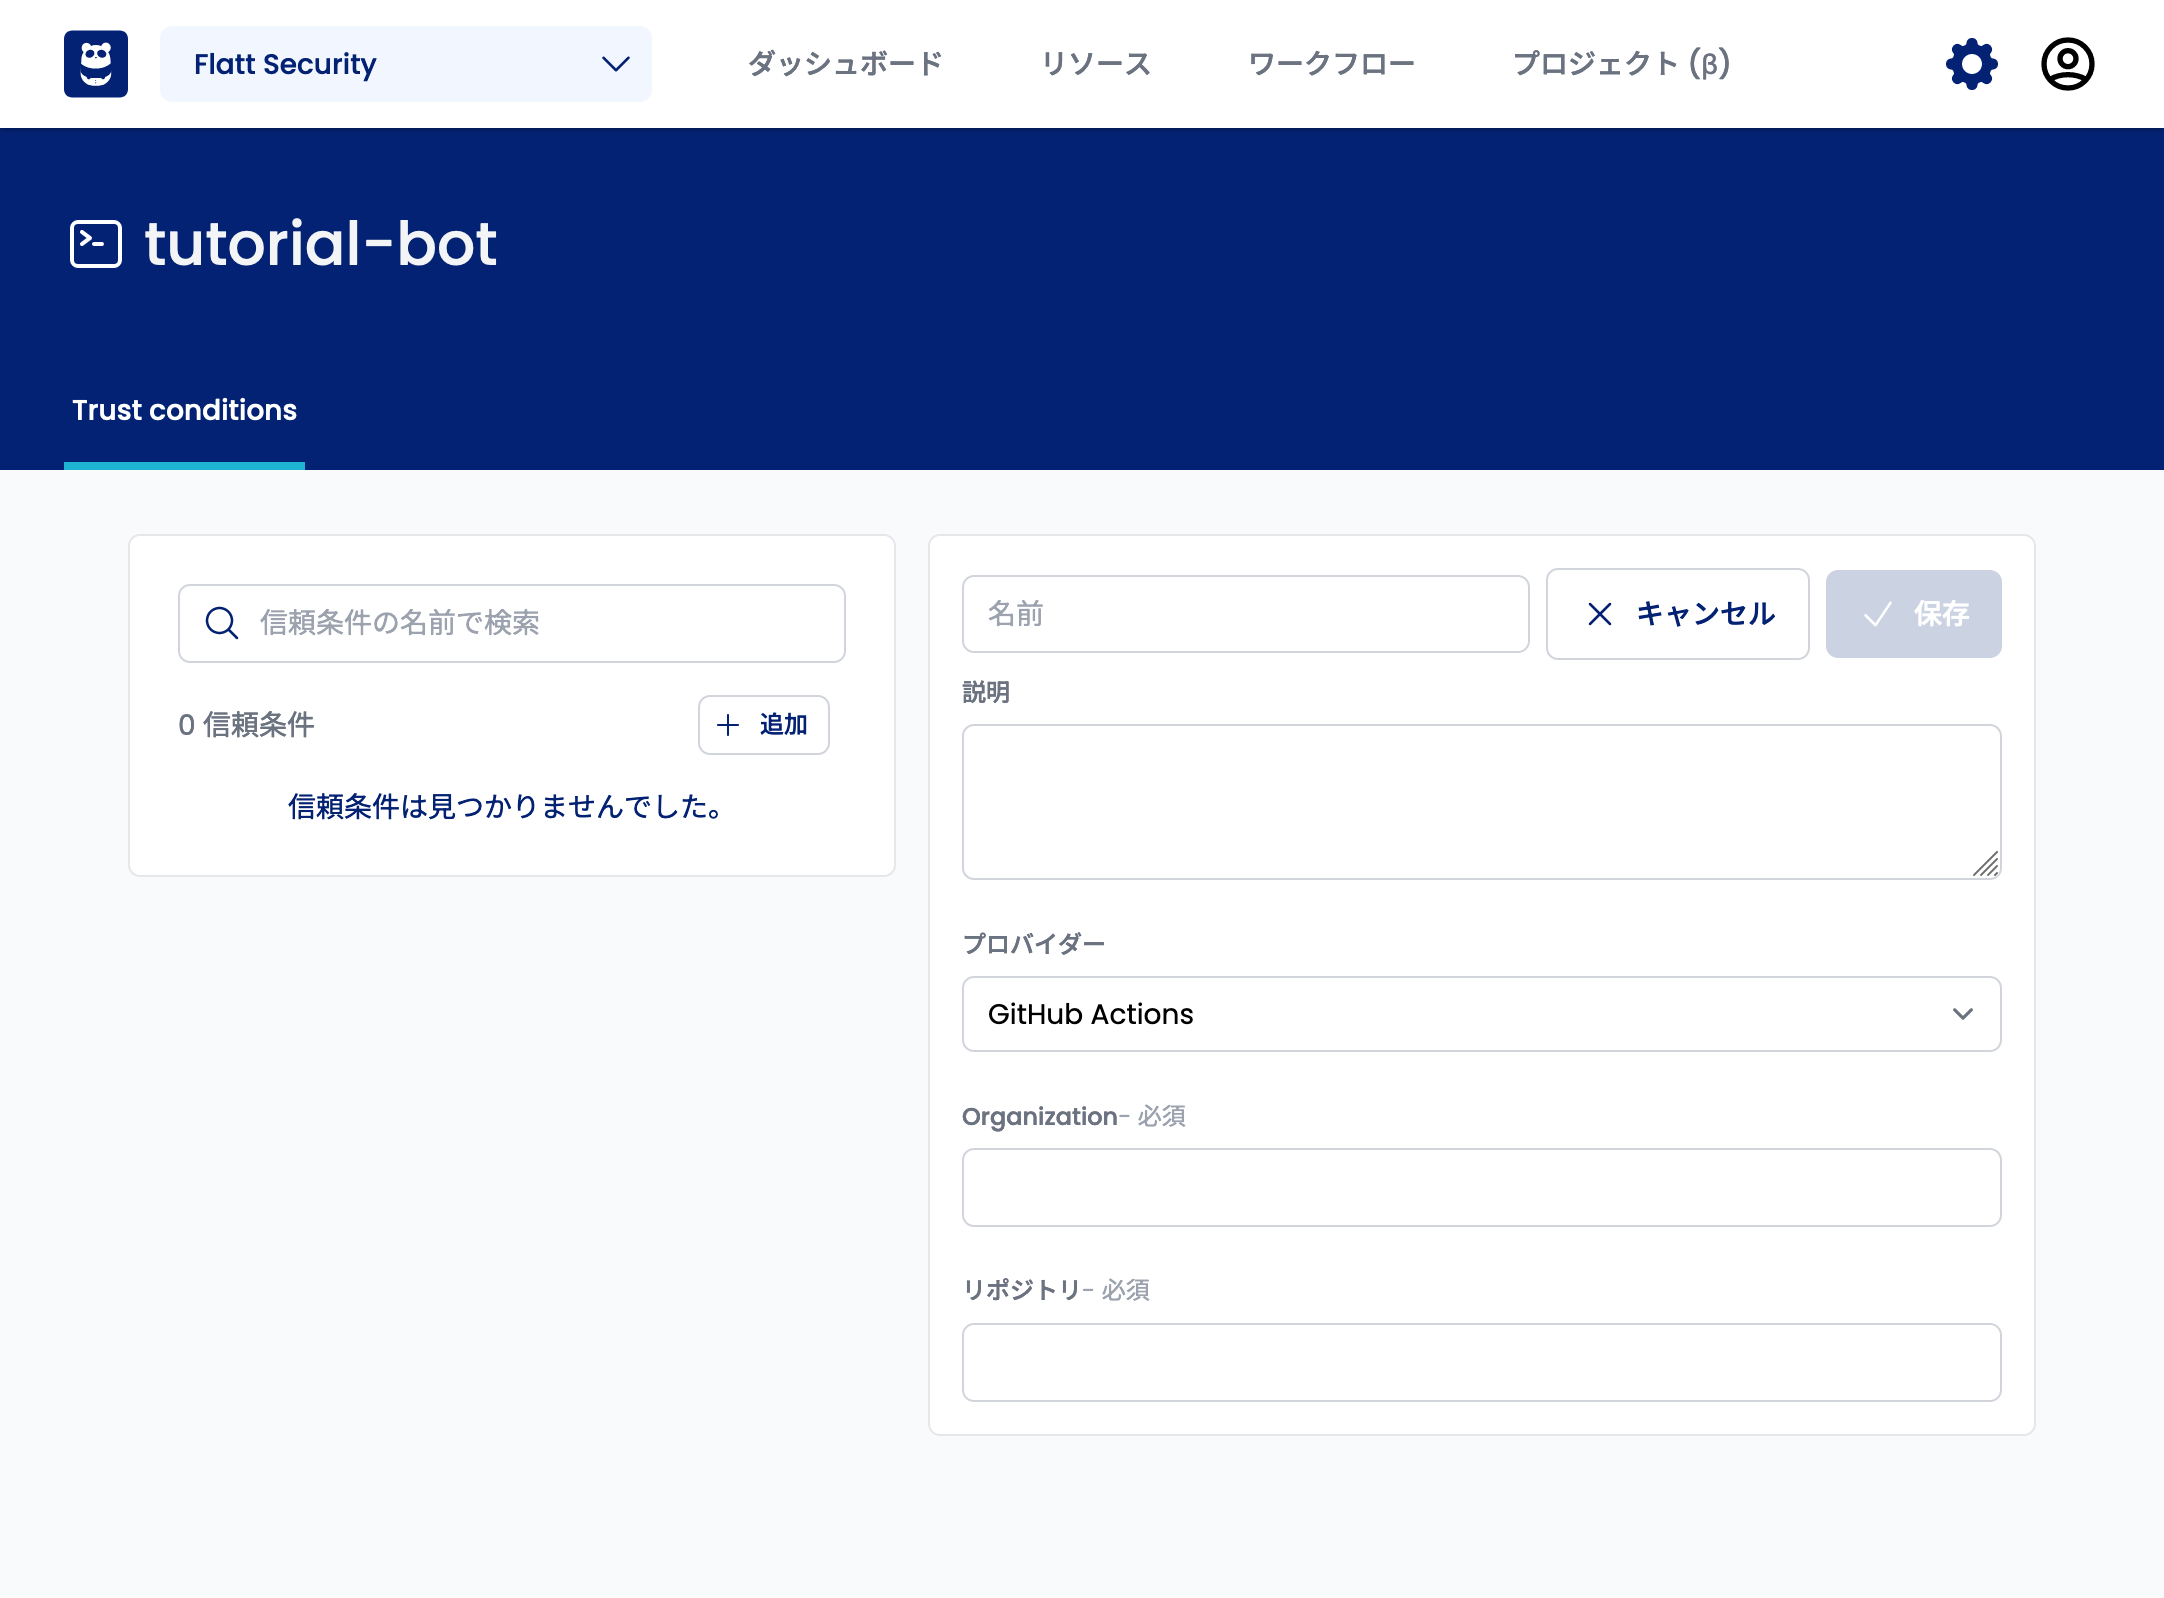
Once you have created a bot, click on the bot name to go to the Trust Condition setting screen.

A trust condition is a condition that a GitHub Actions job must meet in order to log in to Shisho Cloud as that bot. Enter the Organization and repository name of the GitHub repository where your workflow is stored. This will allow GitHub Actions jobs belonging to that repository to log in to Shisho Cloud as the bot you just created. Once you have entered the information, click the "Save" button.
Register the GitHub Actions Workflow
A GitHub Actions workflow for automatic synchronization will look like this:
name: "Sync the Connect RPC (Protocol Buffers) with Shisho Cloud"

permissions:
  contents: read
  id-token: write # Required to allow the workflow to log in to Shisho Cloud

on:
  push:
    branches:
      - main
    paths:
      # Path to the workflow file
      - .github/workflows/sync-connectrpc.yaml
      # FIXME: Replace with the path to the folder containing the schema file you want to reference
      - docs/proto/**

jobs:
  sync:
    name: Sync
    runs-on: ubuntu-latest
    steps:
      - uses: actions/checkout@v4

      - name: Install shishoctl
        run: |
          SHISHOCTL_URL="https://shisho.dev/releases/shishoctl-0.12.0-x86_64-unknown-linux-gnu"
          sudo curl -L $SHISHOCTL_URL -o /usr/local/bin/shishoctl
          sudo chmod +x /usr/local/bin/shishoctl

      - name: Sign in
        uses: flatt-security/shisho-cloud-action@v1
        with:
          # FIXME: The bot-id to be entered is described in the Trust Condition setting screen
          bot-id: "BTXXXXXXXXXXXXXXXXXXXXXXXXXX"

      - name: Zip the schemas
        run: cd $IMPORT_ROOT_DIR && zip -r schema.zip $SCHEMA_DIR
        env:
          # FIXME: Replace with the path to the root directory for import
          IMPORT_ROOT_DIR: docs
          # FIXME: Replace with the path to the folder containing the schema files you want to reference (relative path from IMPORT_ROOT_DIR)
          SCHEMA_DIR: proto

      - name: Sync with Shisho Cloud
        run: |
          shishoctl web-application collect-endpoints connectrpc \
            --org $ORG_ID \
            --app $APP_ID \
            --url $ENDPOINT_URL \
            --path schema.zip
        env:
          ORG_ID: ${{ vars.SHISHO_CLOUD_ORG_ID }}
          APP_ID: ${{ vars.SHISHO_CLOUD_APP_ID }}
          ENDPOINT_URL: ${{ vars.SHISHO_CLOUD_CONNECTRPC_ENDPOINT_URL }}
Be sure to replace any occurrences of FIXME with the appropriate values.
Connect RPC integration uploads multiple schemas as a zip archive. To link multiple schemas, you need to set IMPORT_ROOT_DIR and SCHEMA_DIR appropriately.
For example, consider the following directory structure:
(repository root)/
└─ docs/
   └─ proto/
      └─ feat1/
         └─ example.proto
Here, example.proto has the following content:
syntax = "proto3";

package proto.feat1.example;

// Schema definition goes here
Since the proto directory is the starting point, you would specify the following environment variables:
IMPORT_ROOT_DIR=docsSCHEMA_DIR=proto
Also, register the following variables in your GitHub repository. See the GitHub official documentation for details on how to set them up.
SHISHO_CLOUD_ORG_IDOrganization ID- Included in the URL of the Shisho Cloud dashboard
https://cloud.shisho.dev/{{ Organization ID }}/dashboard
SHISHO_CLOUD_APP_IDApplication ID- Included in the URL of the application page
https://cloud.shisho.dev/{{ Organization ID }}/applications/{{ Application ID }}
SHISHO_CLOUD_CONNECTRPC_ENDPOINT_URLConnect RPC Endpoint URL to be used for scanning
Manually Import with the Web Console
First, go to the "Crawling Jobs" tab (https://cloud.shisho.dev/[orgid]/applications/[appid]/jobs/find) and click the "Crawl from schema" button.

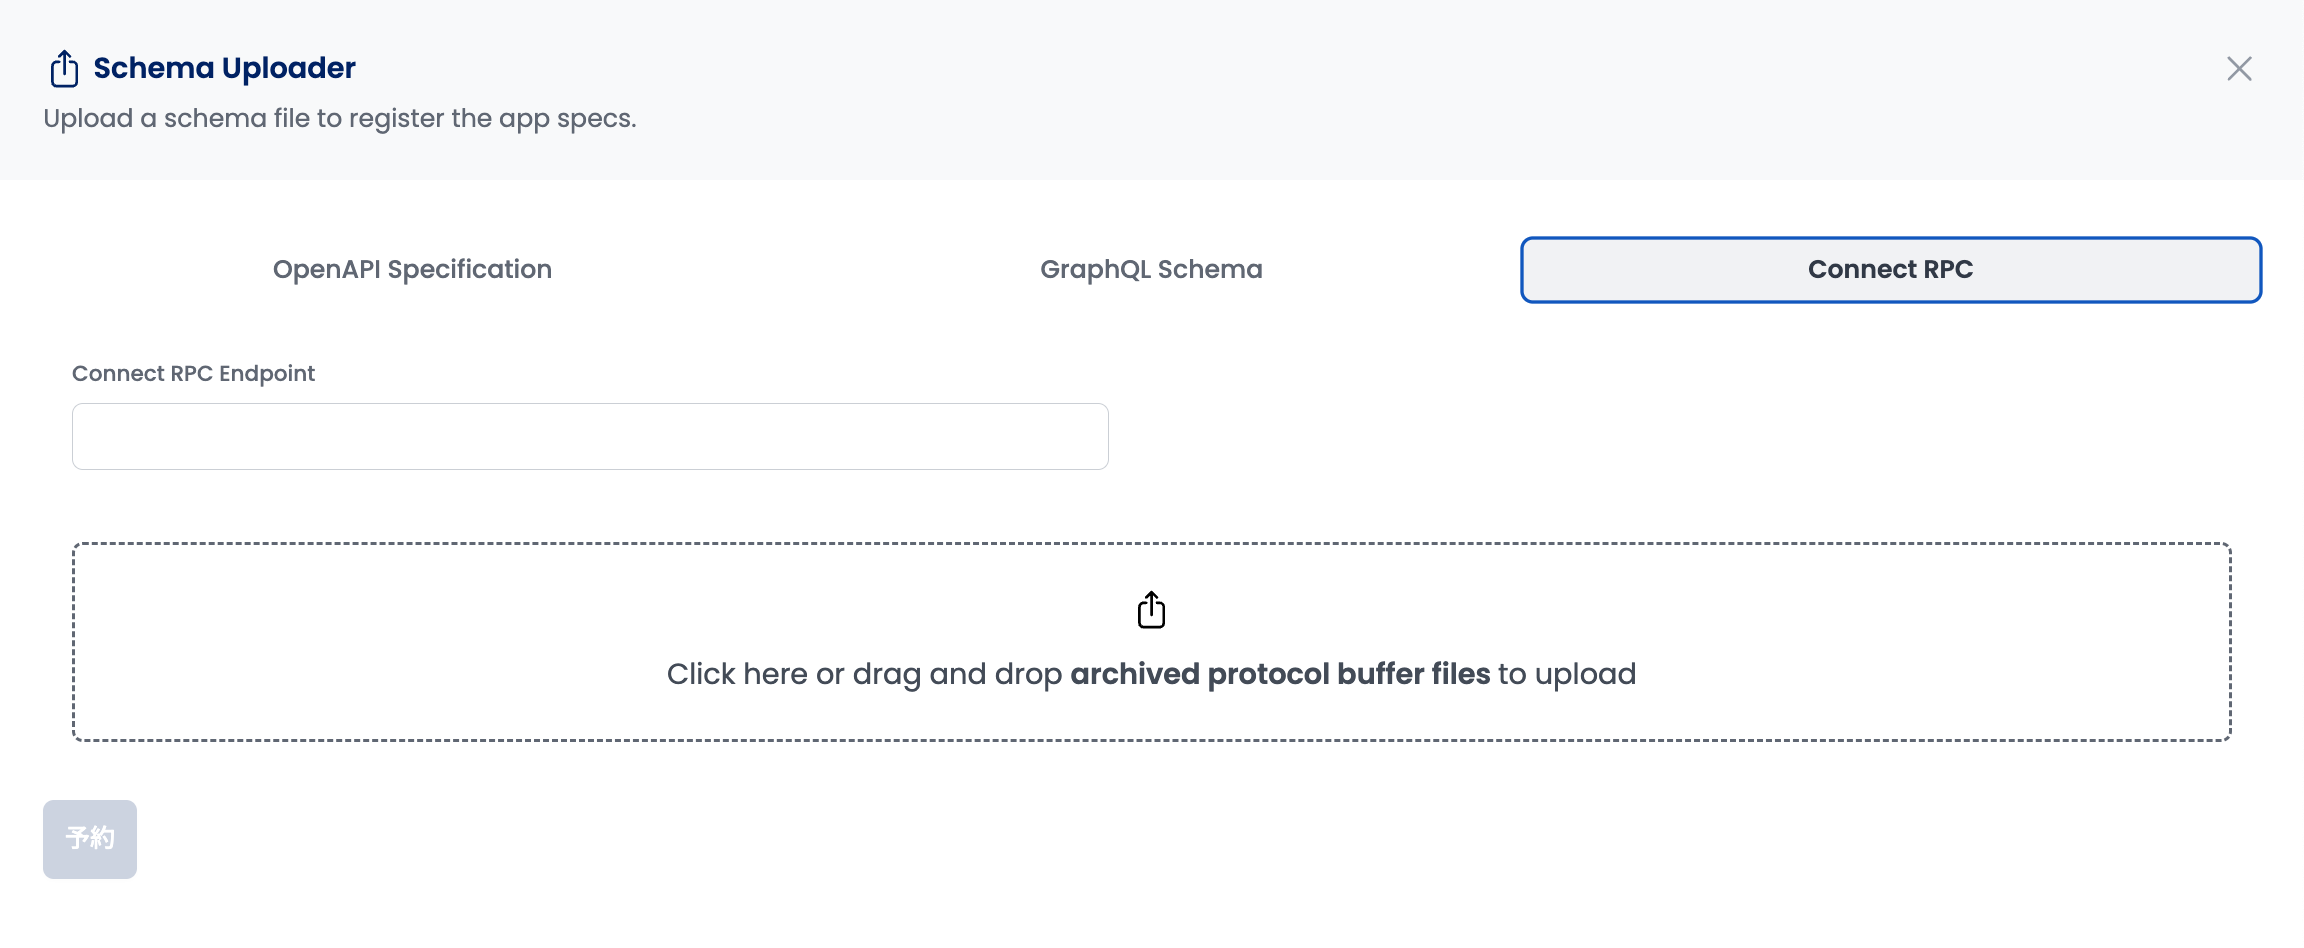
Next, select the "Connect RPC" tab in the sidebar that appears when you click the button.
After selecting, enter the URL of the Connect RPC endpoint in the "Connect RPC Endpoint" input field.
In addition, click "Click here or drag and drop archived protocol buffer files to upload" or drag and drop a zip compressed Protobuf file to upload.

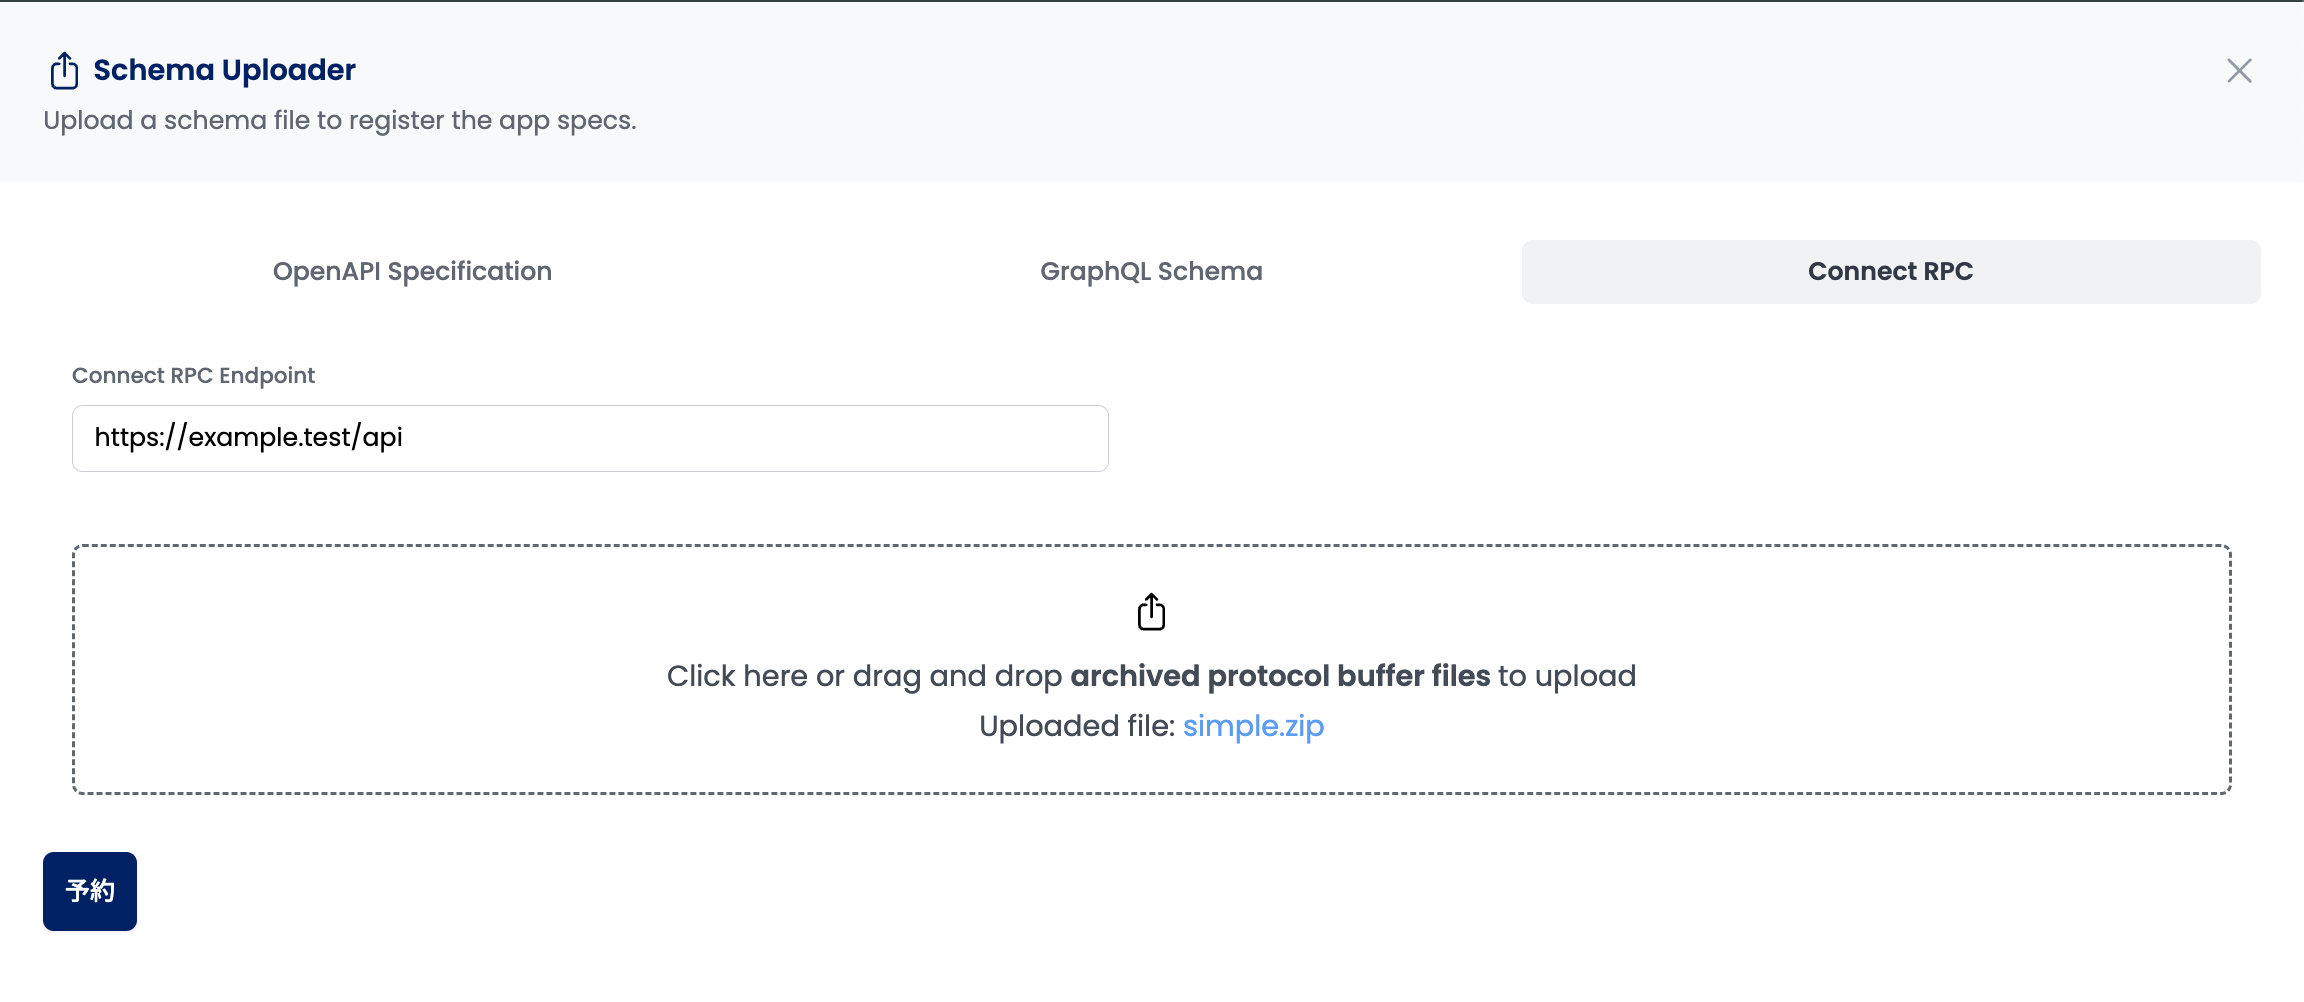
Once the file is uploaded, it will be displayed as "Uploaded file: (name of the uploaded file)".

If the displayed content is correct, click the "Reserve" button at the bottom of the screen.
After waiting for a while after reserving a crawling job, Shisho Cloud will register the endpoint based on the URL specified in Connect RPC Endpoint and the contents of the uploaded Protobuf files. When the job status changes to "Completed", open the "Endpoints" tab to confirm that the endpoint has been registered.