Risk Focus Assessment
The English user guide is currently in beta preview. Most of the documents have been automatically translated from the Japanese version. Should you find any inaccuracies, please reach out to Flatt Security.
Overview
Risk Focus Assessment is an extended mode of blackbox assessment. While standard blackbox assessments scan all features and perspectives at once, Risk Focus Assessment allows you to set priorities and scan incrementally within a credit threshold.
Key features:
- Priority-based scanning: Set priorities (High, Medium, Low, None) for each combination of feature and perspective. Higher-priority items are scanned first.
- Credit threshold: Set a maximum credit limit per scan. Once the threshold is reached, no further credits will be consumed
- Incremental scanning: After a scan completes, you can review the results and run additional scans on unscanned features and perspectives
Regarding Credit Consumption
In Risk Focus Assessment, scans are performed within the configured credit threshold. When the credit threshold is reached during a scan, the scan stops after the currently running test completes.
Even if actual credit consumption exceeds the configured threshold, the excess credits will not be charged.
For example, if the credit threshold is set to 10 and the actual consumption is 11, the final billed credit consumption will be 10.
Assessment Flow
Risk Focus Assessment follows this flow:
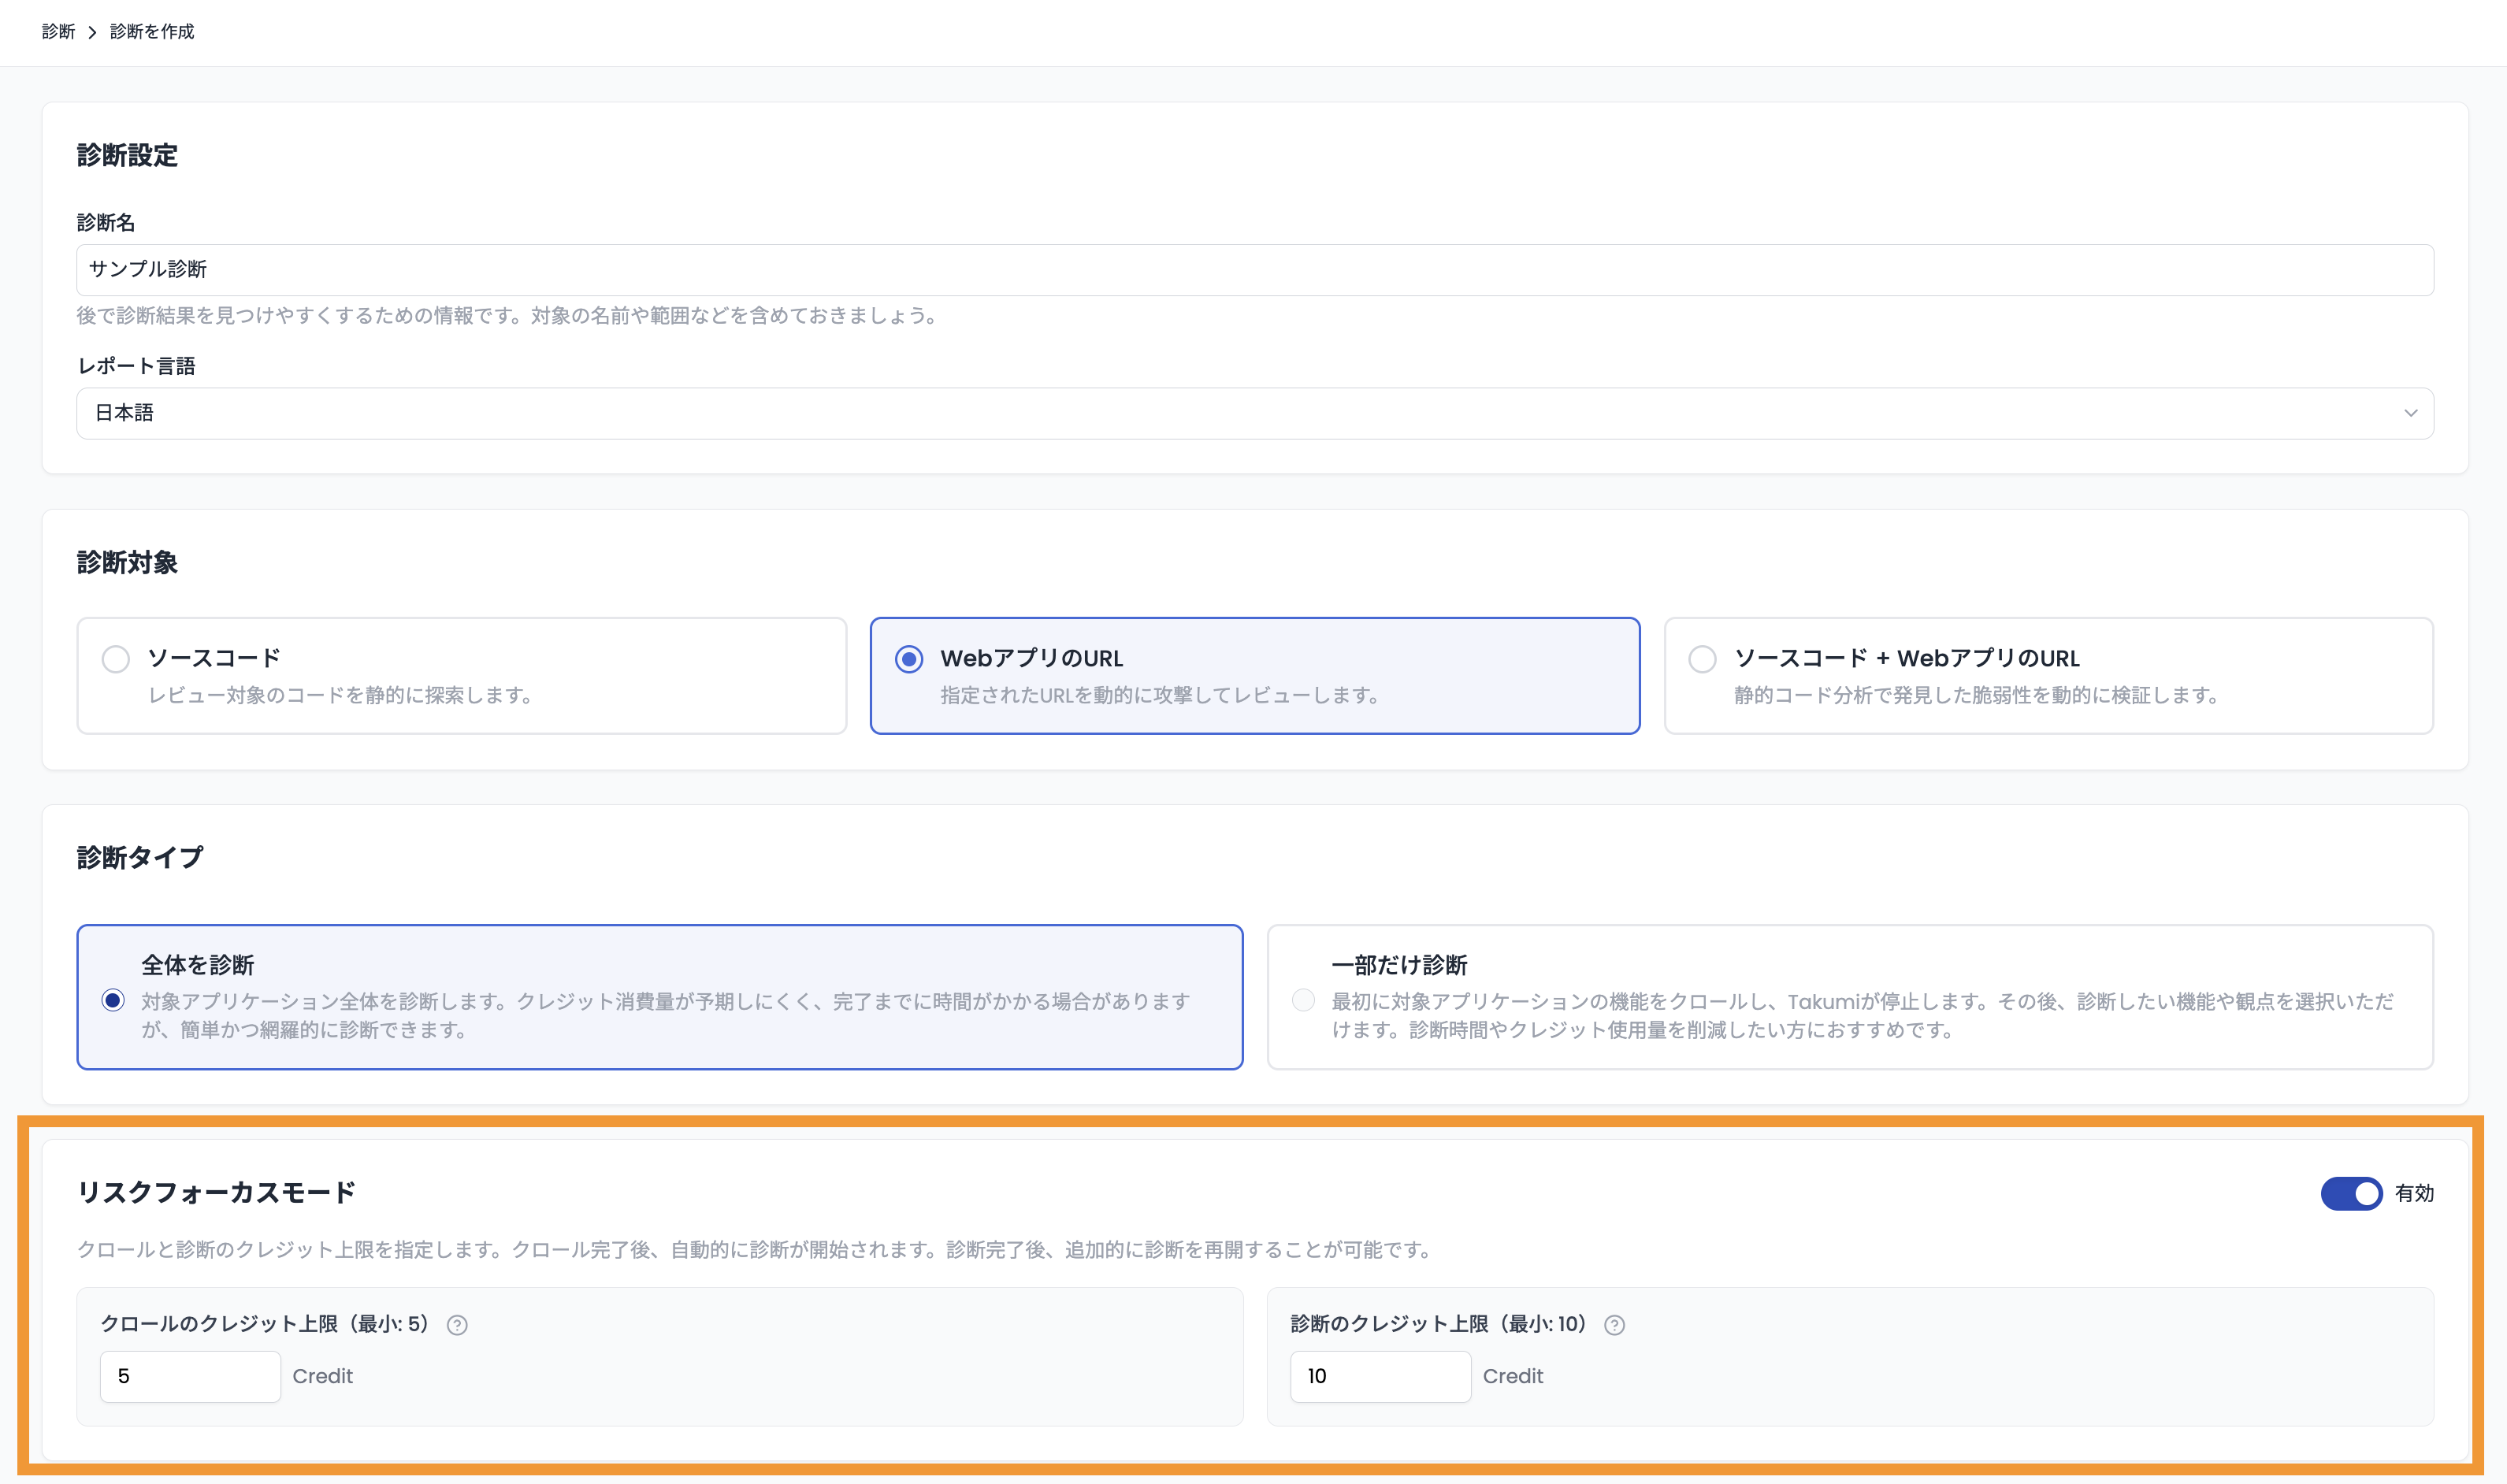
- When creating a blackbox assessment, enable "Risk Focus Mode" and configure the credit threshold
- After crawling and the initial scan complete, select "Risk Focus" from the menu and configure the following before starting the next scan:
- Credit Threshold: Set the maximum credit limit for the upcoming scan
- Priorities: Set priorities (High, Medium, Low, None) for each feature-perspective combination
- Review results and choose to run additional scans or complete the assessment
Starting a Blackbox Assessment
First, create a new assessment from the "Assessment" tab, just like a standard blackbox assessment. Enable Risk Focus Mode and configure the credit threshold.
If you select "Full Assessment", crawling and an initial scan will be performed automatically. Proceed to Reviewing Results and Running Additional Scans.
Configuring Risk Focus Assessment
If you select "Scoped Assessment", the assessment pauses after crawling completes. Select the assessment and choose "Risk Focus" from the menu. A matrix of detected features and assessment perspectives will be displayed. On this screen, configure the credit threshold and set priorities for the scan.
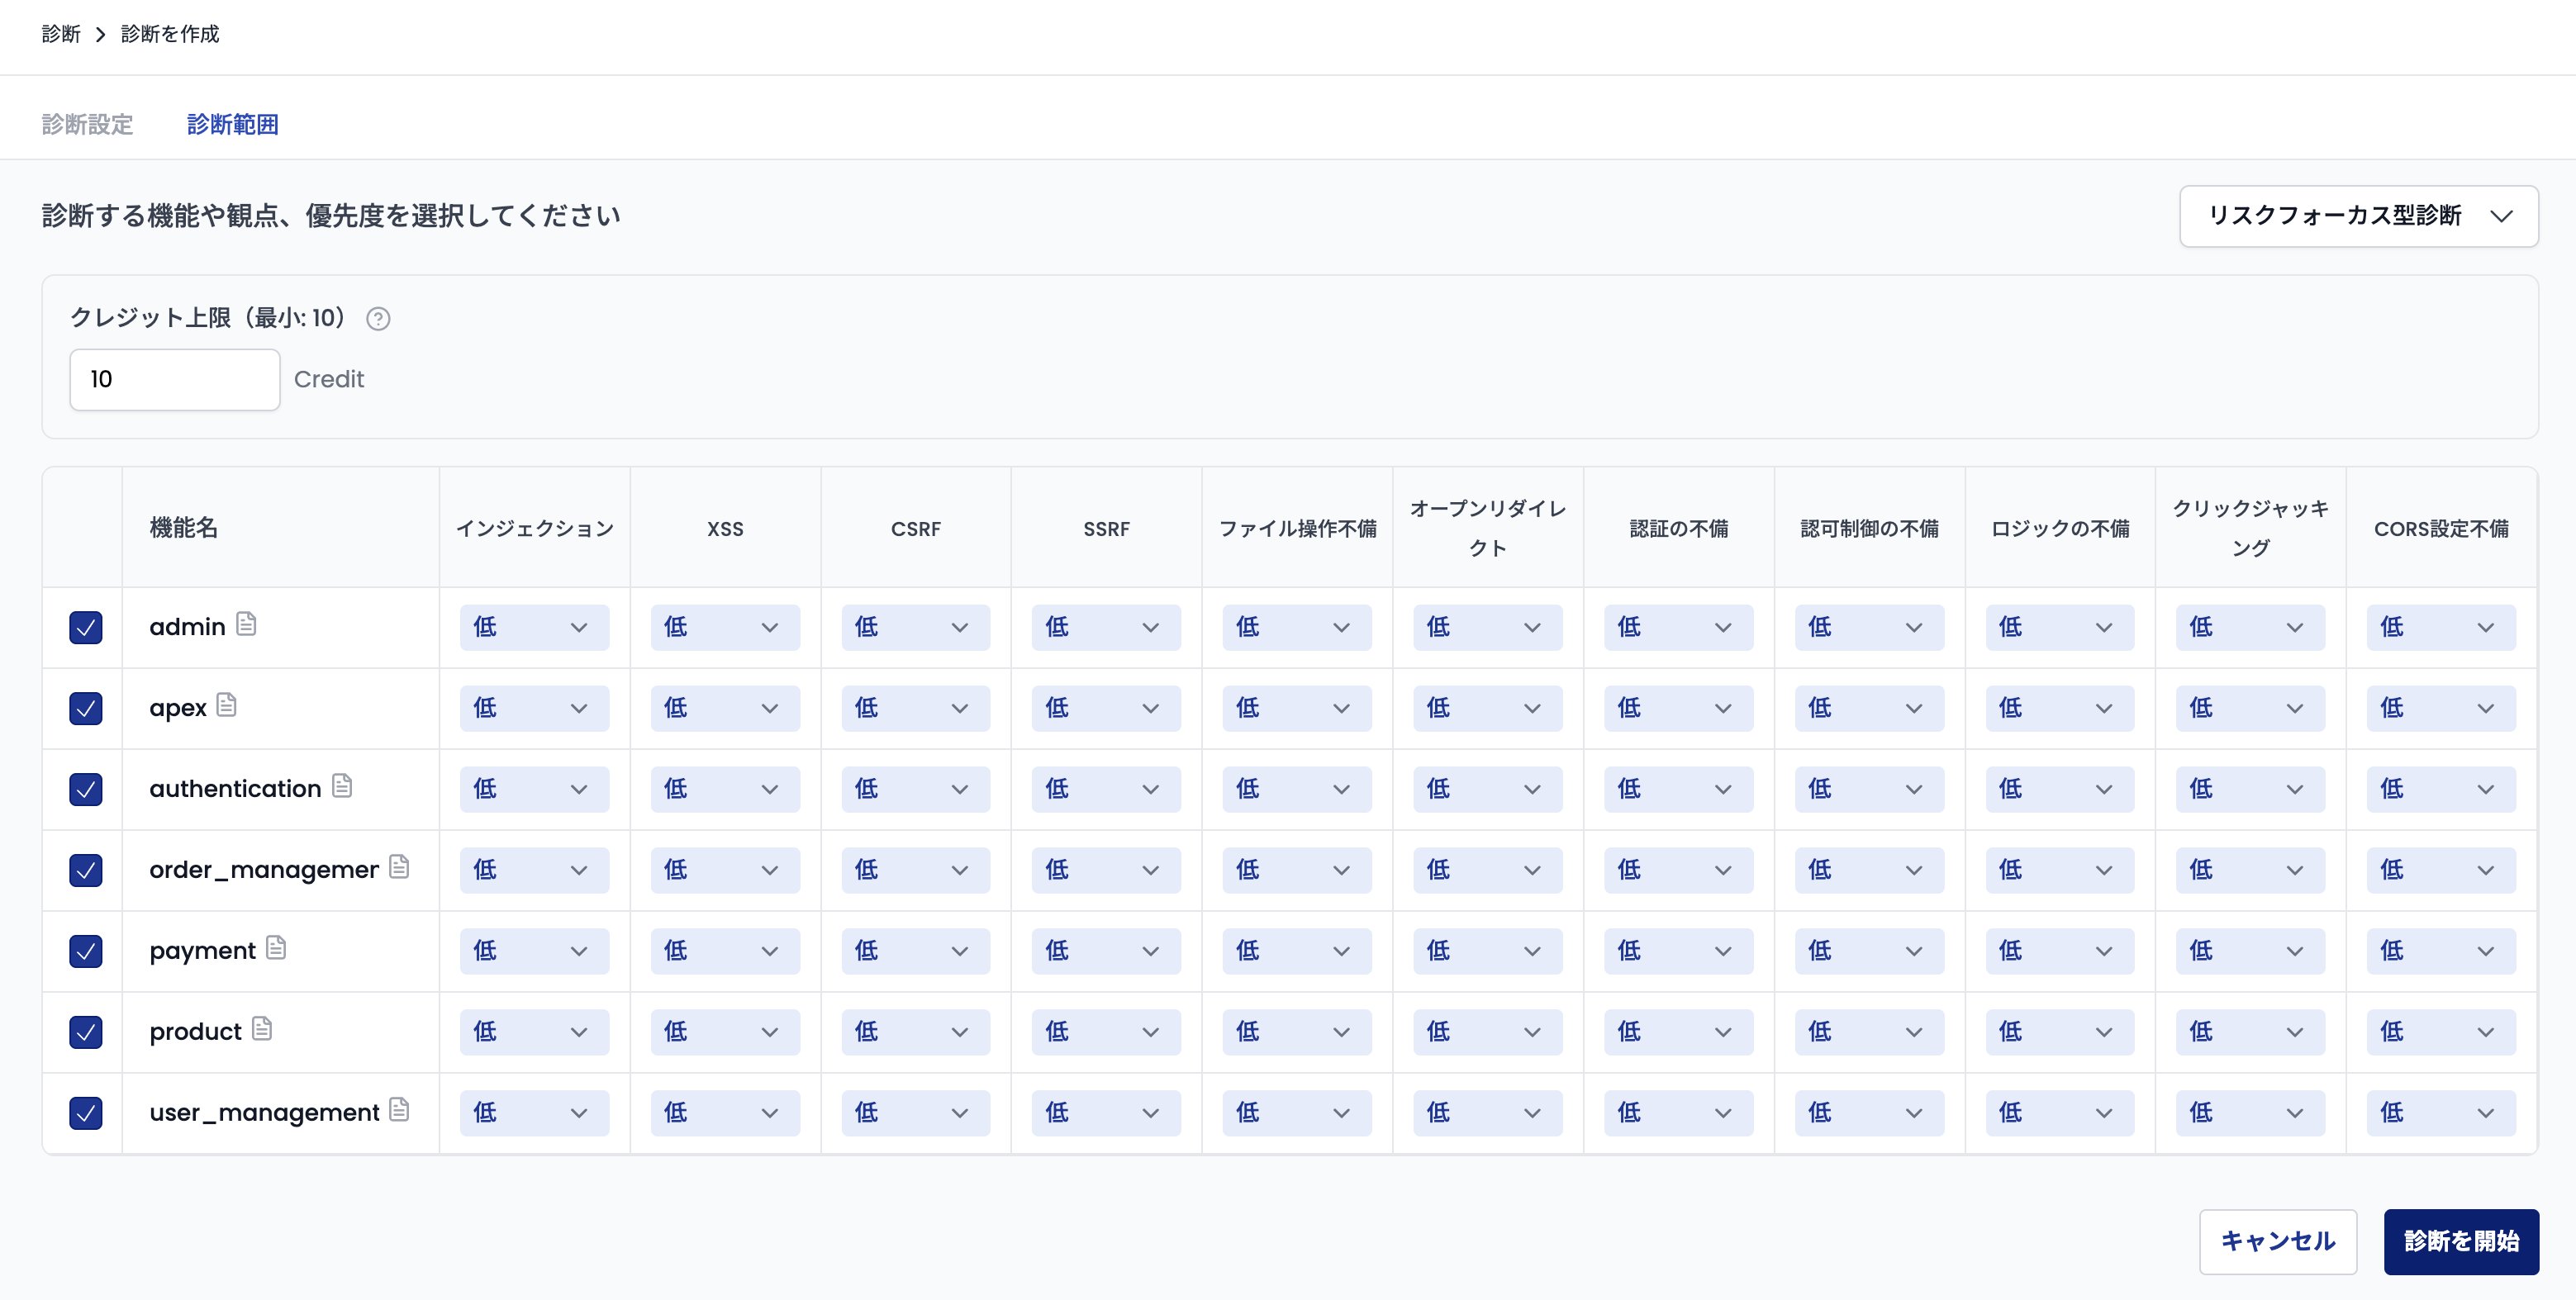
Starting the Scan
Once priorities and the credit threshold are configured, click the "Start Pentesting" button to begin the scan. Scans are executed in order of priority, starting with the highest-priority combinations.
Reviewing Results and Running Additional Scans
When the credit threshold is reached during a scan or all selected combinations have been scanned, the assessment pauses in a "Pending" state.
Opening a "Pending" assessment displays the matrix screen again. Each cell shows one of the following states:
| State | Description |
|---|---|
| Scanned | Displayed for combinations where scanning has completed |
| Skipped | Displayed for combinations that were skipped because scanning was deemed unnecessary |
| Priority menu | Displayed for combinations that have not yet been scanned |
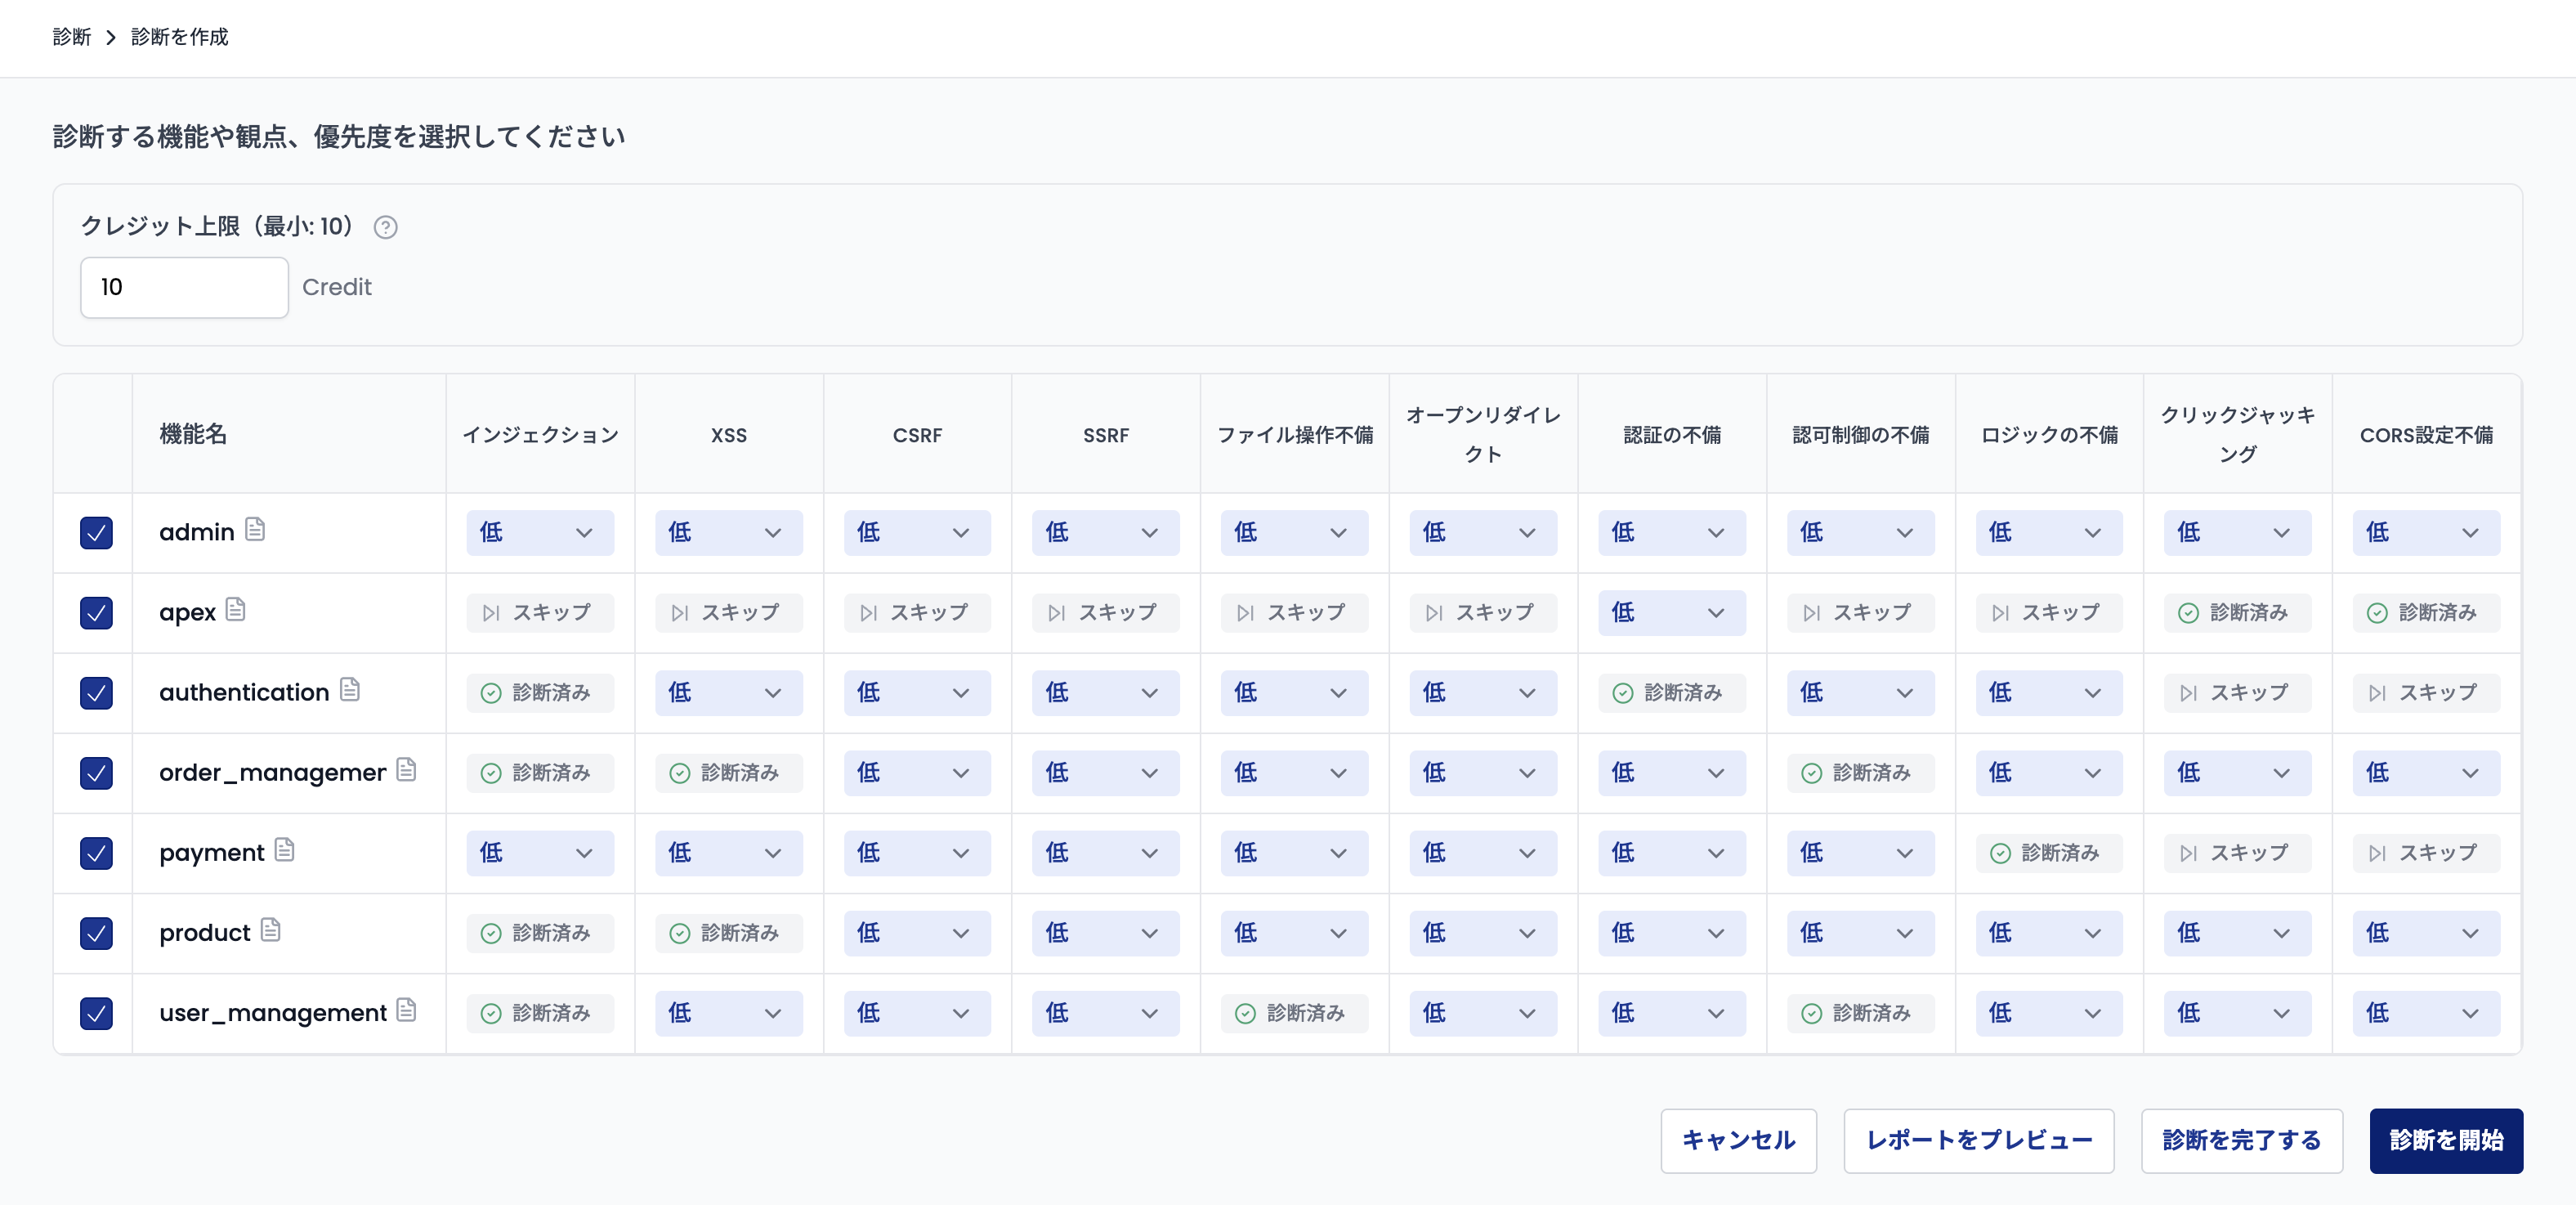
From this screen, you can:
- Preview the interim report: Click "Preview Report" to open the current report in a new tab. You can use it to review findings so far and decide whether to continue scanning or complete the assessment
- Run additional scans: Set priorities for unscanned combinations and click "Start Pentesting" to run additional scans
- Complete the assessment: If no additional scans are needed, click the "Complete Assessment" button to finalize the assessment
Additional Crawl
When an assessment is in the "Crawled" state, you can select "Additional Crawl" from the menu to run additional crawling. This is useful when you want to discover endpoints that were not found during the initial crawl.
The following settings are available for additional crawls:
- Credit Threshold: The maximum credit limit for the additional crawl
- Additional Crawl Instructions: Free-form instructions to guide the crawl toward specific areas (e.g., focusing on specific API paths)
When the additional crawl completes, newly discovered endpoints are added to the matrix.
Running an additional crawl does not guarantee that new endpoints will be discovered. Credits are consumed even if no new endpoints are found.
Completing the Assessment
Clicking "Complete Assessment" transitions you to the assessment report page. Reports can be viewed in the same format as standard blackbox assessments.