Quickstart
The English user guide is currently in beta preview. Most of the documents have been automatically translated from the Japanese version. Should you find any inaccuracies, please reach out to Flatt Security.
This page walks you through running your first Takumi assessment after you have purchased a Takumi plan.
Prerequisites
Before you run your first assessment, the following needs to be in place:
- A Shisho Cloud organization with an active base subscription.
- You are a member of that organization.
Run Your First Assessment
Pick the assessment type that matches what you want to test, then follow the steps below.
Whitebox Assessment
A whitebox assessment reads source code and specifications and runs a focused security review against the repository.
- Open Assessments from the Shisho Cloud console sidebar.
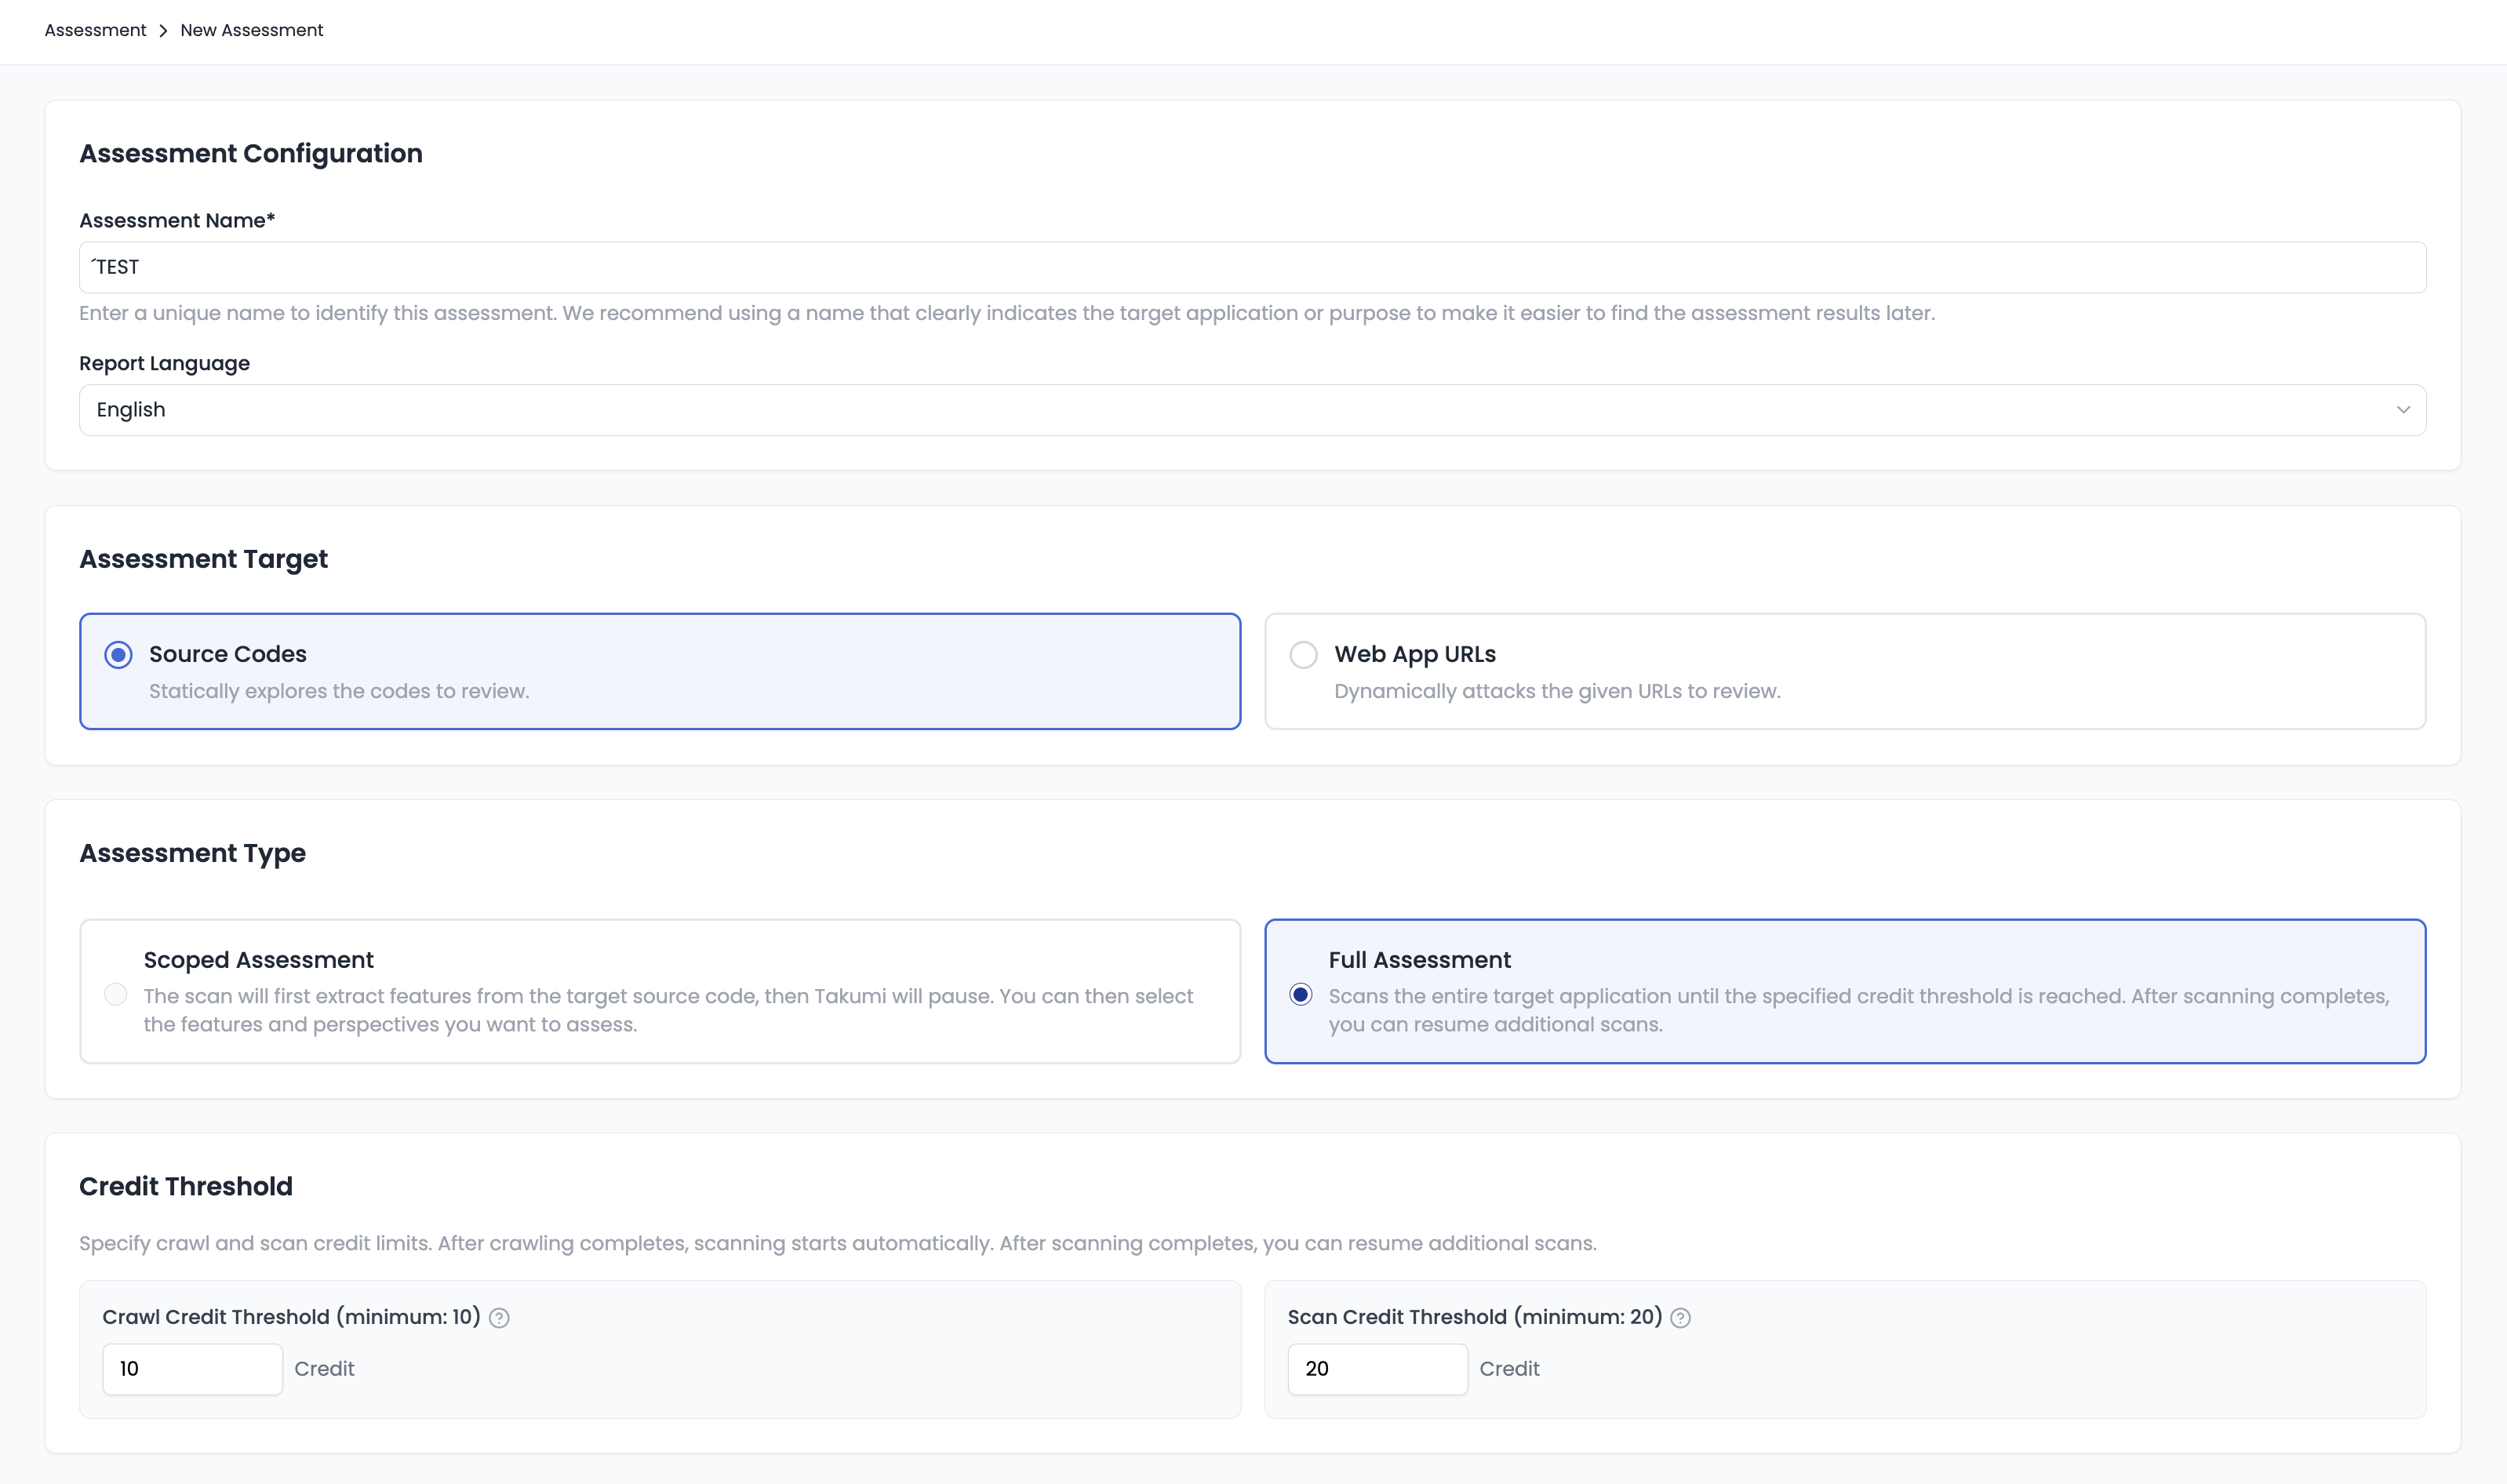
- Click New Assessment and choose Whitebox.
- Upload the source you want to assess as a file.
- Click Start.
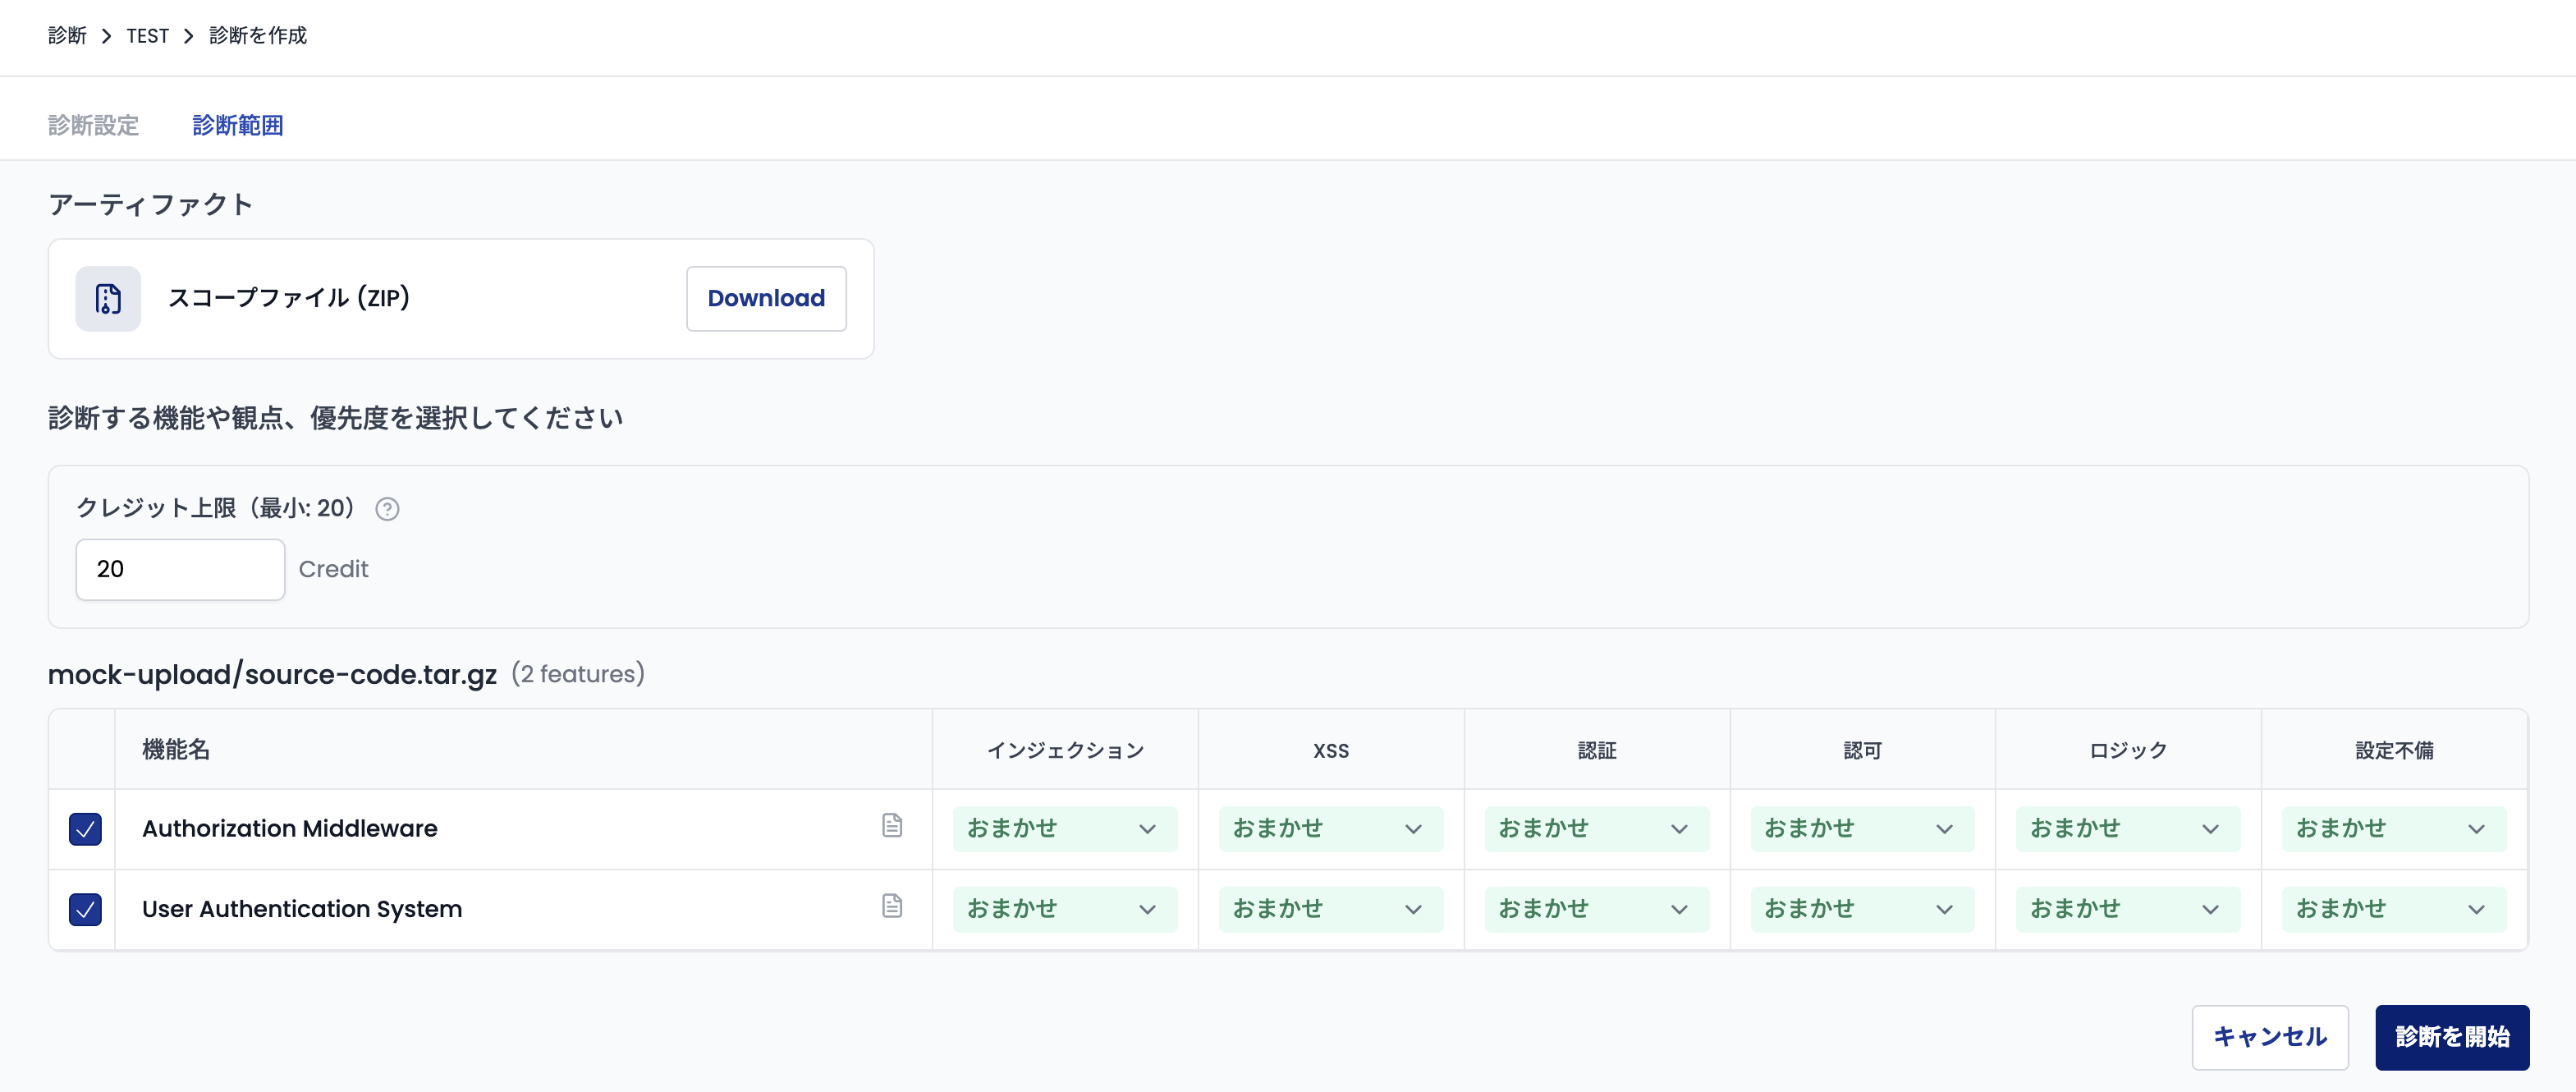
The configuration screen looks like this:
Instead of uploading a file, you can select one of the GitHub repositories connected to Takumi. To do this, complete the GitHub integration first.
The run continues in the background, so closing the screen does not stop it.
For details on what consumes credits, see Whitebox Assessment.
Blackbox Assessment
A blackbox assessment crawls a target URL and probes for vulnerabilities without reading source code.
- Open Assessments from the Shisho Cloud console sidebar.
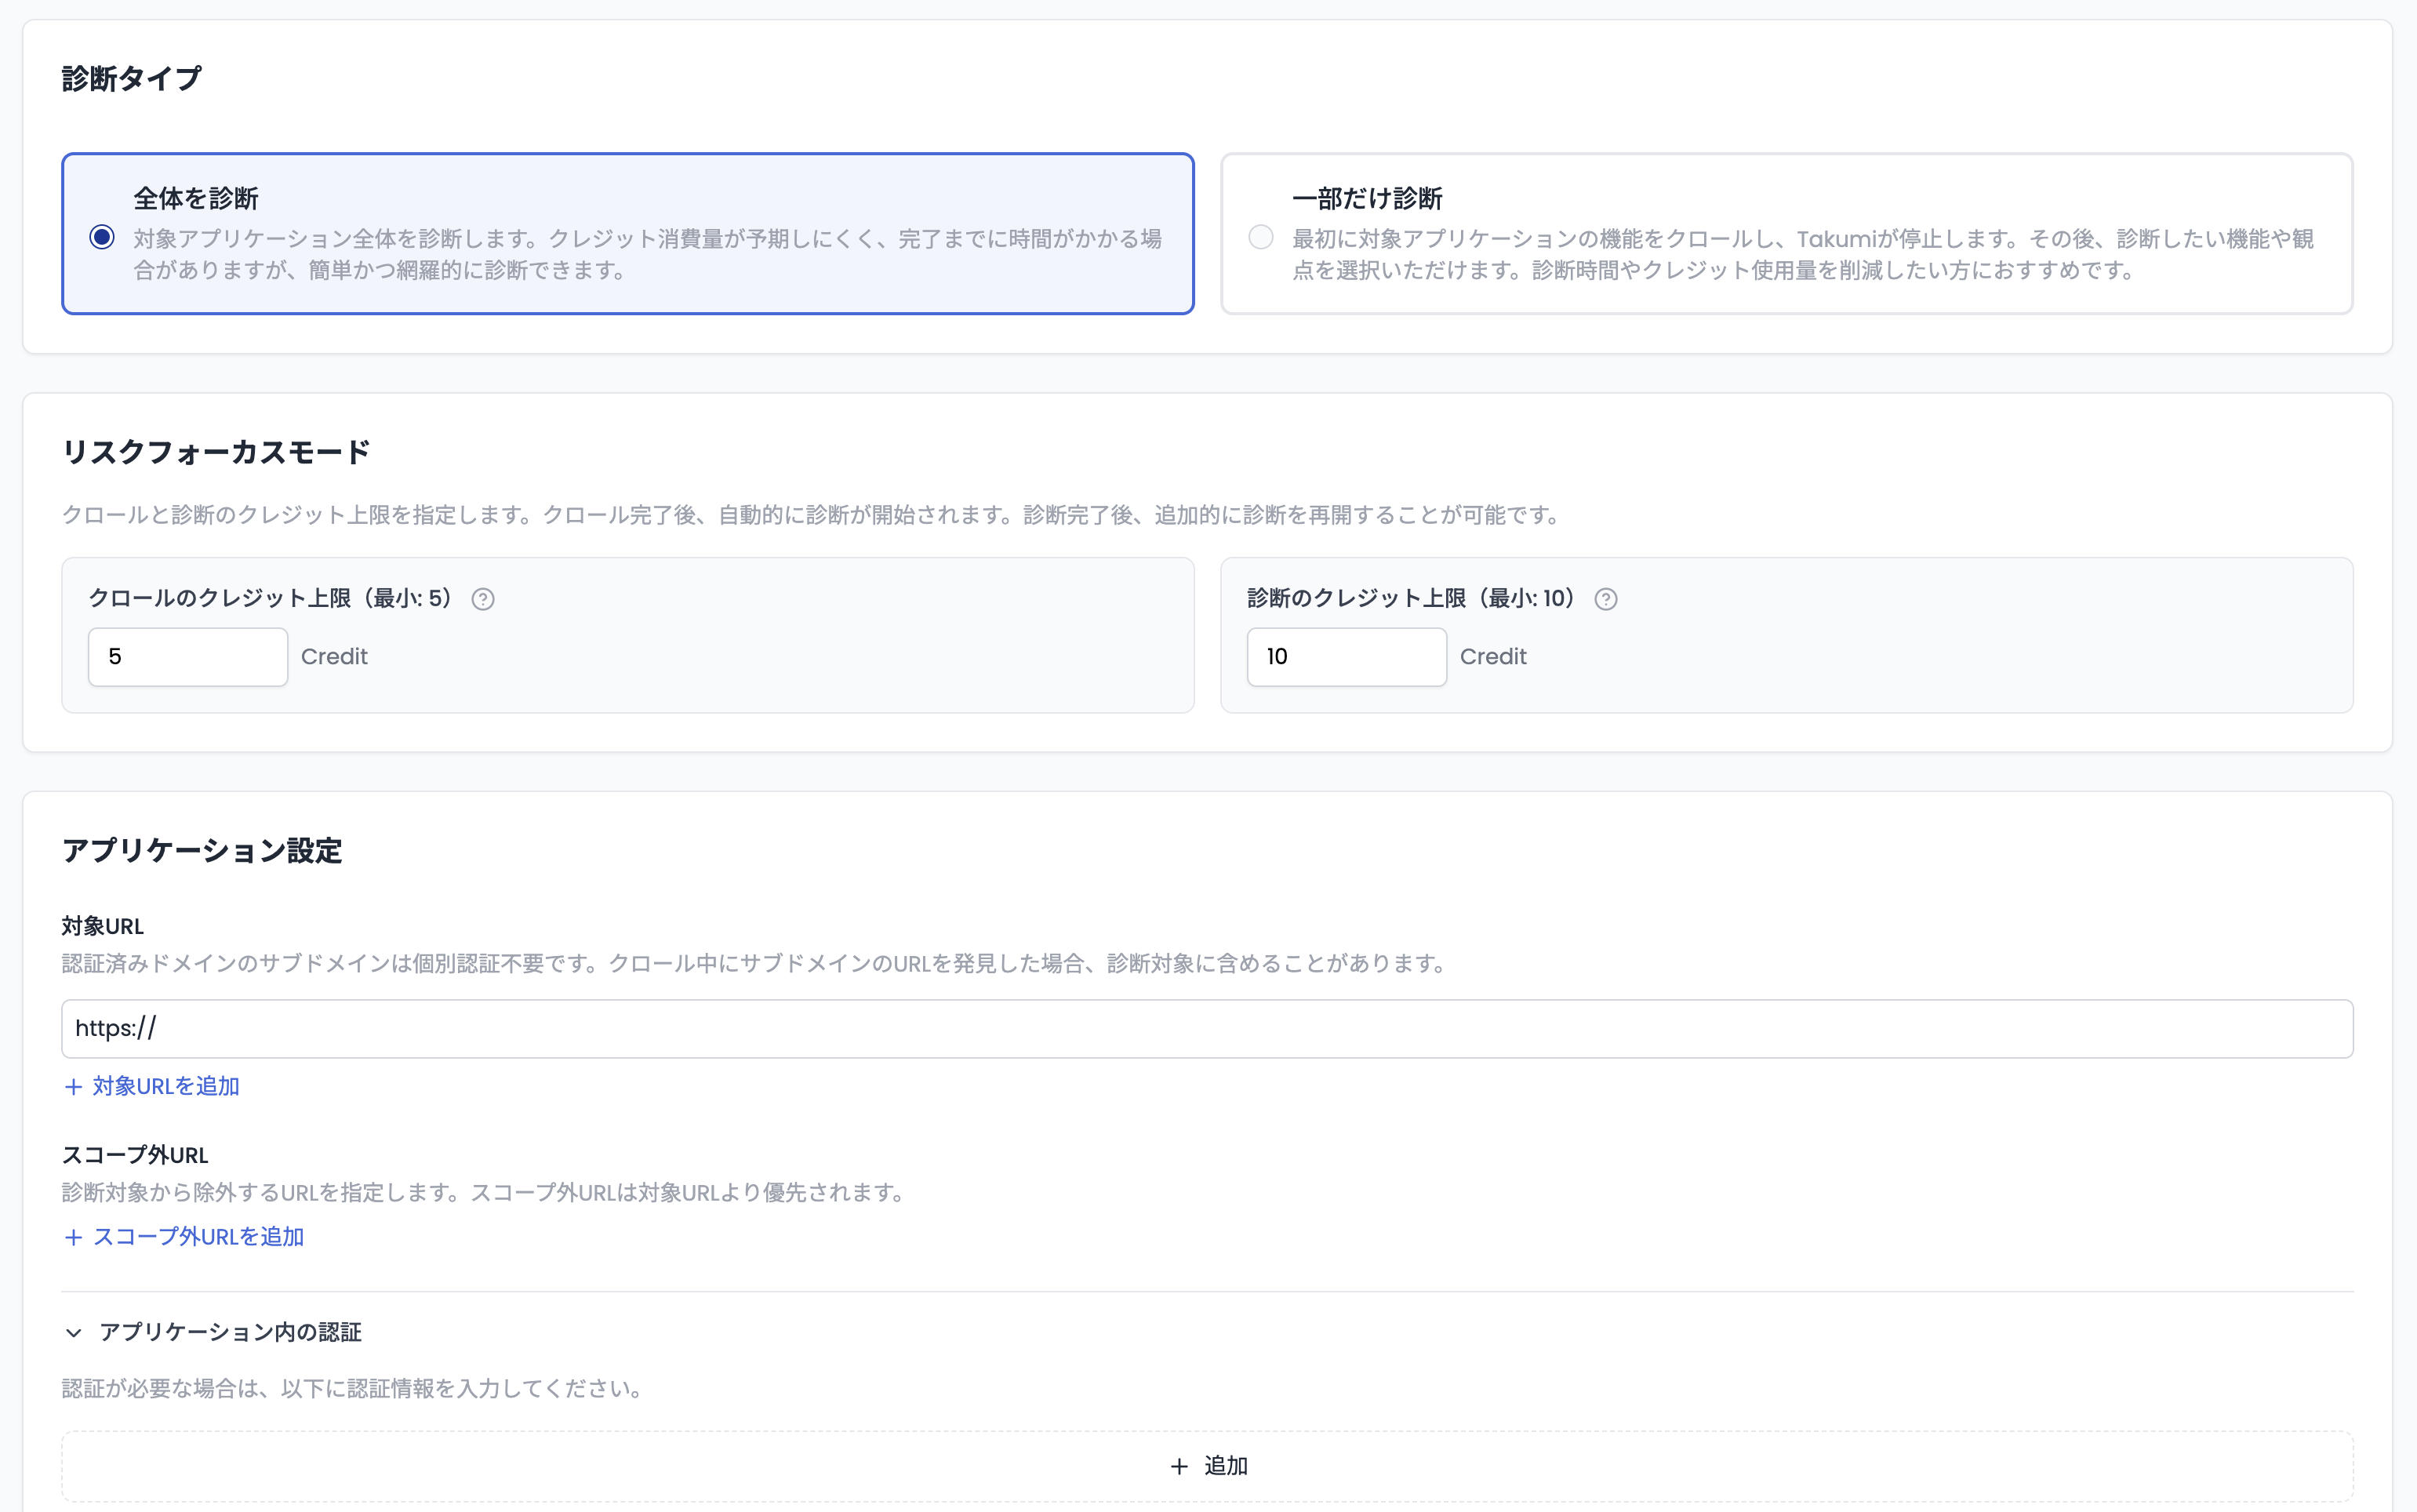
- Click New Assessment and choose Blackbox.
- Enter the target URL and any authentication details.
- Click Start.
The configuration screen for blackbox assessments looks like this:
For authentication options and crawl-result editing, see Blackbox Assessment. Before you can target a URL for the first time, complete the organization or ownership verification flow:

Completing an Assessment
Both whitebox and blackbox assessments currently use a risk-focus model. Takumi assesses cells (functions, endpoints, and other fine-grained units of the target) in order of risk score, and a run transitions through these states depending on the credit limit and other conditions:
Run until every cell is assessed
When you start an assessment, you can set a credit limit that caps how much the run may consume. Setting an appropriate initial limit caps unintended consumption and lets you commit more credits incrementally as you watch progress.
When the limit is reached and the assessment enters Awaiting Resume, raise the limit on the assessment detail page and resume the run. You can repeat this as many times as needed until every cell has been assessed.
Mark as completed midway
Once you have the findings you need, press Complete on the assessment detail page to mark the run as completed even if not every cell has been assessed. Findings produced so far are preserved and the assessment moves to the Completed state.
Stop midway
If the scope turns out to be wider than intended, cancel the run from Cancel on the assessment detail page. Findings produced up to the cancellation point are preserved.
Preview interim results
While the assessment is Running or Awaiting Resume, the findings produced so far are visible from Preview, so you can act on critical issues before the run finishes.
Review Findings
Once the assessment completes, open the assessment from the Assessments sidebar entry to view findings, evidence, and remediation suggestions.

Each finding has its own detail page with the impacted code/endpoint, severity, and the recommended fix.
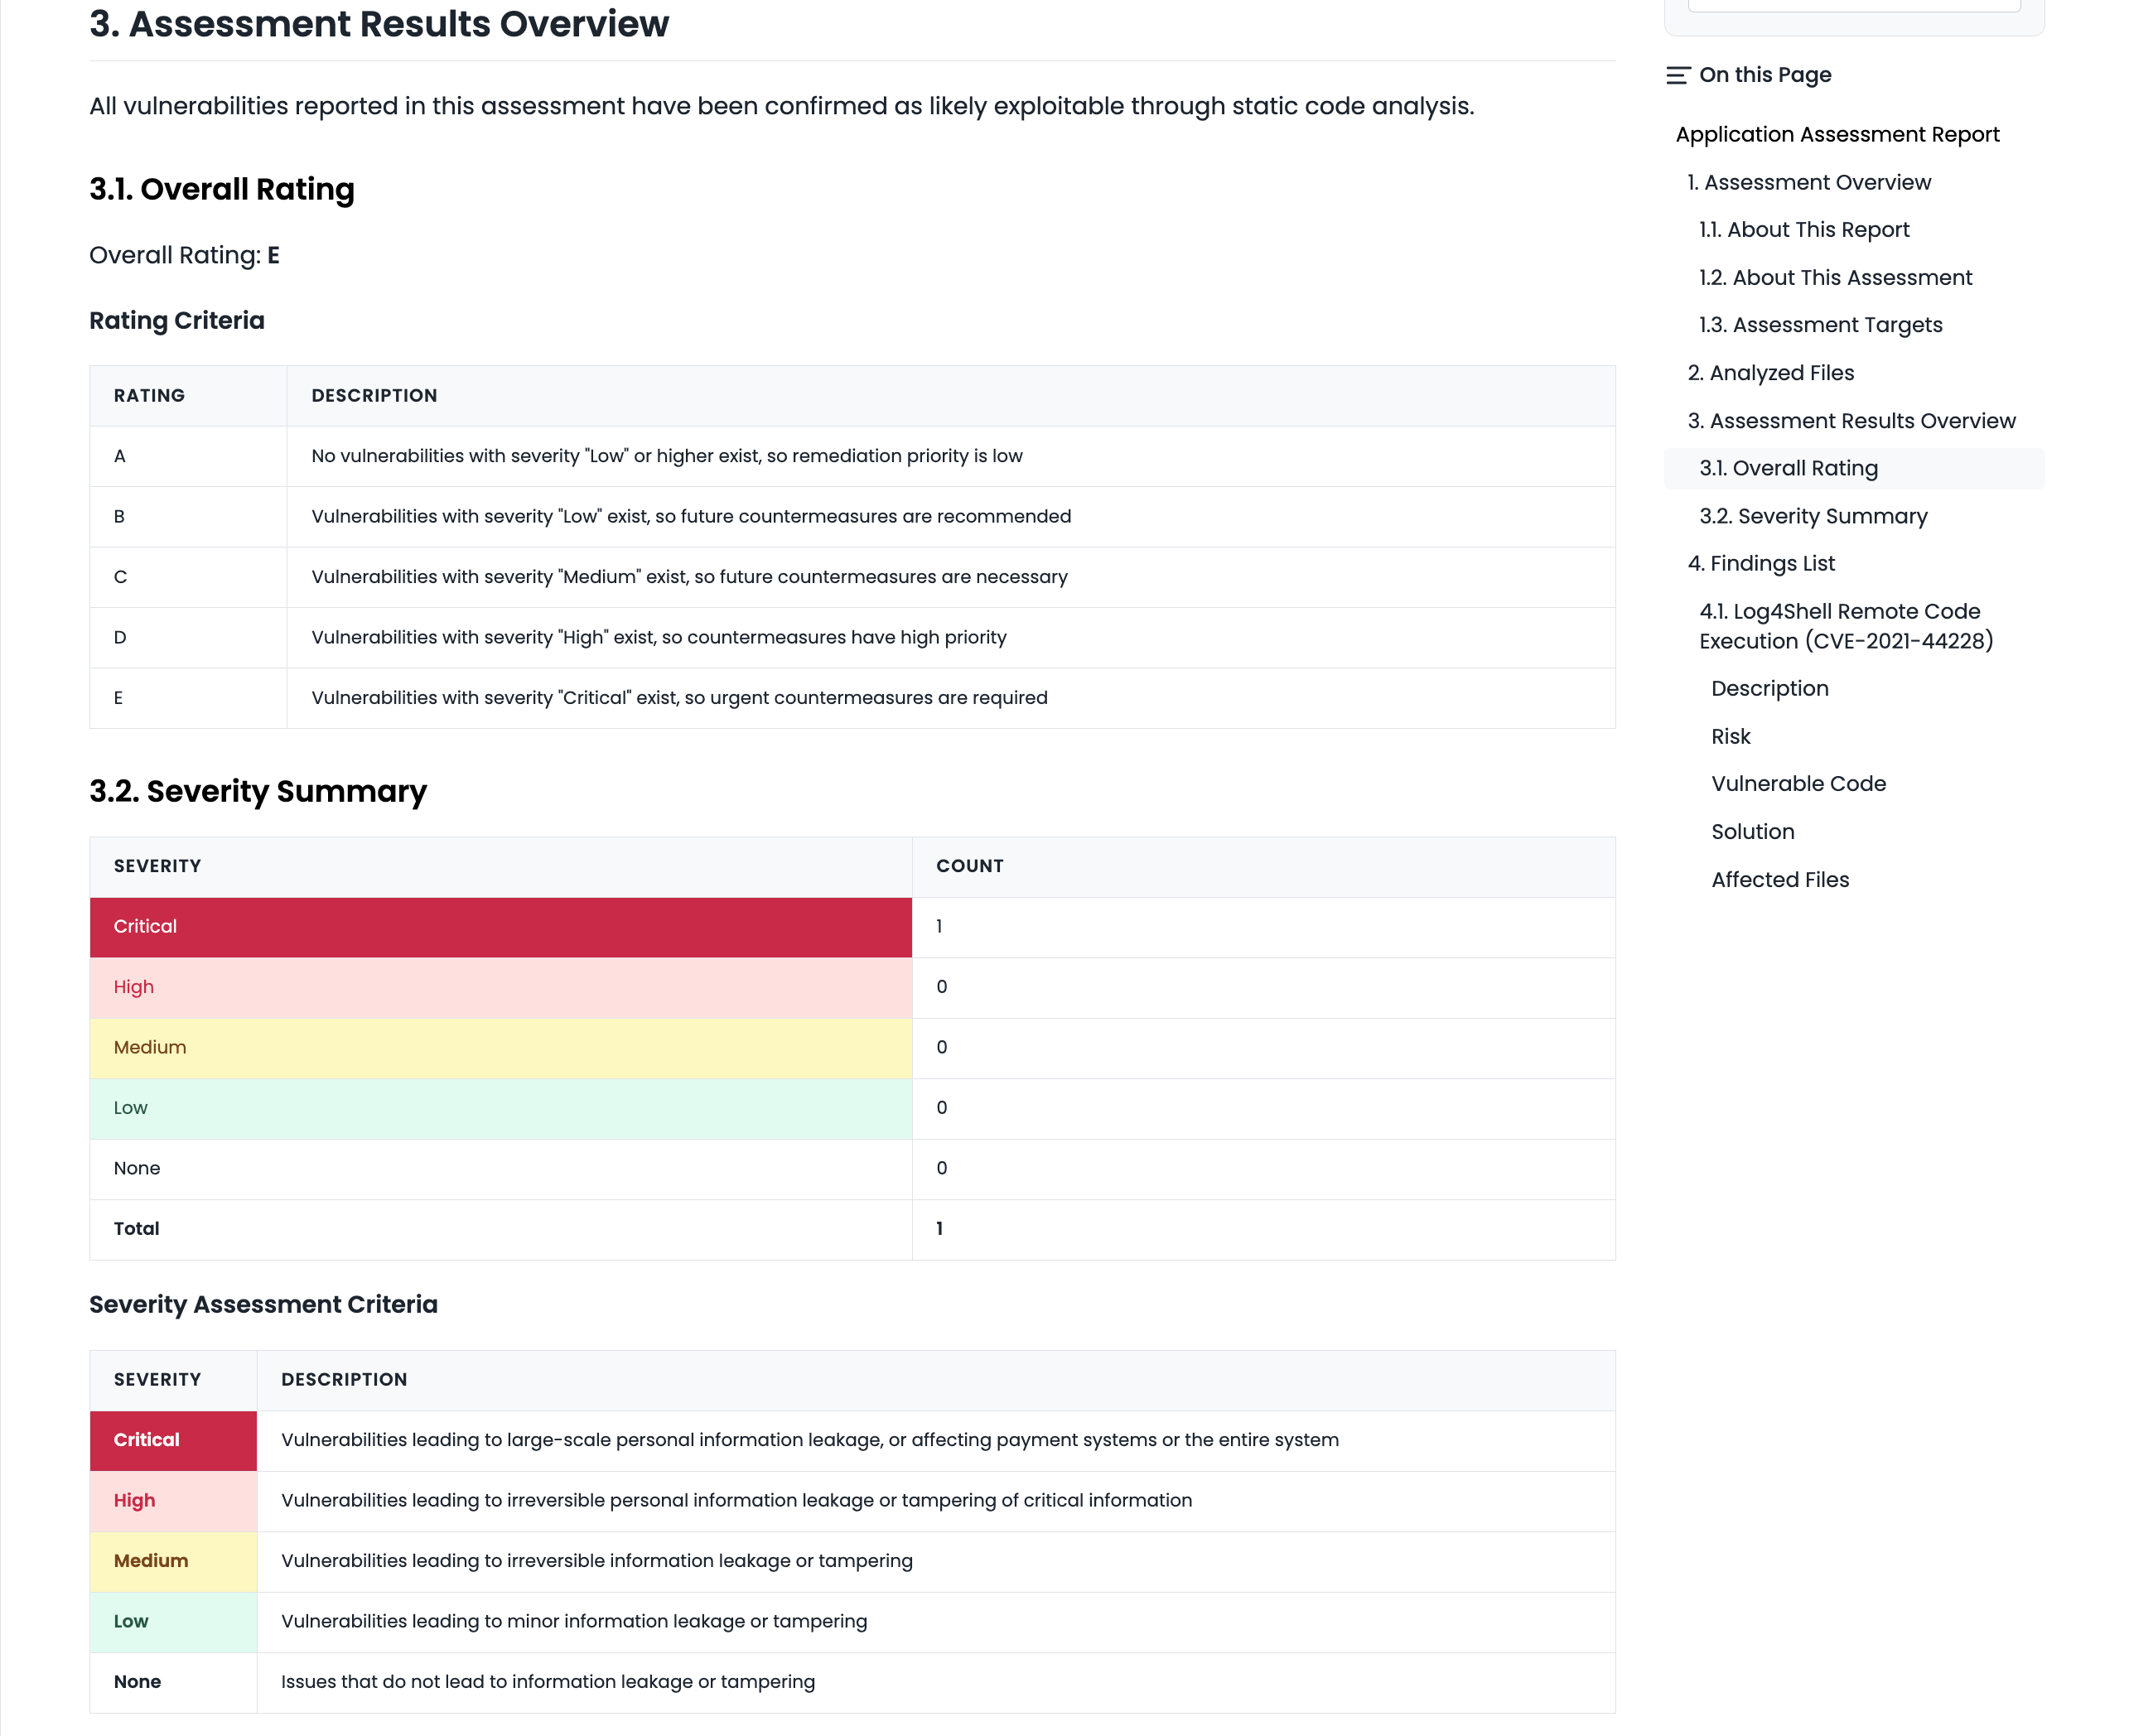
Severity assignment is described in Severity.
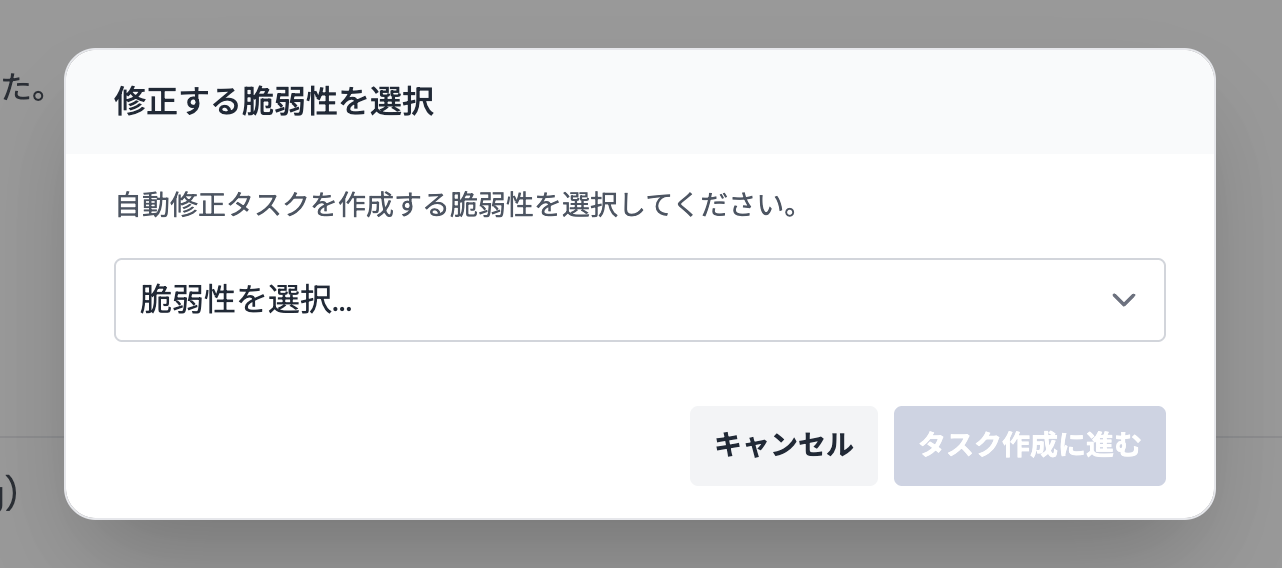
For findings you want Takumi to fix automatically, use Autofix to generate a fix pull request.