Configuring Notifications
The English user guide is currently in beta preview. Most of the documents have been automatically translated from the Japanese version. Should you find any inaccuracies, please reach out to Flatt Security.
Notifications in Shisho Cloud can be fully controlled in terms of timing and content through a workflow. Nonetheless, a standard notification workflow is available for convenient use without needing to delve into intricate details.
With this notification workflow, it's possible to facilitate notifications to Slack channels based on the urgency of detected events.
In this section, we will alter the setup of this workflow and configure Slack notifications for the detection and triage of issues.
Accessing the Notification Workflow Settings Page
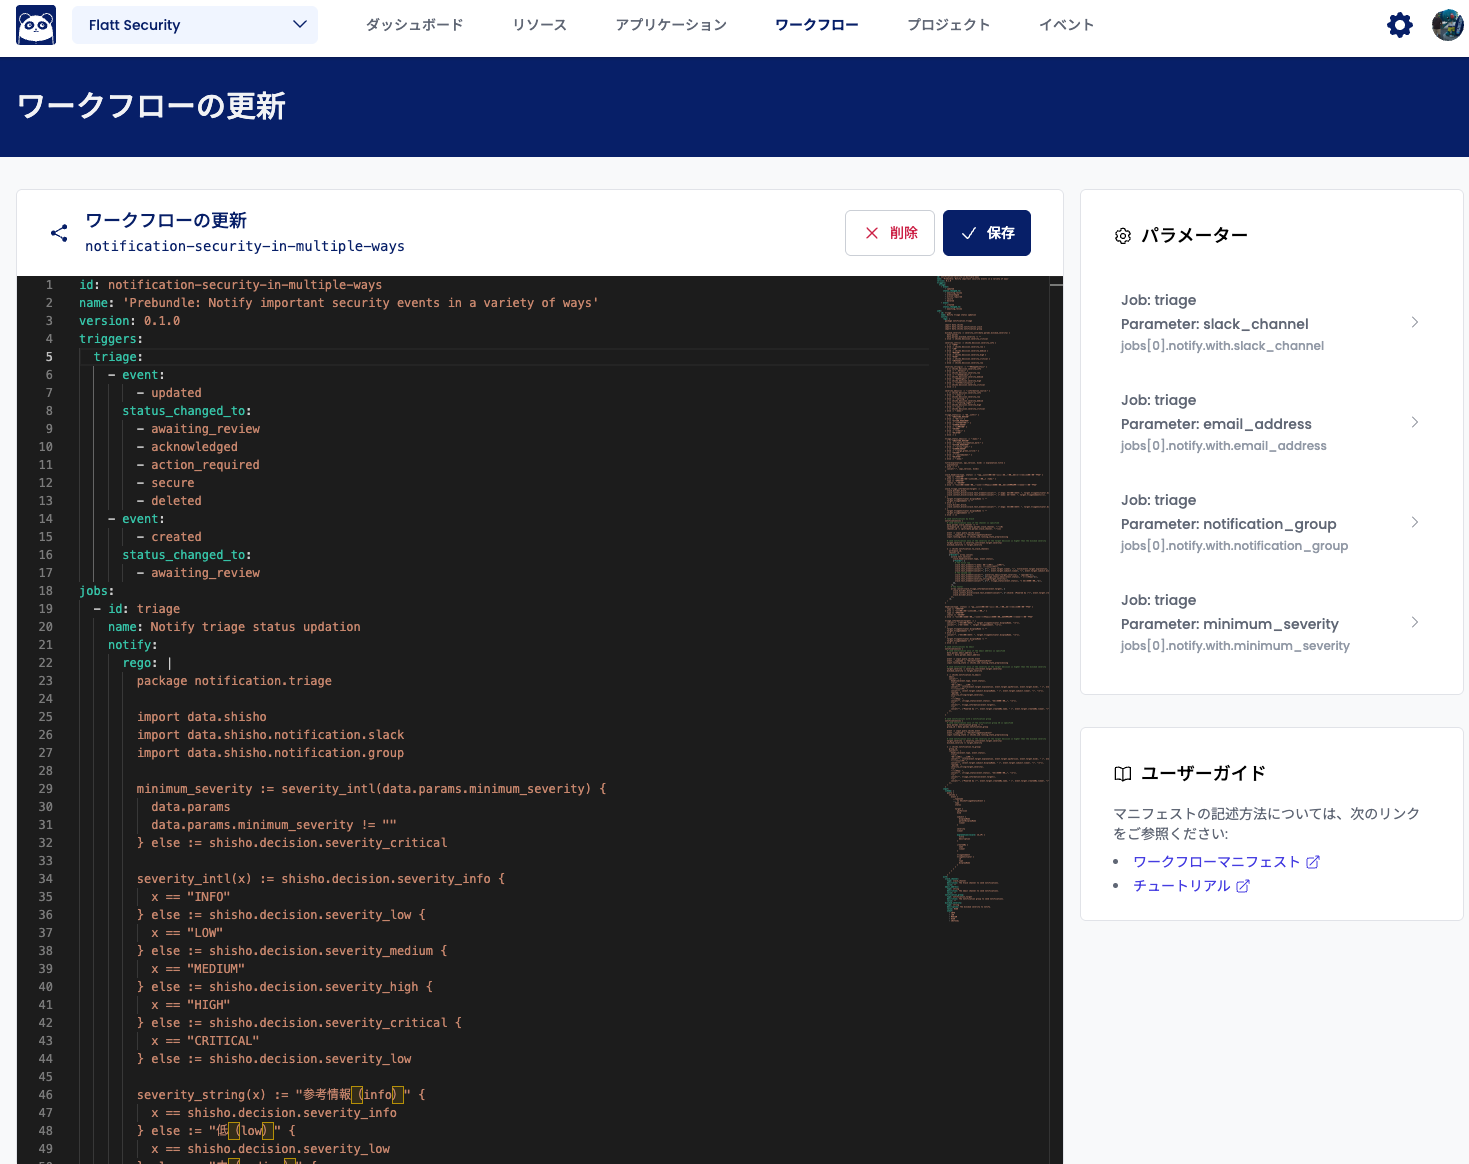
When you access the notification workflow editing page, the following screen should appear:
Modifying Parameters
Checking the upper right section of the screen will reveal settings for the destination of notifications and the urgency levels (severity) of events that should trigger notifications:
To set up Slack notifications here, a preliminary setup of Slack Integration is required.
Input settings for each item then click on Save.
Inviting Shisho Cloud's Slack App to the Notification Destination Channel
With parameters edited, please invite the Shisho Cloud App to your designated Slack channel. If you've concluded Slack integration, an invite can be done using Slack’s slash command /invite.
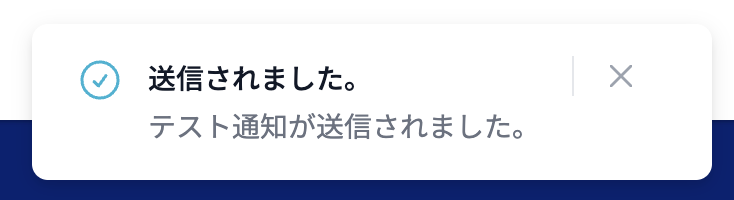
Testing Notifications
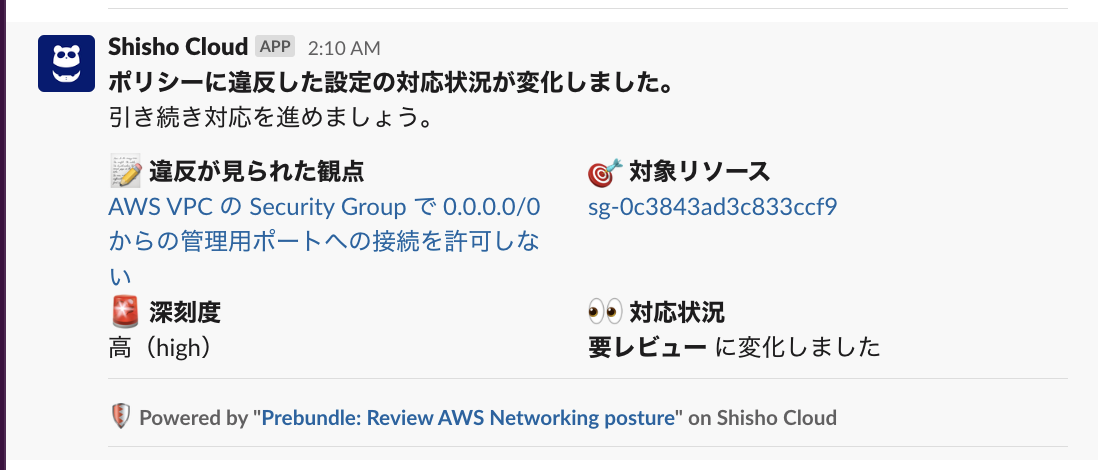
Upon successful completion of the previous steps, pressing the Send Test Notification button will transmit an actual test notification to Slack. If you can confirm a message akin to the one below, then your notification setup process is accomplished.