Azure
The English user guide is currently in beta preview. Most of the documents have been automatically translated from the Japanese version. Should you find any inaccuracies, please reach out to Flatt Security.
By integrating Shisho Cloud with Azure, you can run security scans on your Entra ID tenant and Azure subscriptions. This integration can be done in the following five steps:
- Create an App Registration in your Entra ID that Shisho Cloud can use.
- Add API permissions.
- Create a related Federated Credential.
- Grant the registered App Registration permissions for your Azure subscriptions.
- Register the created App Registration and other information in Shisho Cloud.
Shisho Cloud does not use static keys for Azure applications. Instead, it uses Federated Credentials to access Azure while issuing short-lived credentials as needed.
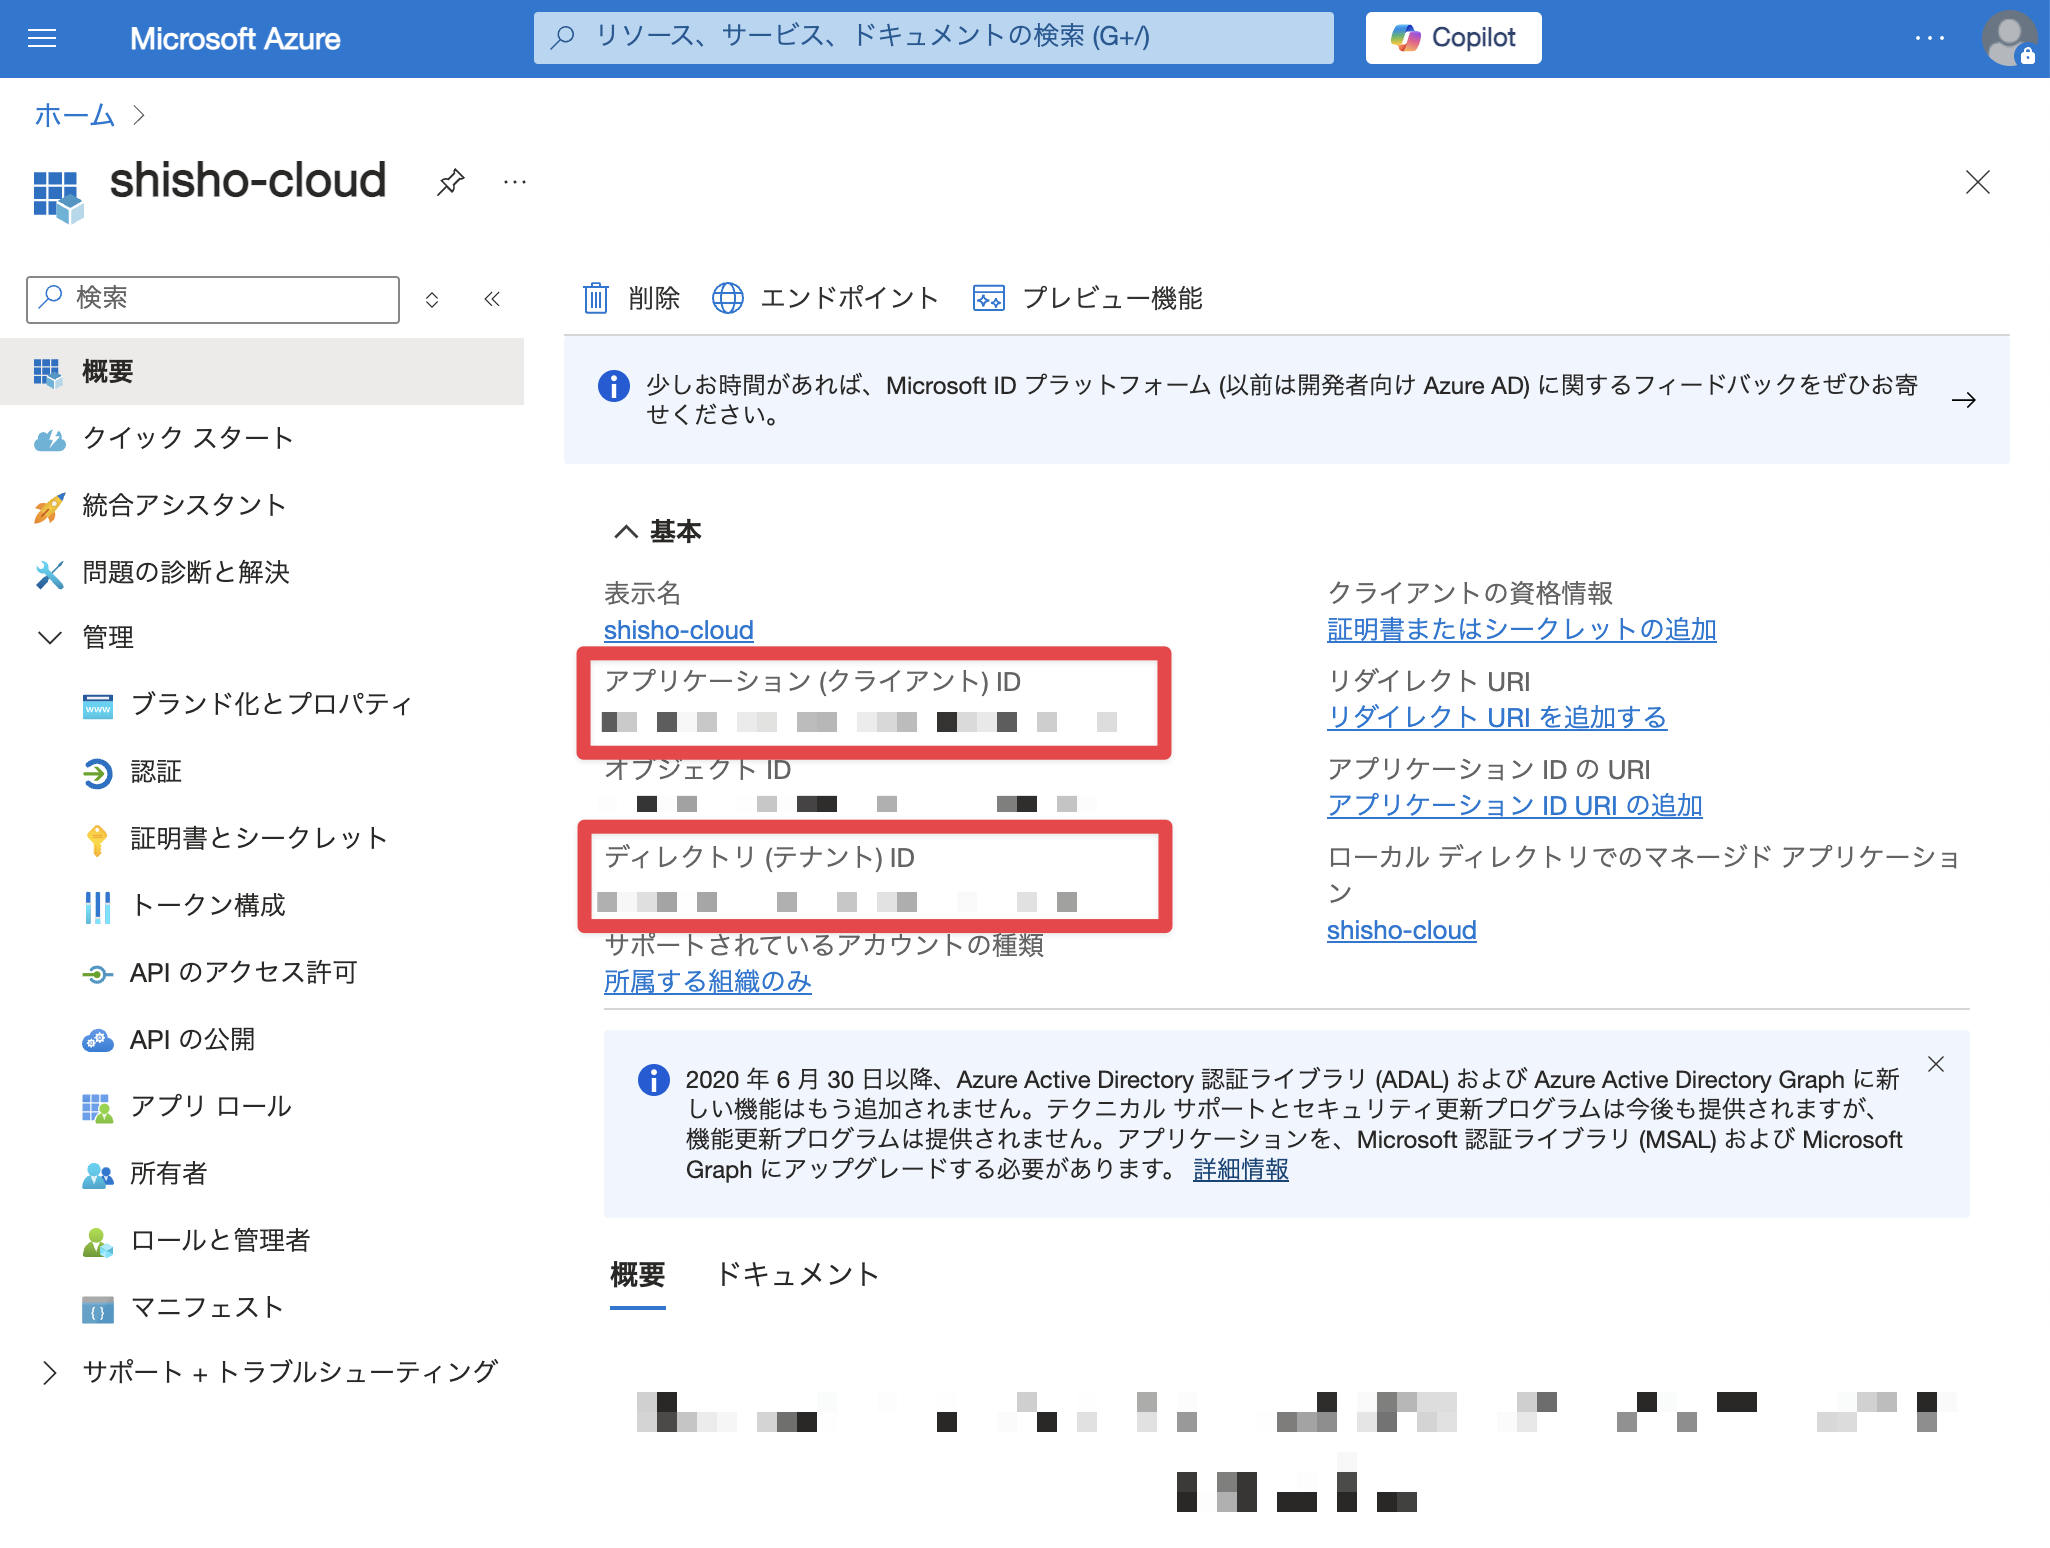
Create an App Registration
Follow the steps below.
- Open Microsoft Entra ID in the Azure portal.
- Click App registrations.
- Click New registration.
- Enter any application name (e.g.,
shisho-cloud). - Under Supported account types, select Accounts in this organizational directory only.
- Click "Register".
API Permissions
Follow the steps below.
- On the page of the application you created, click API permissions.
- Add API permissions from Add a permission as follows.
- Permission type: Application permissions
- API to be authorized (Microsoft Graph)
Directory.Read.AllGroup.Read.AllPolicy.Read.AllUser.Read.All
- Click Grant admin consent for (your tenant name) to give consent as an administrator to use the API.
- Verify that the status of each API above is Granted.
Create a Federated Credential
Follow the steps below.
- On the page of the application you created, click Certificates & secrets.
- Click Federated credentials.
- Click Add credential.
- For Federated credential scenario, select Other issuer.
- Create credentials as follows.
- Issuer:
https://tokens.cloud.shisho.dev - Type: Explicit subject identifier
- Value:
job:<Shisho Cloud Organization Name>:default(e.g.job:your-organization-id:default) - Name: Any (e.g.,
shisho-cloud) - Description: Any
- Issuer:
- Select the created credential.
- Click Add credential.
Grant Permissions to Subscriptions
Assign the following role to the subscriptions you want to scan with Shisho Cloud, as well as the resource groups and management groups that contain them.
- Reader
- Security Reader
For how to assign, please refer to the Azure official documentation.
Shisho Cloud retrieves and evaluates configuration data for all subscriptions that it can access through the application.
Register the Integration
Click the "Settings" button on the "Azure" card displayed on the "Gear icon ⚙ > Integrations" screen, and enter the information according to the instructions on the screen.
The information you need is displayed on the page of the application you created.