GitLab
The English user guide is currently in beta preview. Most of the documents have been automatically translated from the Japanese version. Should you find any inaccuracies, please reach out to Flatt Security.
This tutorial explains how to import workflows on Shisho Cloud into a GitLab repository and keep them synchronized using GitLab CI/CD.
This tutorial consists of four steps:
- Create a GitLab project to store your Shisho Cloud workflows.
- Allow access to your Shisho Cloud organization from your CI/CD workflow for a specific project.
- Create a GitLab CI/CD job to deploy workflows to Shisho Cloud.
- Create a GitLab CI/CD job to check for differences between the workflows in your repository and those on Shisho Cloud.
Step 3 ensures that any changes to your workflows in the repository are immediately reflected on Shisho Cloud. Step 4 automatically creates a merge request to reflect changes made directly from the Shisho Cloud web interface. These setups keep your GitLab repository and Shisho Cloud workflows synchronized.
You do not need to perform operations like "Register the Shisho Cloud access token to GitLab CI/CD as a secret" to access Shisho Cloud from GitLab CI/CD. Instead, Shisho Cloud issues short-lived credentials based on the OIDC token information that GitLab issues for the CI/CD job.
Create a GitLab Project to Store Your Workflows
To manage all your Shisho Cloud check rules with Git, first, export your existing workflows on Shisho Cloud and add them to a repository.
Create a new project on GitLab and clone the repository. To export your Shisho Cloud workflows to the cloned directory, run the following command. Replace $SHISHO_CLOUD_ORG_ID with the ID of your Shisho Cloud organization.
shishoctl workflow export --structured --org $SHISHO_CLOUD_ORG_ID --path .
Once the export is complete, commit the created file and push it to GitLab.
Allow Access to Your Shisho Cloud Organization from Specific Project's CI/CD
Next, configure Shisho Cloud so that you can log in from GitLab CI/CD. Open the Shisho Cloud Bots creation page and create a "Bot." Bots have access rights to Shisho Cloud organizations, and your GitLab job will log in to Shisho Cloud as this bot.
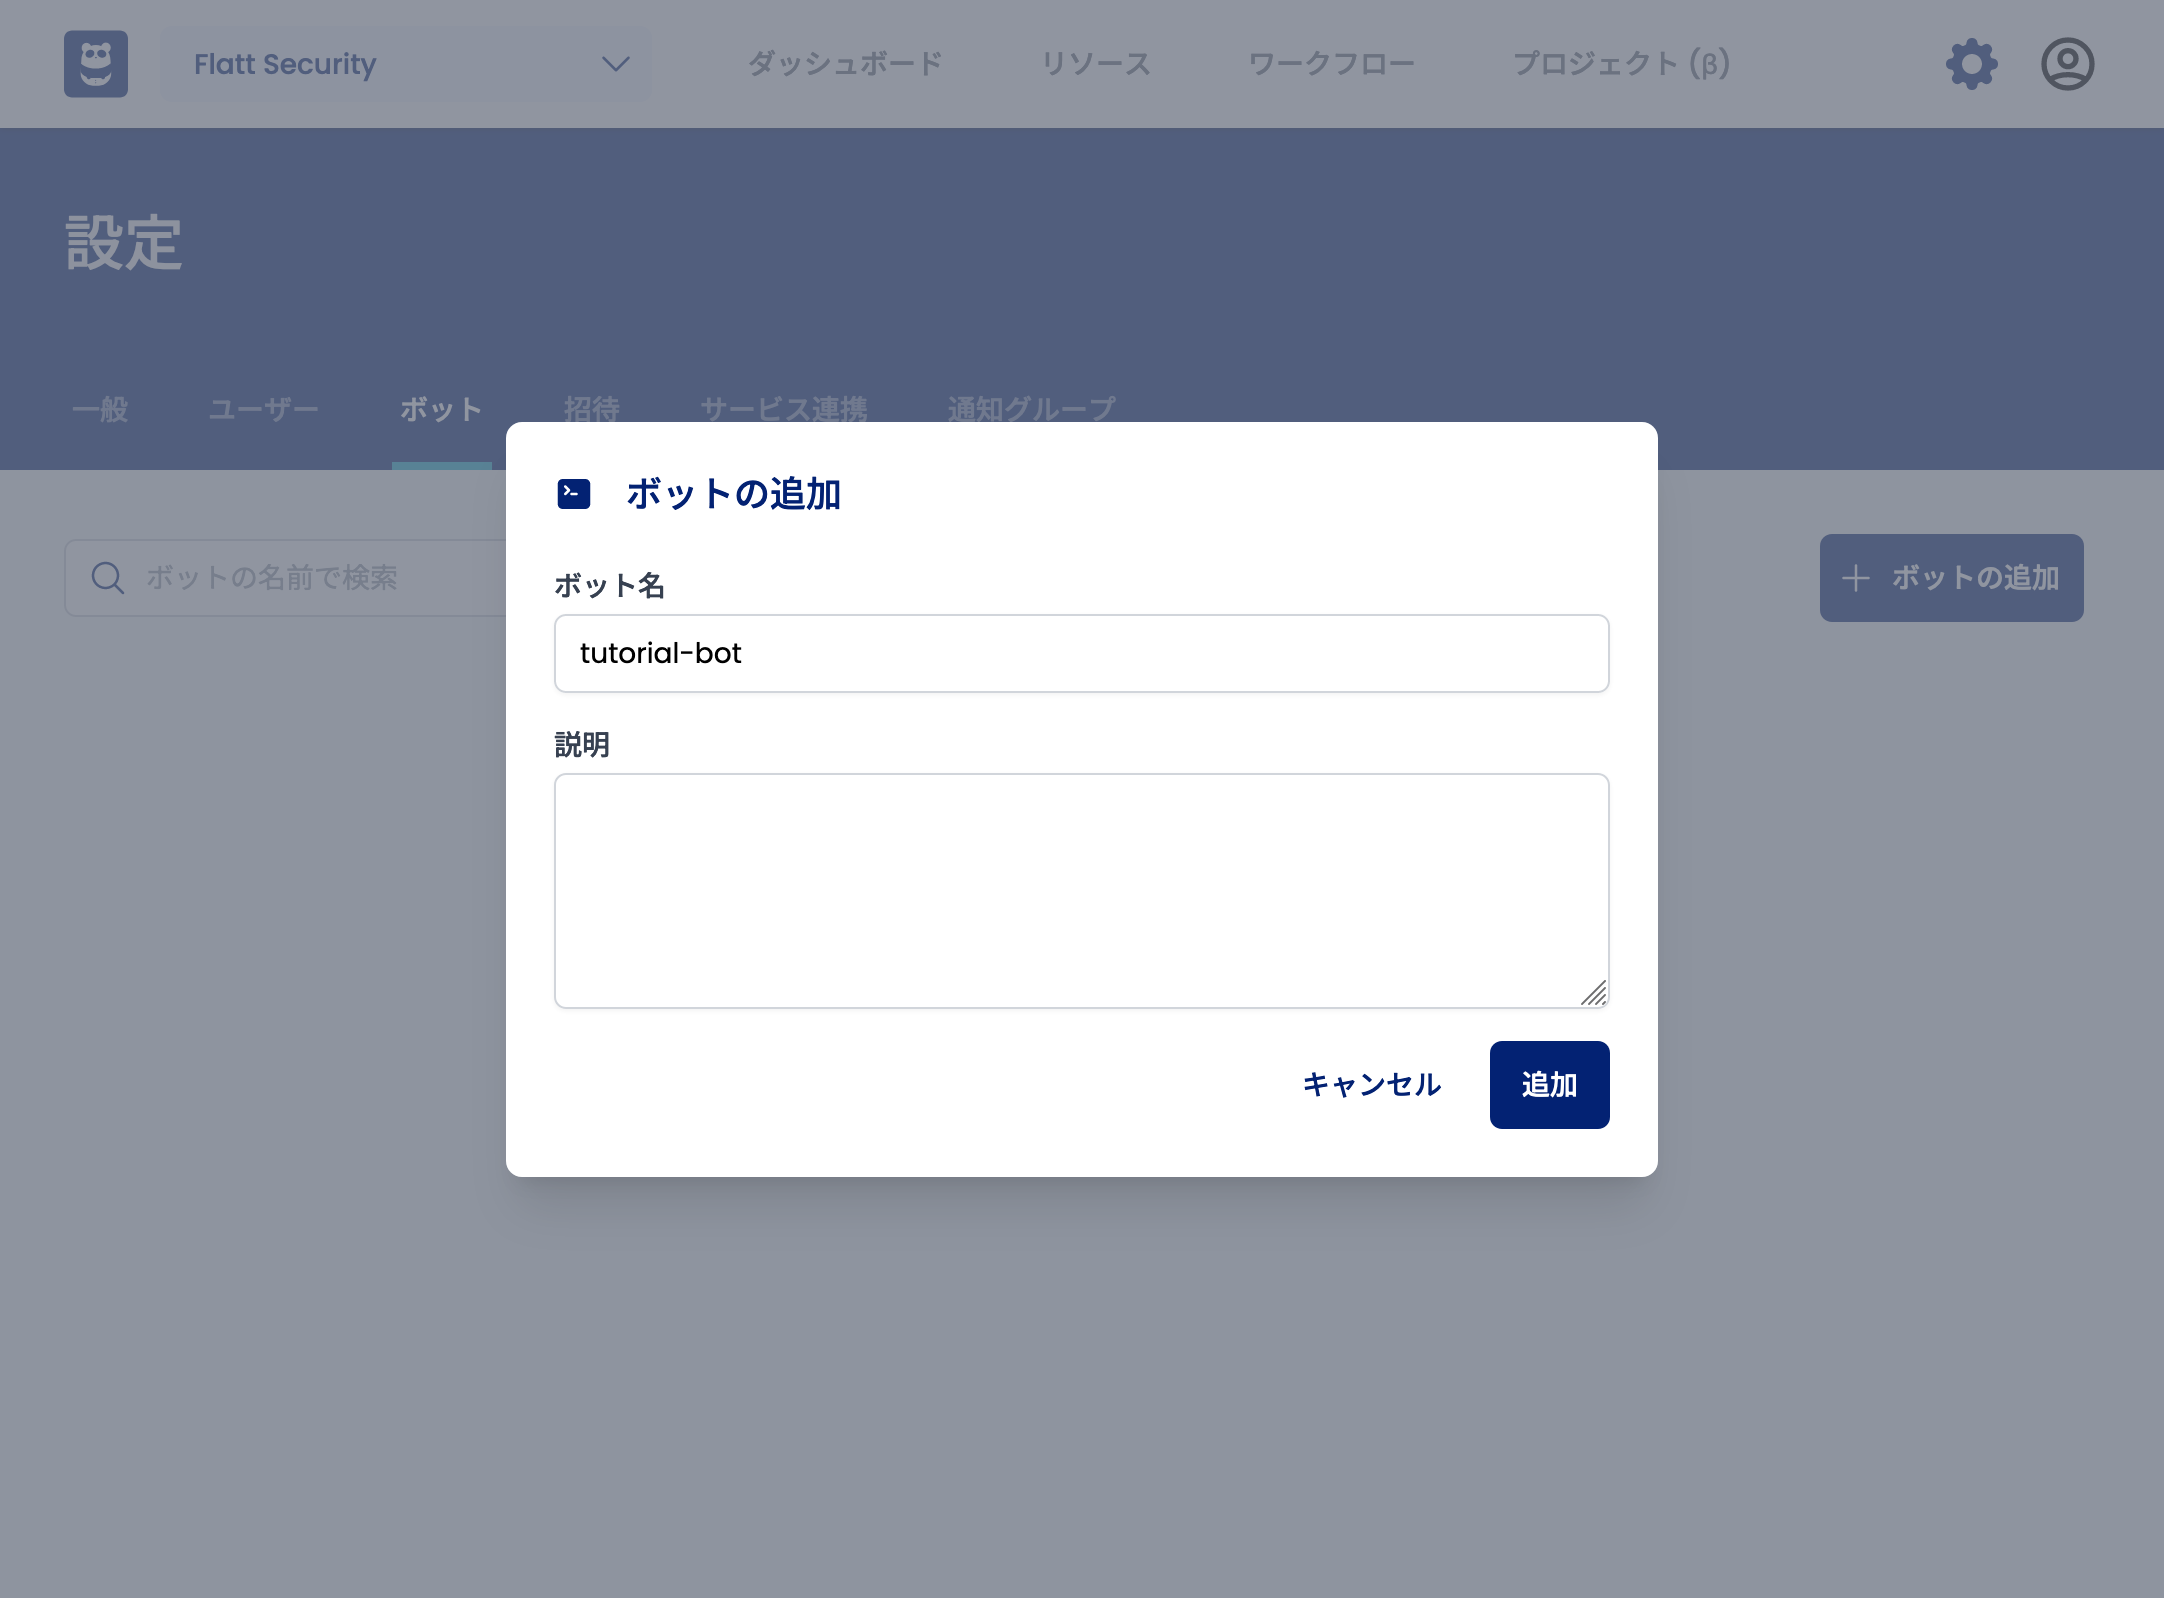
Clicking on the created bot's name will take you to the trust condition settings screen.
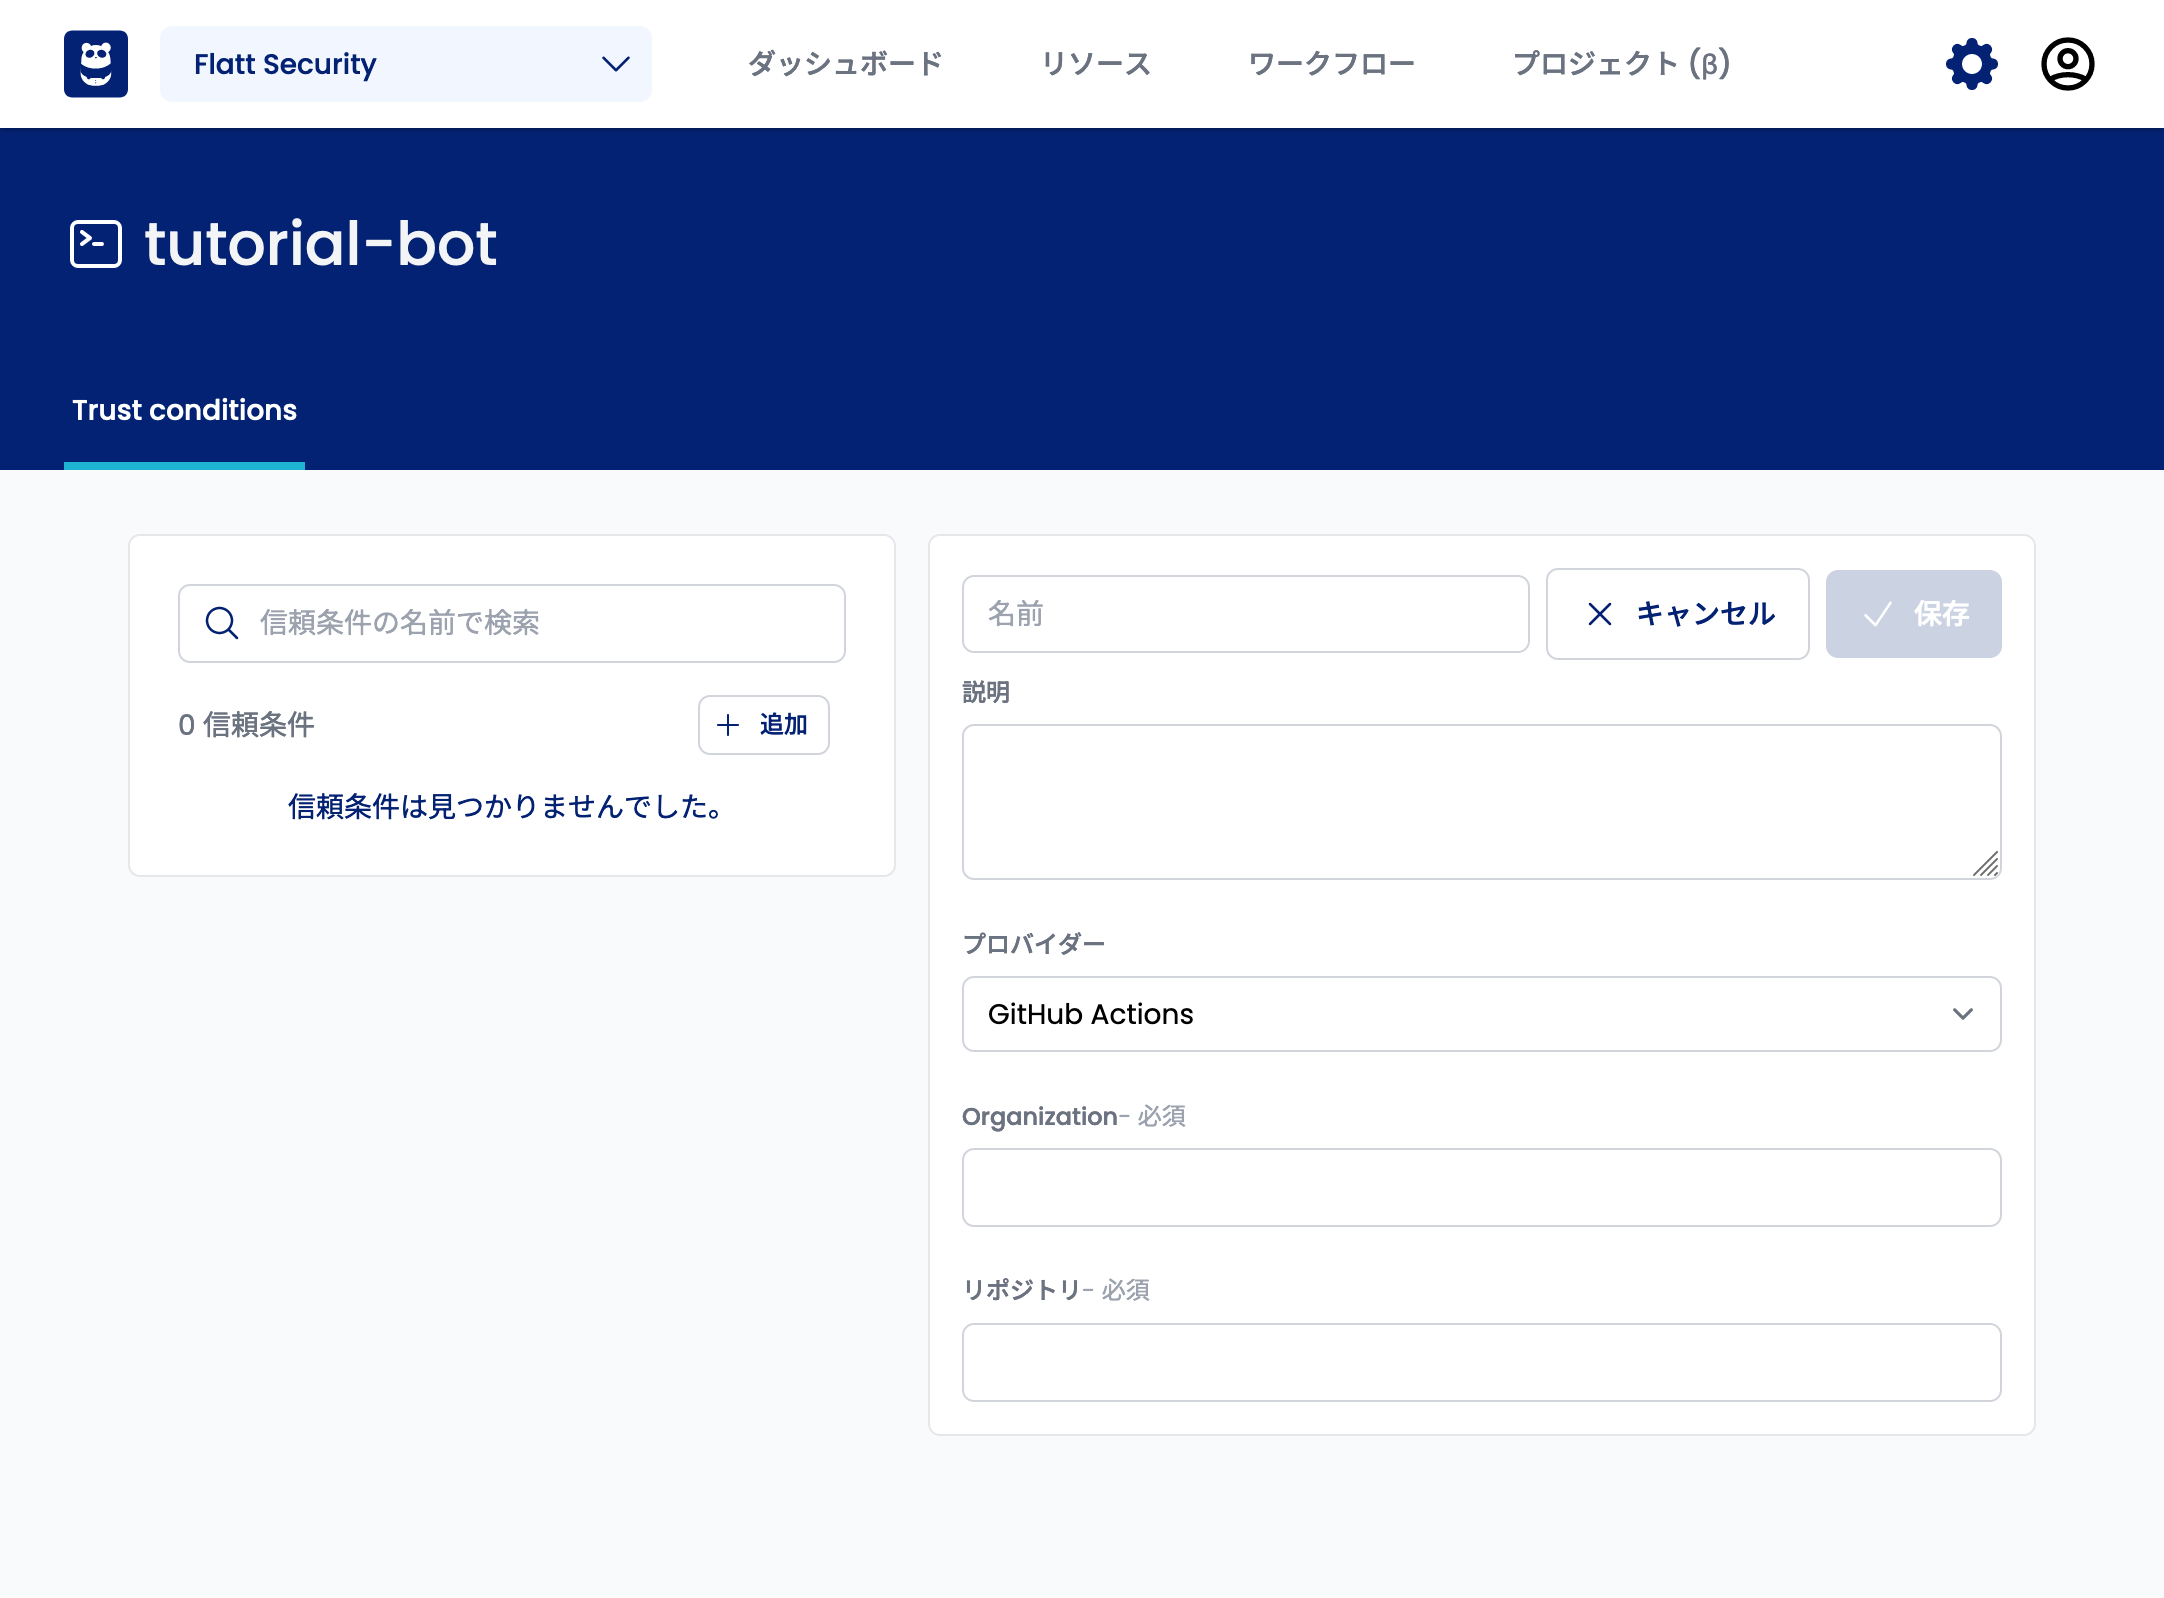
When you select "GitLab CI/CD" for "Provider," you can enter the GitLab trust condition.
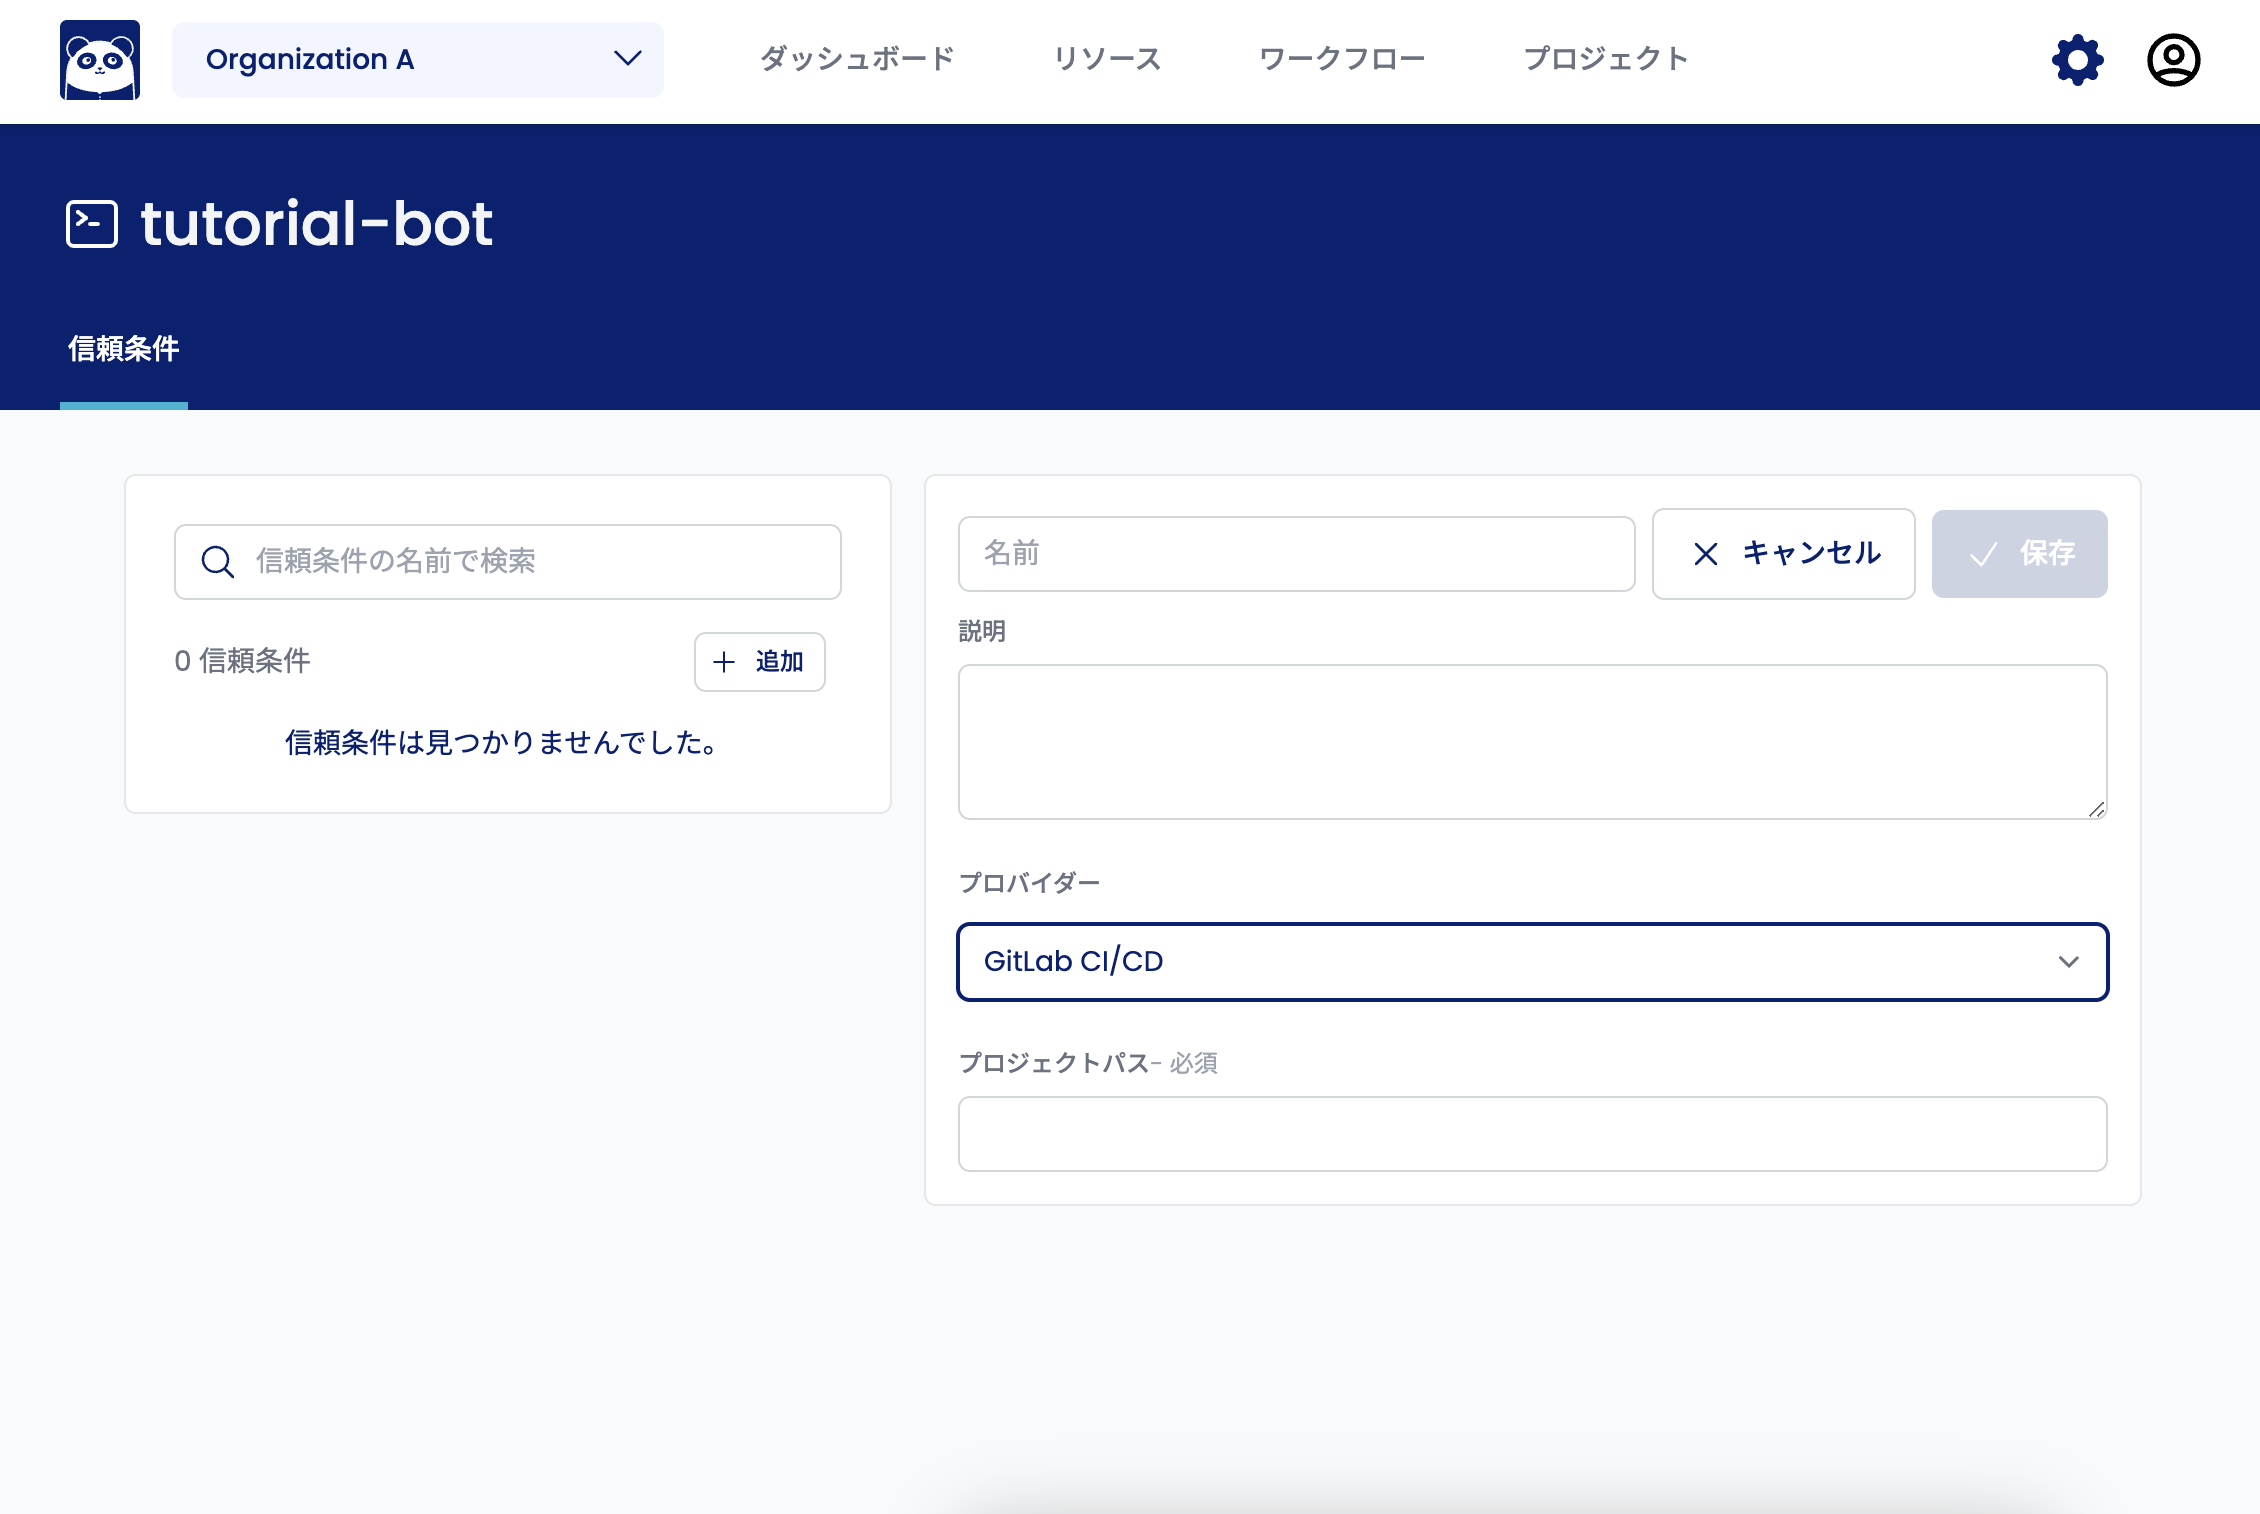
A trust condition is a condition that a GitLab job must meet to log in to Shisho Cloud as that bot. If you enter the path of the GitLab project where your workflows are stored, jobs belonging to that project will be able to log in to Shisho Cloud as the bot you just created.
For GitLab, the trust condition is based on the project path match. The project path starts with the group name of the URL that identifies the GitLab project and ends with the project name.
When you open a GitLab project page in your browser, the URL is in the following format:
https://gitlab.com/[group name]/[project name]
If subgroups are included, the subgroup names are inserted in between.
https://gitlab.com/[group name]/[subgroup 01]/[subgroup 02]/ ... /[project name]
The part of the path starting with these group names and ending with the project name is the project path.
[group name]/[subgroup 01]/[subgroup 02]/ ... /[project name]
For example, if you have the following project page URL, the bolded portion is the project path:
- https://gitlab.com/my-group/my-project
- https://gitlab.com/my-group/my-subgroup01/my-project
- https://gitlab.com/my-group/my-subgroup01/my-subgroup02/my-project
In GitLab, it is possible to set a different character string from the group, subgroup, and project names as the path of the URL. Be sure to check the path used in the URL of your GitLab project.
Note that if you open another page under the project (such as a repository page) in your browser, the information on that other page will also be included in the path.
Click the "Save" button to complete the process.
Create a GitLab CI/CD Job to Deploy Workflows to Shisho Cloud
The next step is to create a GitLab CI/CD job to deploy the workflow to Shisho Cloud. Create a file in your repository that looks like the one below.
include:
  - local: /.gitlab/jobs/shishocloud-workflows-deploy.yml
shishocloud-workflows-deploy-job:
  variables:
    # FIXME: Replace with your Shisho Cloud organization ID.
    SHISHOCLOUD_ORG: flatt-security
    # FIXME: The value of the BOT_ID to be entered is described in the trust condition setting screen.
    SHISHOCLOUD_BOT_ID: BTXXXXXXXXXXXXXXXXXXXXXXXXXX

  id_tokens:
    # Permissions required to log in to Shisho Cloud.
    ID_TOKEN:
      aud: https://gitlab.com

  script:
    # Install shishoctl
    - SHISHOCTL_URL="https://shisho.dev/releases/shishoctl-0.14.0-x86_64-unknown-linux-gnu"
    - curl -L $SHISHOCTL_URL -o /usr/local/bin/shishoctl
    - chmod +x /usr/local/bin/shishoctl

    # Sign in (as bot)
    - shishoctl auth signin:bot \
      --bot ${SHISHOCLOUD_BOT_ID} \
      --expires-in-minutes 60 \
      <<< ${ID_TOKEN}

    # Deploy workflows
    - shishoctl workflow apply --org "${SHISHOCLOUD_ORG}" --path .
Be sure to replace the parts of the code that say FIXME appropriately. The value of bot to be entered is displayed at the bottom of the trust condition setting screen you created earlier.
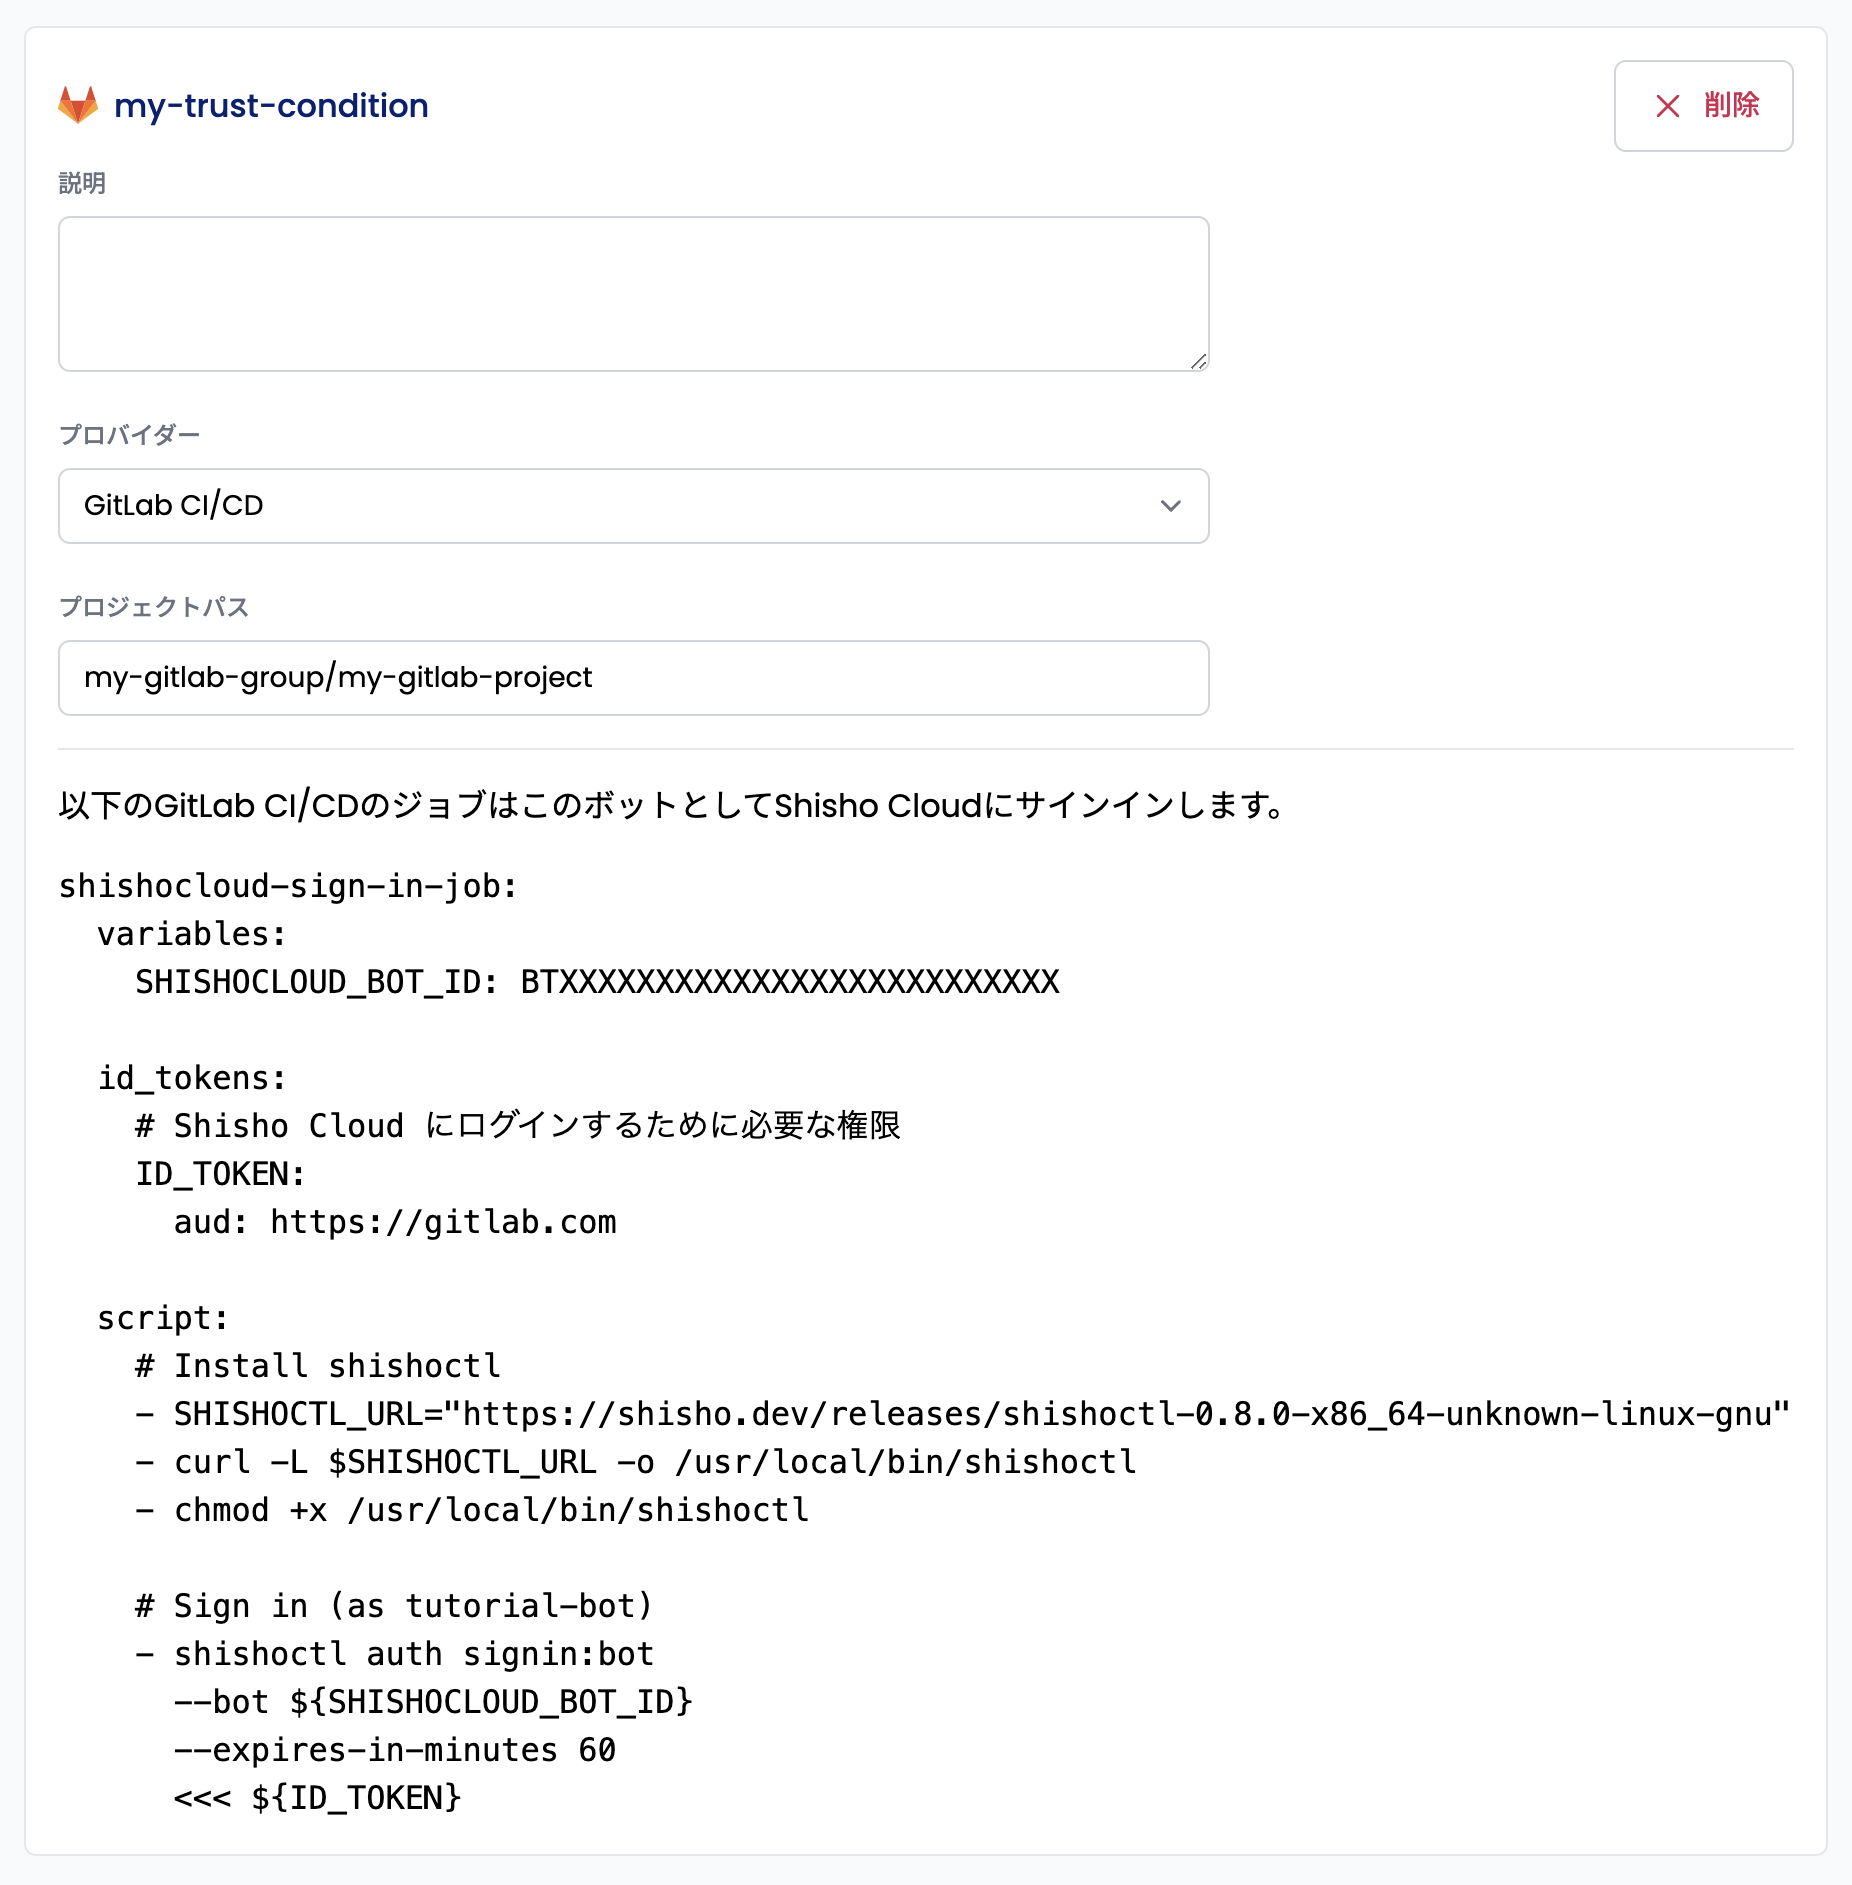
Once you have created the files as described above, commit and push them to GitLab.
With this setup, every time you push to the main branch, the workflow in your repository will be deployed to Shisho Cloud. Go to "Build" > "Pipelines" from your GitLab project page and make sure the job ran successfully.
Create a GitLab CI/CD Job to Check for Differences Between the Workflows in Your Repository and Those on Shisho Cloud
With the setup so far, every time you push to the default branch, the workflow is deployed to Shisho Cloud. However, if you edit a workflow directly from the Shisho Cloud web interface, a discrepancy will occur between the workflow in your repository and the workflow on Shisho Cloud. To ensure that the workflow you manage in your GitLab repository is identical to the workflow actually running on Shisho Cloud, you need to periodically check for differences between the two.
The shishoctl workflow pull command retrieves the workflows on Shisho Cloud to your local machine. Using this command, you'll create a job that automatically creates a merge request when there is a difference between the workflow on Shisho Cloud and the workflow in the repository.
To push a branch within a GitLab CI/CD job, you must first create a project access token with permission to push. Open "Settings" > "Access Tokens" from your GitLab project page and click "Add new token."

Go to "Add a project access token" page and enter the following content:
| Field | Value |
|---|---|
| Token name: | Access token |
| Expiration date: | Any |
| Select Roles: | Developer |
| Select Scopes: | Select only write_repository |
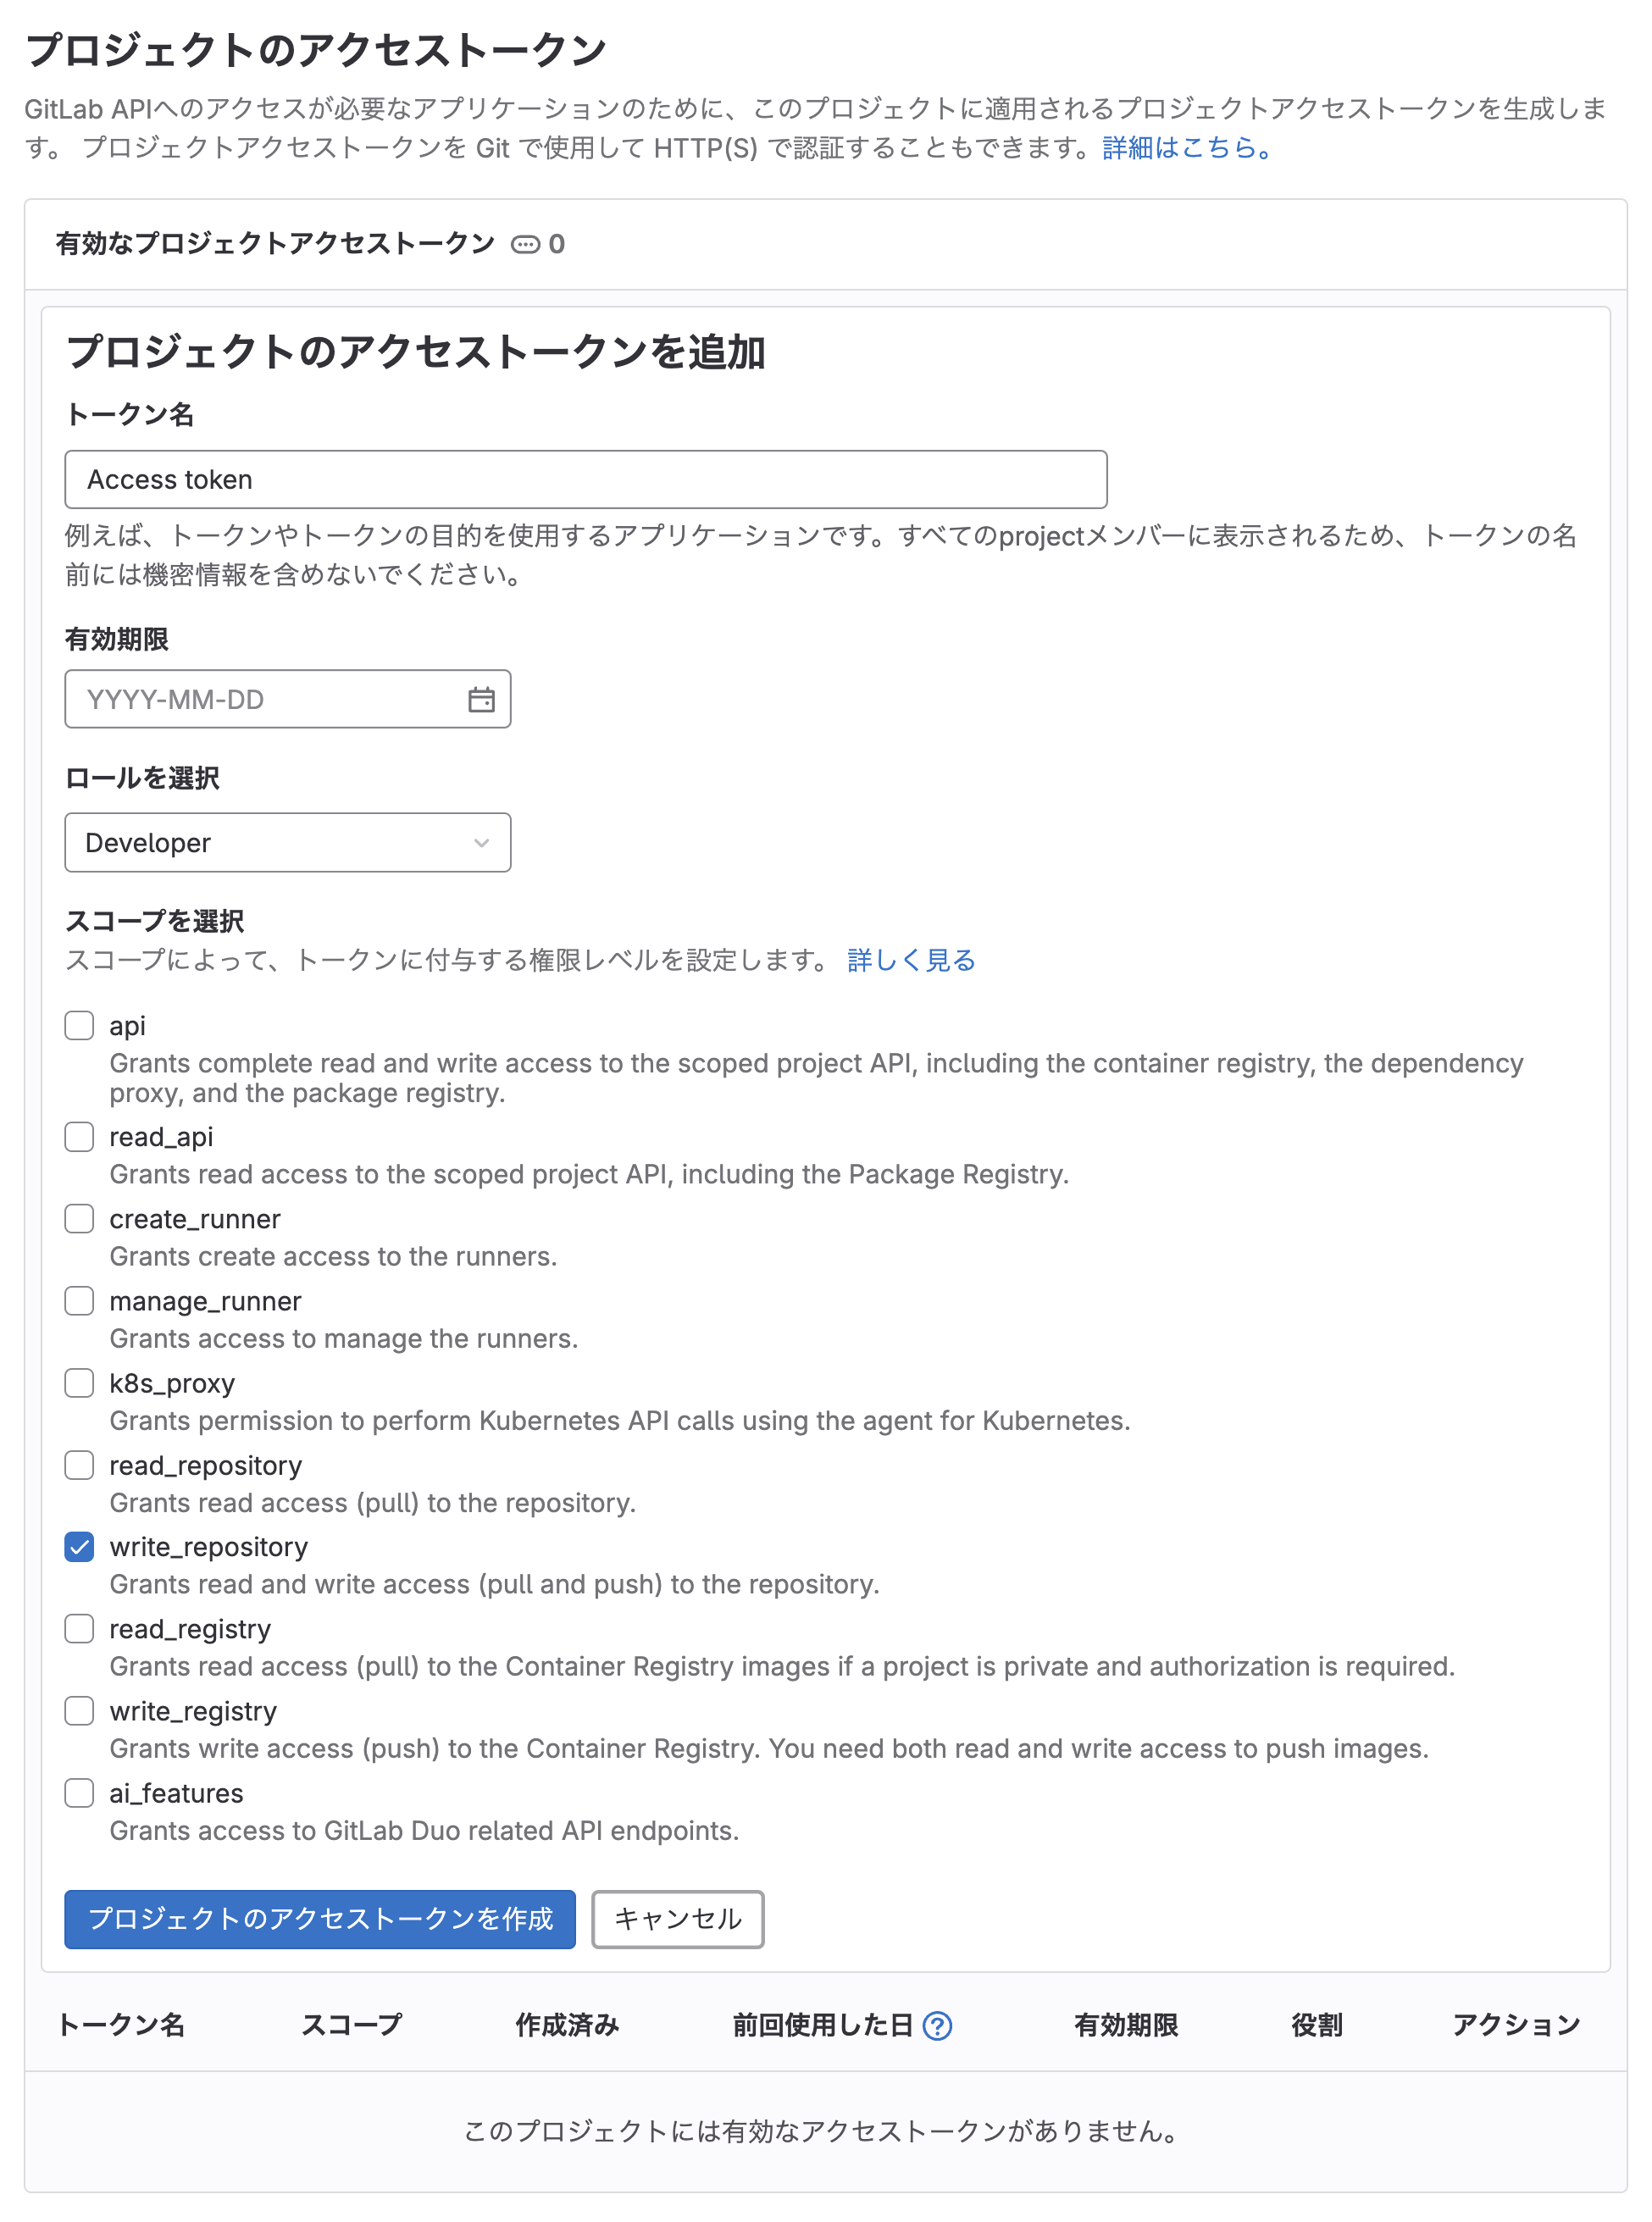
Click on "Create project access token" to see the created token. Copy the token you created.
Next, you need to set the token as a CI/CD variable so that it can be accessed from your CI/CD job. Open "Settings" > "CI/CD" from your GitLab project page, expand "Variables," and then click "Add variable."
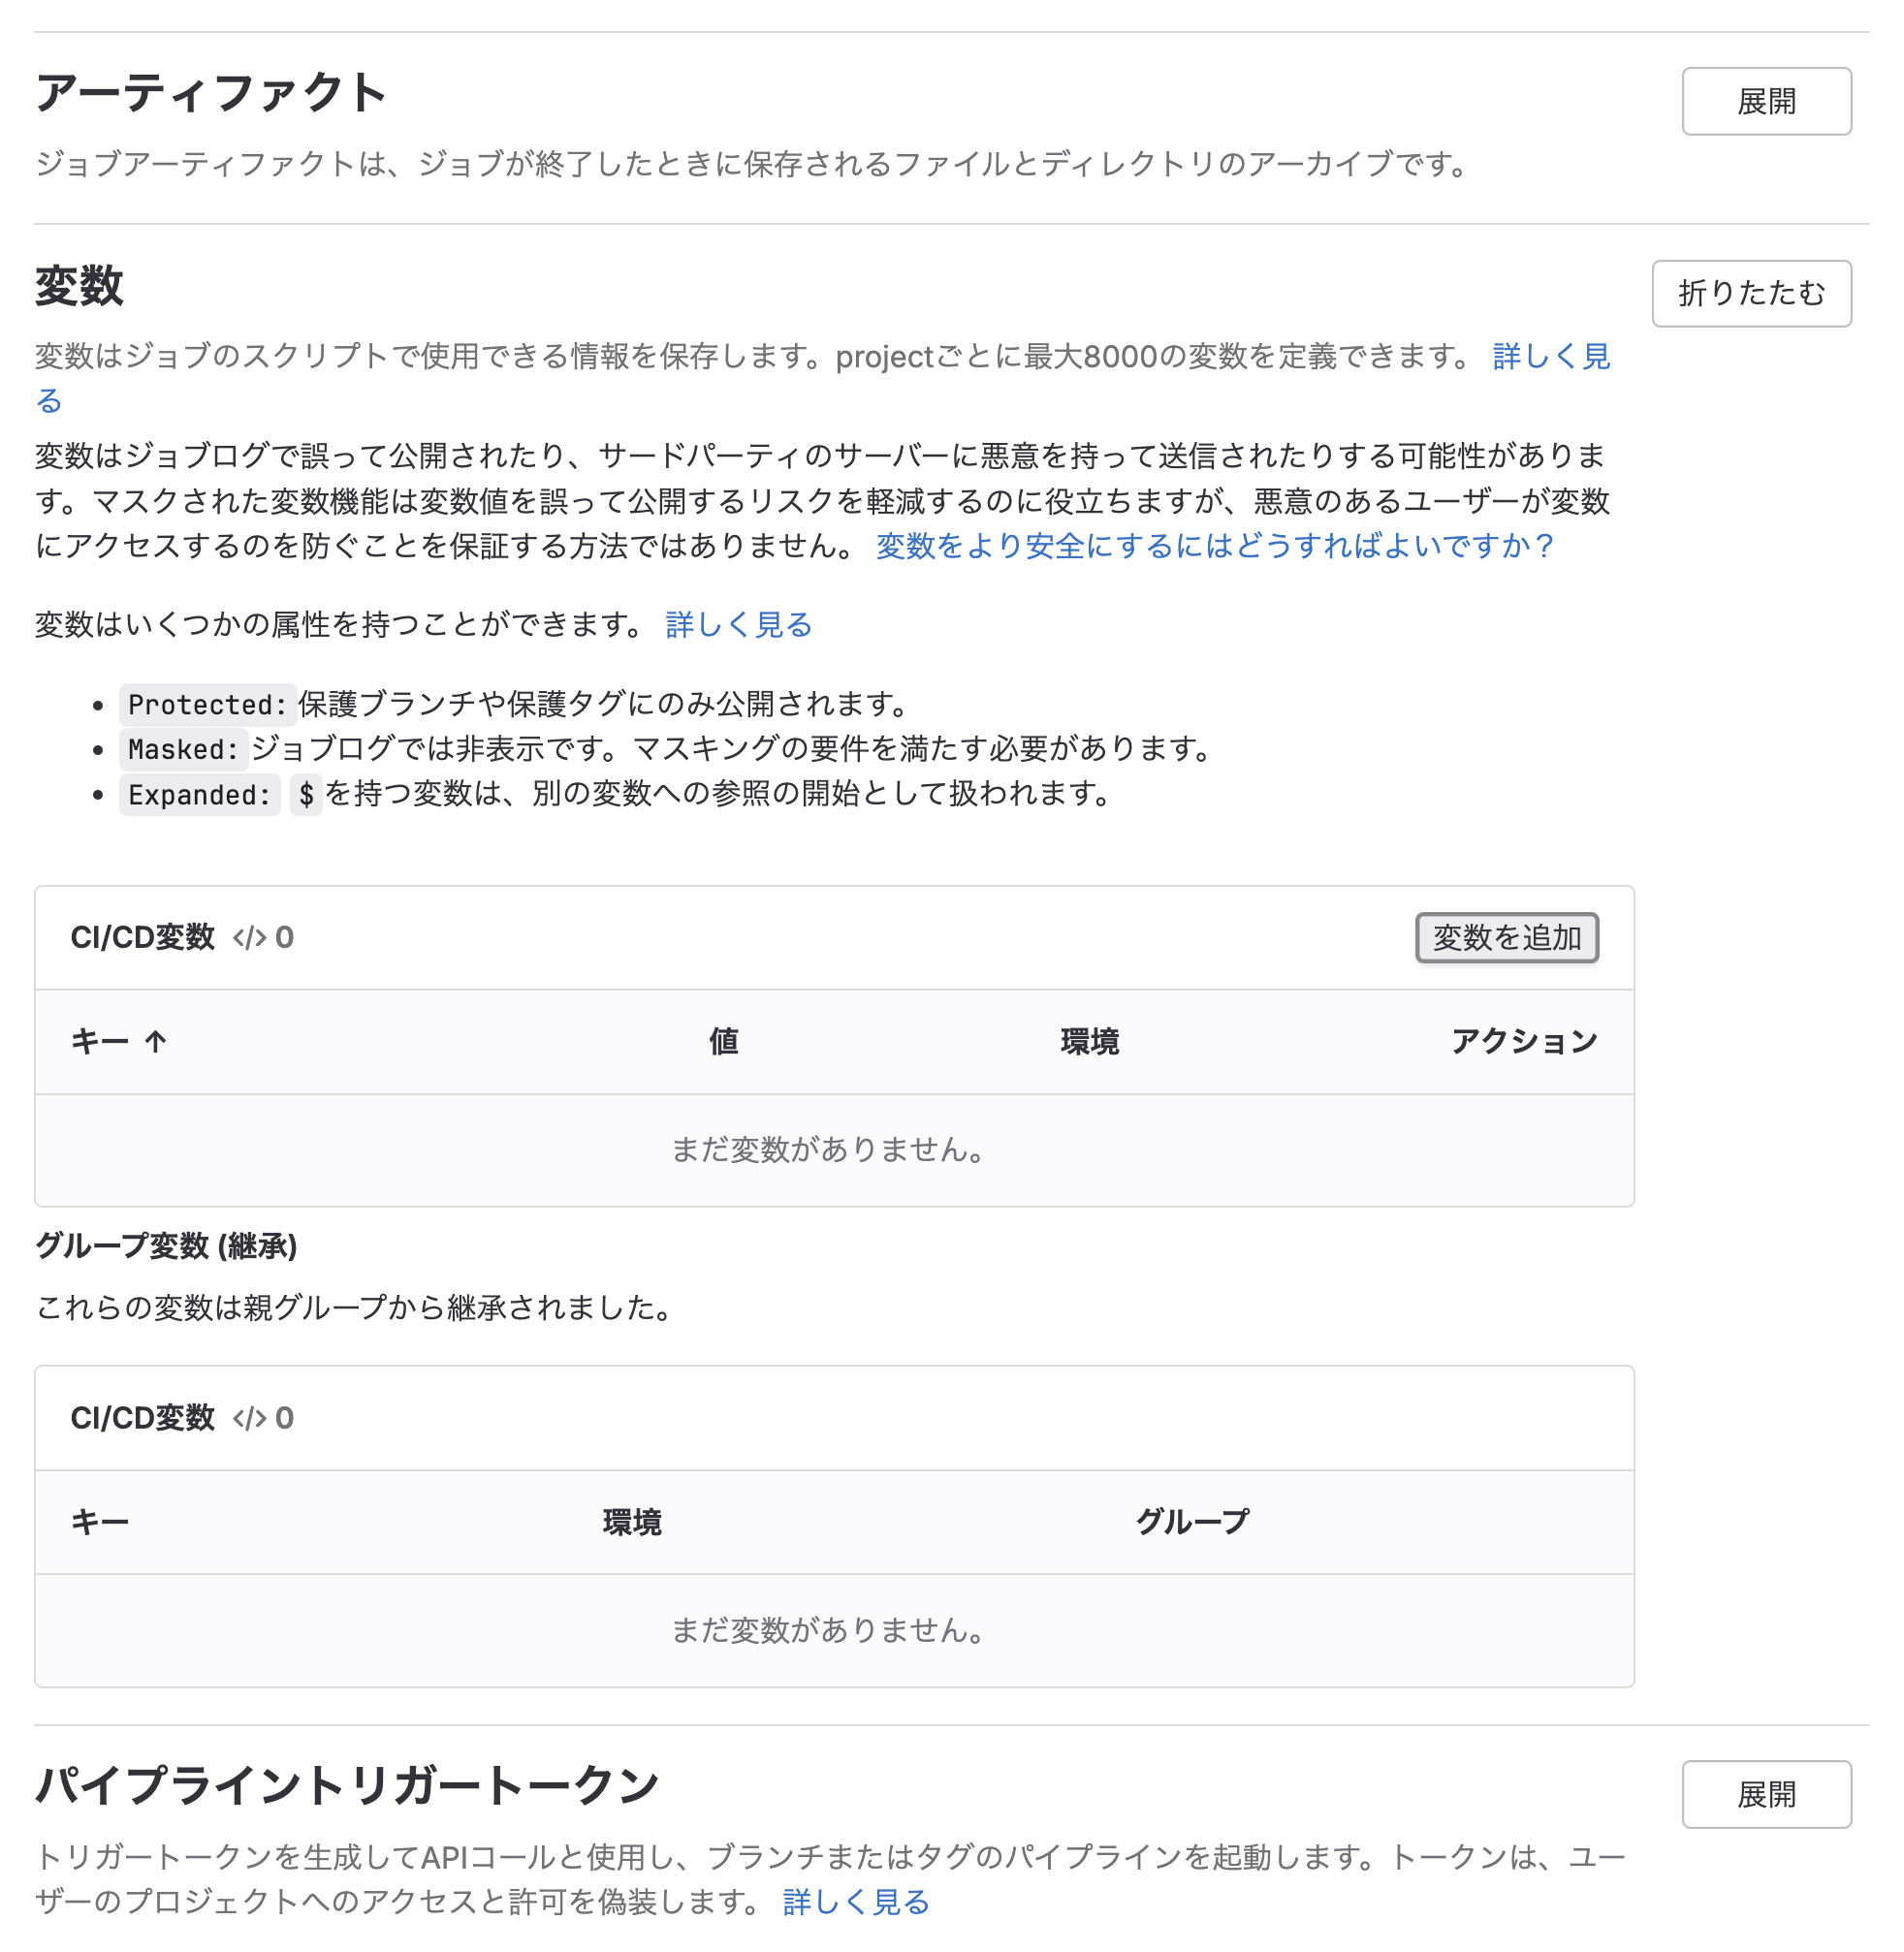
Go to "Add variable" and enter the following content:
| Field | Value |
|---|---|
| Type: | Variable |
| Env: | All |
| Visib: | Masked |
| Flags: | Select all |
| Key: | ACCESS_TOKEN |
| Value: | Paste the access token you copied. |
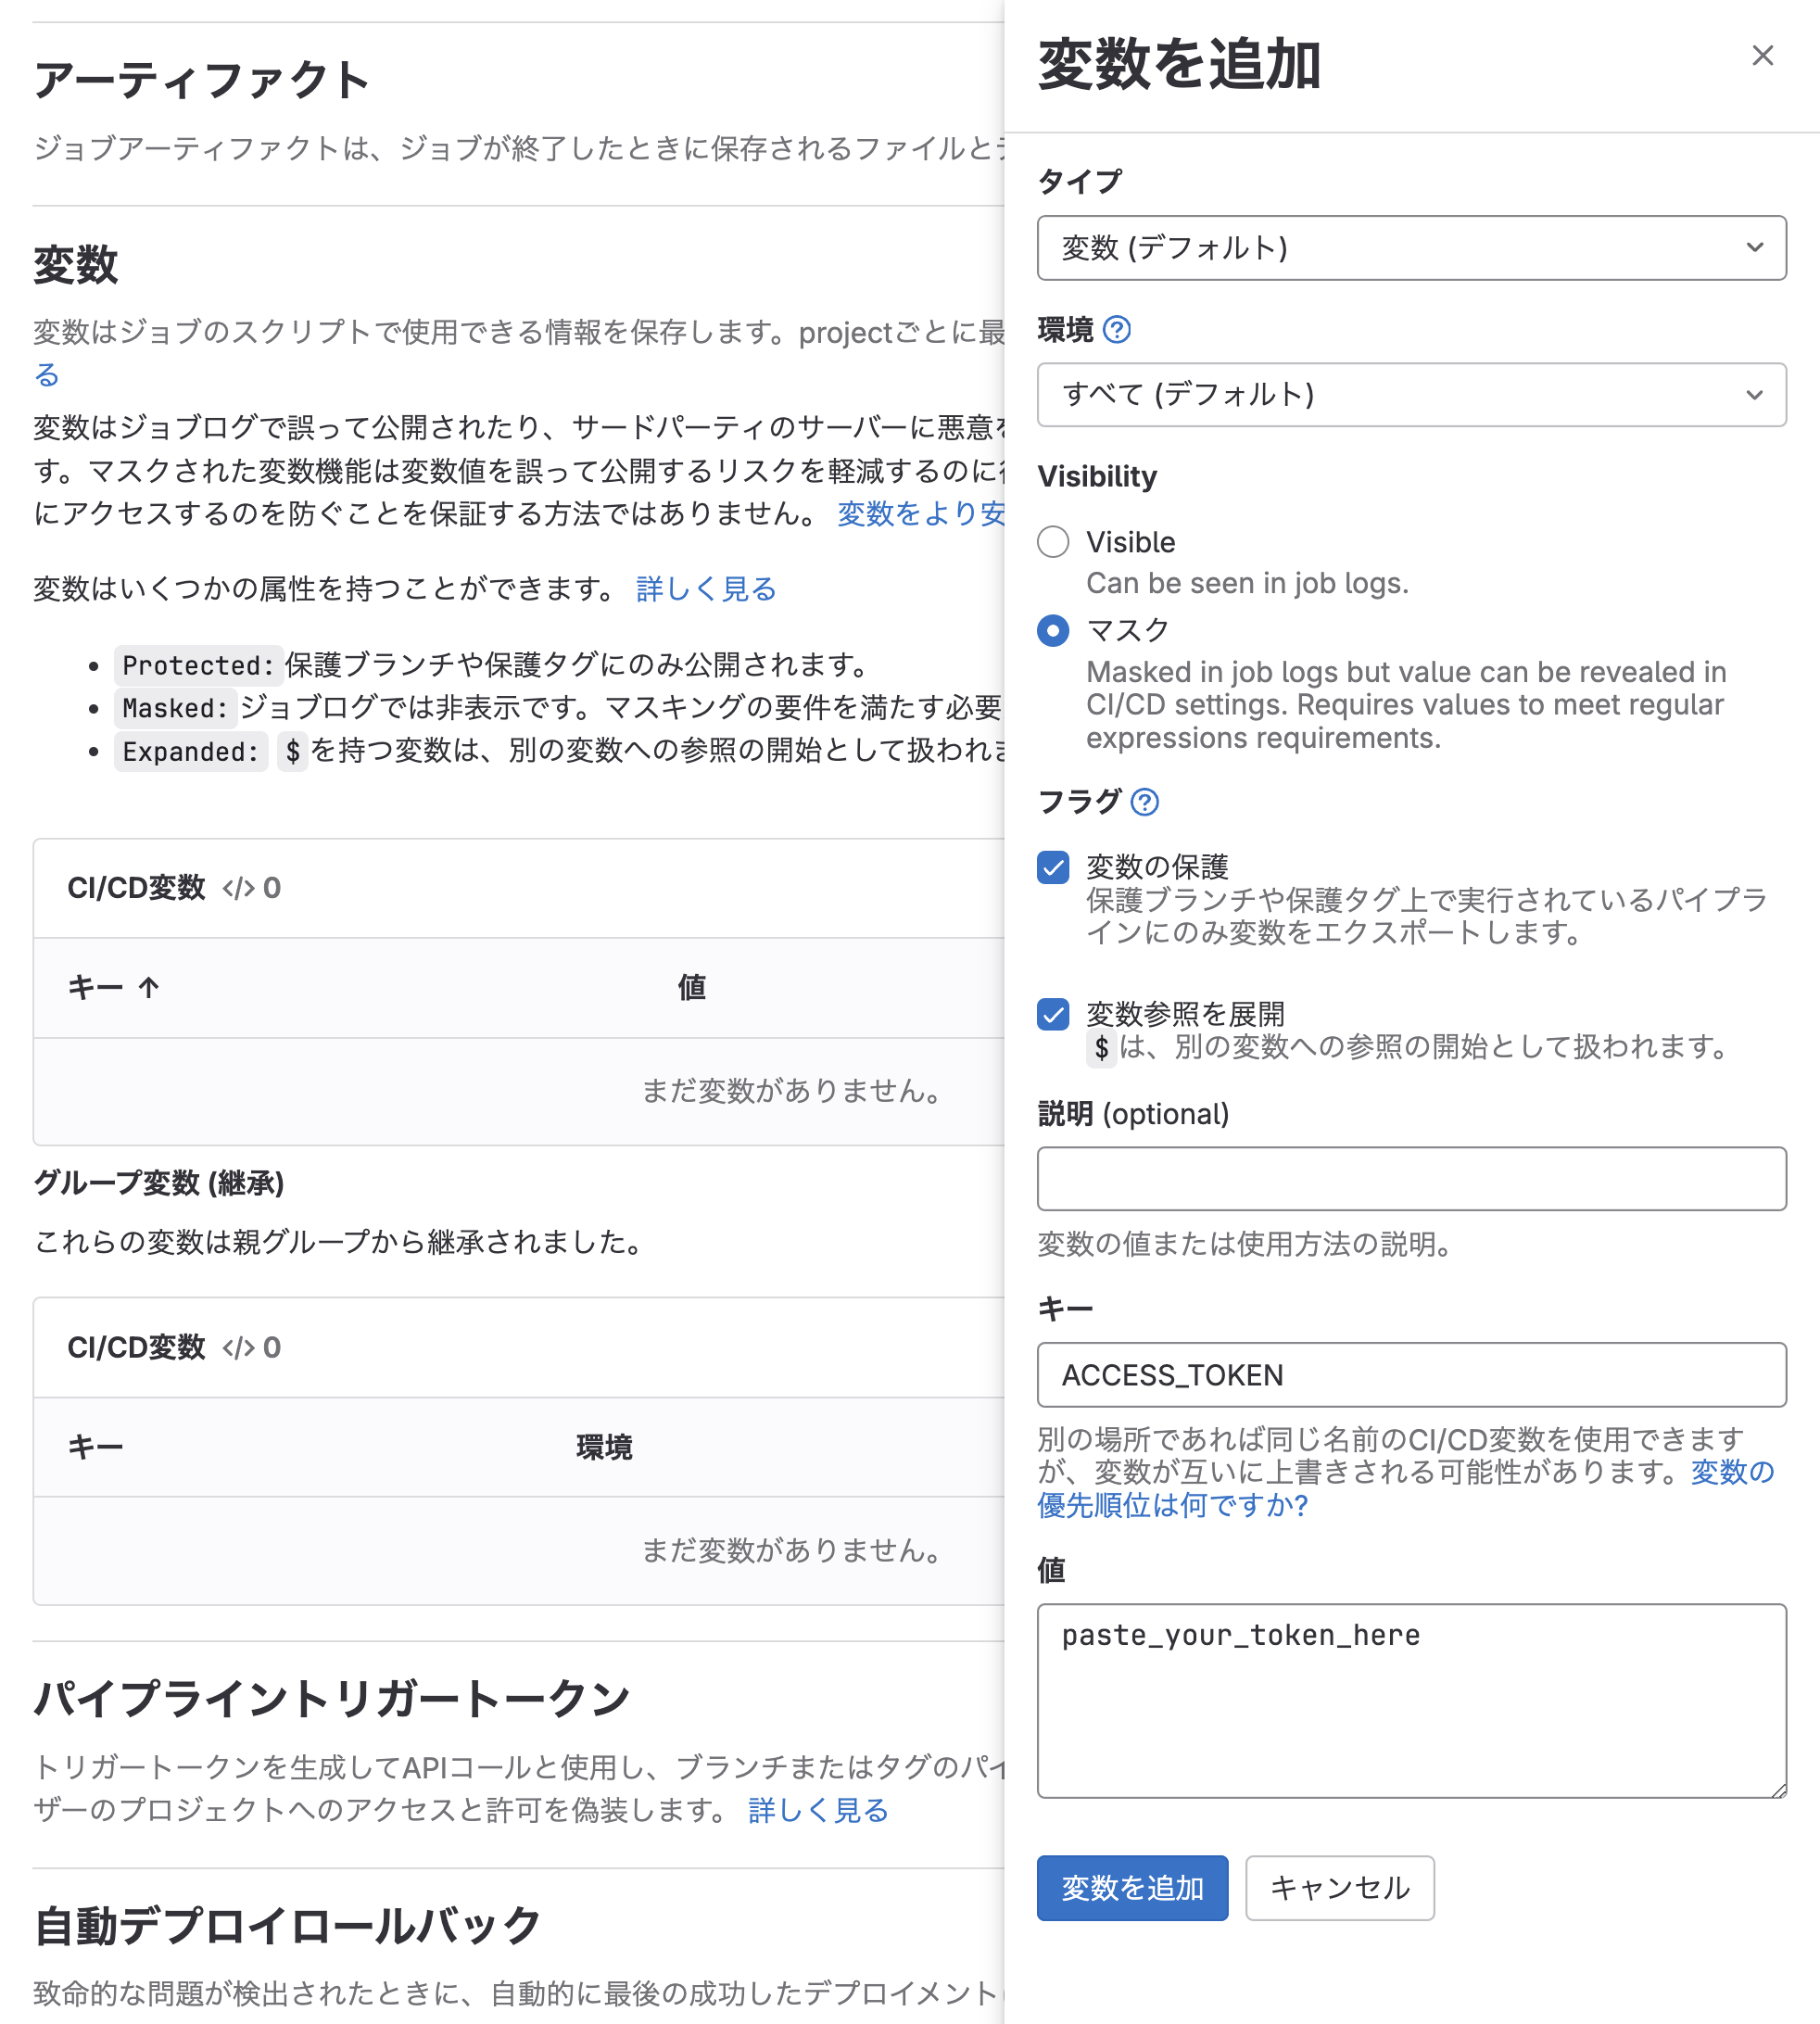
Clicking on "Add variable" will complete the variable setup. The ACCESS_TOKEN variable can now be referenced from the job.
Next, create a job like the one below. Update .gitlab-ci.yml to include the execution of this new job. Since this job is triggered by a pipeline schedule, we will add a condition for execution.
include:
  - local: /.gitlab/jobs/shishocloud-workflows-deploy.yml
    rules:
      - if: '$CI_PIPELINE_SOURCE != "schedule"'
  - local: /.gitlab/jobs/shishocloud-workflows-diff-check.yml
    rules:
      - if: '$CI_PIPELINE_SOURCE == "schedule"'
shishocloud-workflows-diff-check-job:
  variables:
    # FIXME: Replace with your Shisho Cloud organization ID.
    SHISHOCLOUD_ORG: flatt-security
    # FIXME: The value of BOT_ID to be entered is described on the trust condition setting screen.
    SHISHOCLOUD_BOT_ID: BTXXXXXXXXXXXXXXXXXXXXXXXXXX
    MR_TITLE: "Workflows on Shisho Cloud has changed"
    MR_DESCRIPTION: 'The workflows on Shisho Cloud has changed from those in this repository.\n\n> This PR was automatically created by the job `${CI_JOB_NAME}` in `${CI_CONFIG_PATH}`.'

  id_tokens:
    ID_TOKEN:
      aud: https://gitlab.com

  script:
    # Install shishoctl
    - SHISHOCTL_URL="https://shisho.dev/releases/shishoctl-0.14.0-x86_64-unknown-linux-gnu"
    - curl -L $SHISHOCTL_URL -o /usr/local/bin/shishoctl
    - chmod +x /usr/local/bin/shishoctl

    # Sign in (as bot)
    - shishoctl auth signin:bot \
      --bot ${SHISHOCLOUD_BOT_ID} \
      --expires-in-minutes 60 \
      <<< ${ID_TOKEN}

    # Pull workflows from Shisho Cloud, exit if no diff
    - shishoctl workflow pull --org "${SHISHOCLOUD_ORG}" --path . --structured
    - if [[ `git status --porcelain` == "" ]]; then echo "No diff between Shisho Cloud and this repository" && exit 0; fi

    # Commit changes and push
    - git remote add gitlab_origin ${CI_SERVER_PROTOCOL}://access_token:${ACCESS_TOKEN}@${CI_SERVER_FQDN}/${CI_PROJECT_PATH}.git
    - git config user.name "${GITLAB_USER_NAME}"
    - git config user.email "${GITLAB_USER_EMAIL}"

    - git checkout -b shisho-cloud-workflow-diff-`date +'%Y%m%d%H%M%S'`
    - git add .
    - git commit -m "pulled changes from Shisho Cloud"

    - |
      git push gitlab_origin \
        -o merge_request.create \
        -o merge_request.target=main \
        -o merge_request.title="${MR_TITLE}" \
        -o merge_request.description="${MR_DESCRIPTION}" \
        -o ci.skip
The above job will create a merge request when a difference is detected; however, you can also send a notification to Slack, for example. In that case, you can add a step like the one below instead of the # Commit changes and push step. See the official website for how to obtain and use the SLACK_WEBHOOK_URL.
# Notify slack
- >
  curl -X POST \
    -H 'Content-type: application/json' \
    --data "{ \"text\": \"Shisho Cloud detected a workflow difference between Shisho Cloud and the repository.\"}" \
    ${SLACK_WEBHOOK_URL};
Once you have finished editing, commit and push to GitLab.
Finally, you set up a pipeline schedule. Go to "Build" > "Pipeline Schedules" from your GitLab project page, and click "New Schedule" or "Create new pipeline schedule."
Open "Create new pipeline schedule" and enter the following:
| Field | Value |
|---|---|
| Description: | Shisho Cloud workflows diff check |
| Interval pattern: | Custom: 0 0 * * * |
| Cron Timezone: | [UTC+9] Tokyo |
| Target branch or tag selection: | main |
| Variables: | None |
| Active: | ✅ |
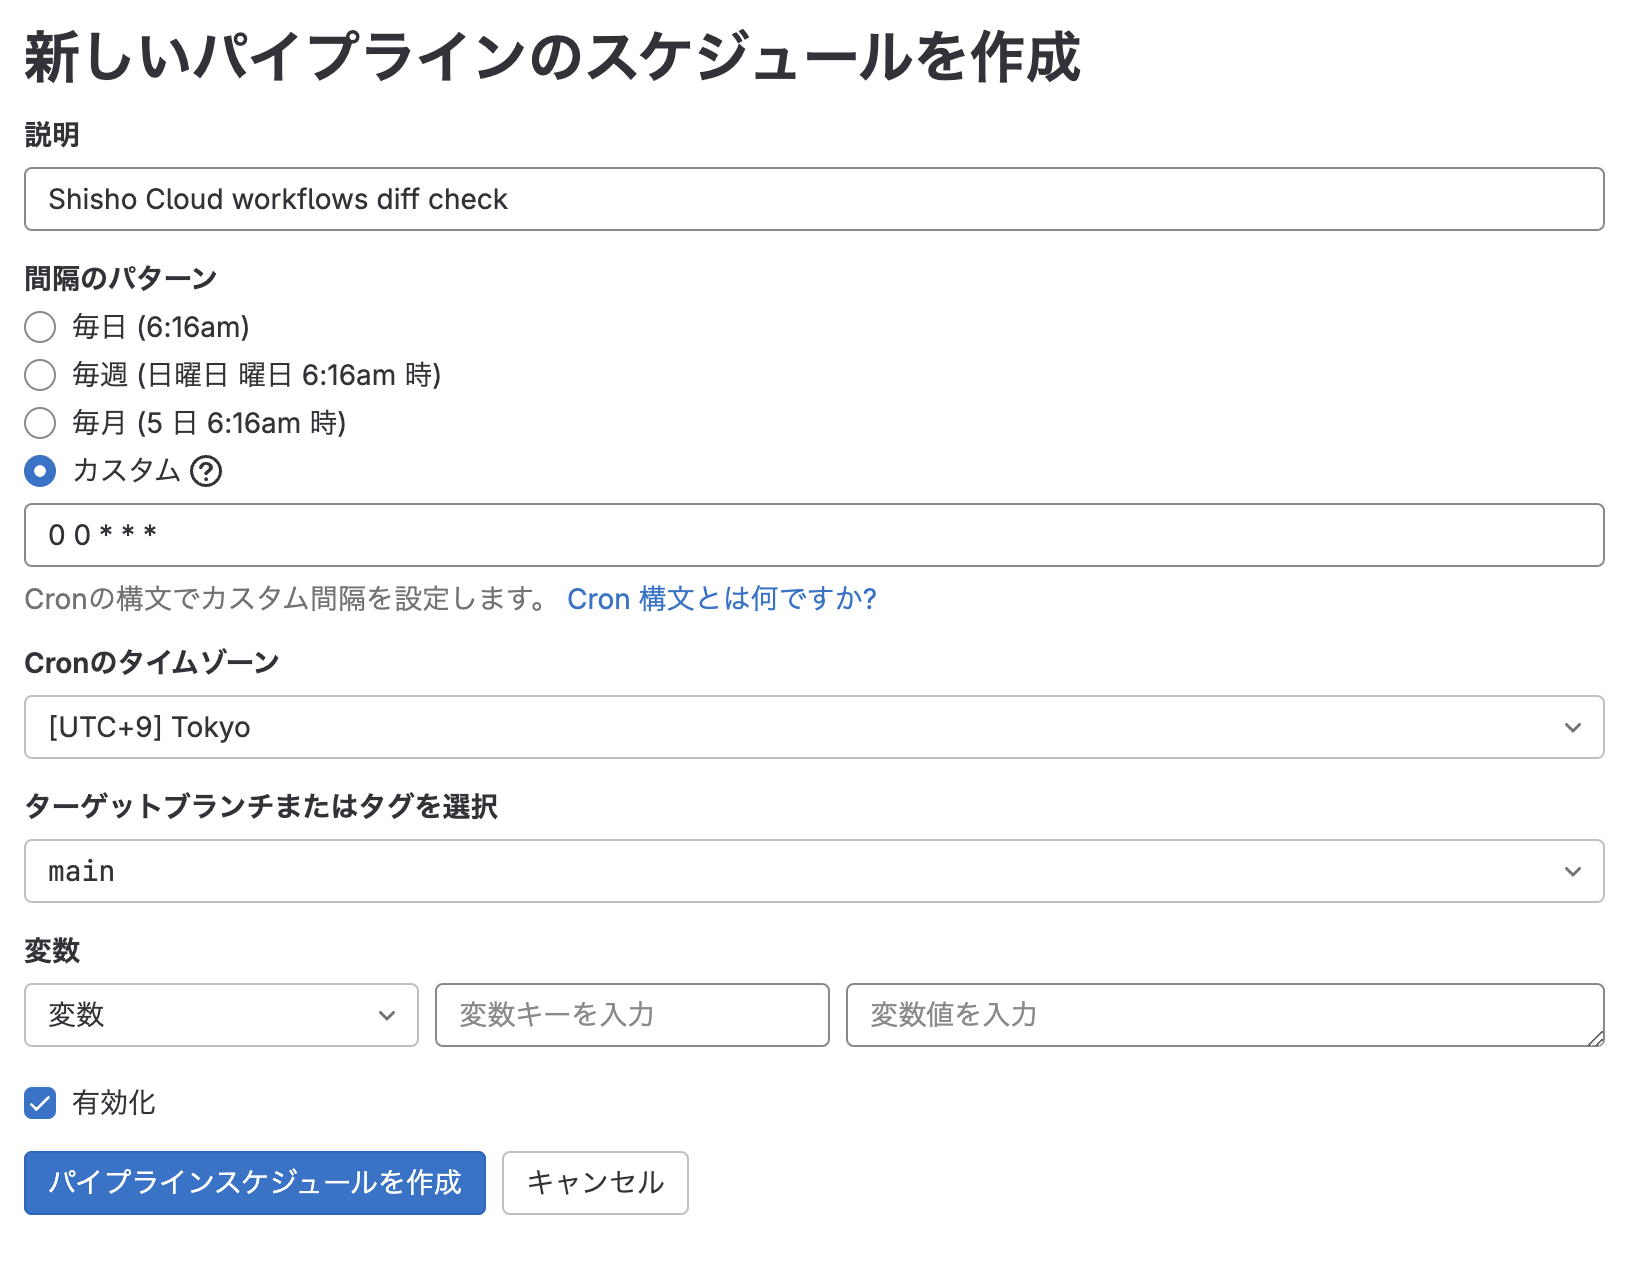
Clicking "Create pipeline schedule" will complete the schedule setup.
This will periodically check if the workflows in the repository and on Shisho Cloud are consistent. From this point, let's actually edit the workflow directly from the web interface and see if the GitLab CI/CD can correctly detect the difference in the workflow.
First, open the Edit screen for the demo workflow demo-notification.
Edit the manifest for this workflow, for example, as follows, and click the "Save" button.
version: 0.1.0
id: "demo-notification"
name: "DEMO: Send notifications to various channels (edited from console)"
triggers: {}
jobs:
- id: group
  name: Send to notification groups
  notify:
    rego: |
      package demo.notification.group

      import data.shisho

      notifications[n] {
        input.running_state == shisho.job.running_state_preprocessing

        data.params.group != ""
        n := shisho.notification.to_group(
          data.params.group,
          "hello! (edited from console)",
        )
      }
# omitted below
Next, go to "Build" > "Pipeline Schedules" from your GitLab project page, and click the run button for the schedule you just created.

The GitLab CI/CD job you created in this tutorial should have created a merge request to incorporate the changes you made from the web interface. Make sure that the changes you just made are reflected.

In this way, even if the workflow is changed in the Shisho Cloud web interface, the GitLab CI/CD job created earlier can detect the change and incorporate it into the repository. Here we have confirmed the execution result when an existing workflow is changed, but even if a workflow is newly created or deleted from the web interface, this job allows you to incorporate the change into your GitLab repository.